When you connect an optical cable, the D1 will sense that an optical input is present and give that input priority. If using D1 with optical outputs from your TV, DVD player, Apple TV, etc you will need an AC USB power adapter (sold separately) to power D1. When using the optical output from your computer, you may power D1 via the computer’s USB power and therefore no external power supply is needed.
Audioengine Factory Refurbished Products are customer returns or new items with slight cosmetic blemishes that undergo Audioengine’s stringent refurbishment process prior to being offered for sale.
Each Refurbished Product:
- is fully tested.
- is refurbished with replacement parts for any defects identified in testing.
- is put through a thorough cleaning process and inspection.
- is repackaged (including appropriate manuals, cables, etc.).
- is placed into a Final QA inspection prior to being added to sellable refurbished stock.
Refurbishment procedures follow the same basic technical guidelines as Audioengine’s Finished Goods testing procedures. We test and certify all Audioengine refurbished products and include our standard 3-year warranty and are eligible for our 30 Day Audition Period.
Please note that promotional discount codes do not apply to refurbished products.
There are some excellent online computer audio forums. A quick search will turn up everything you need to know about the best hardware and software. Computer audio is quickly evolving; however, so we suggest to check and make sure the information you find is up to date.
An external DAC is essentially a very high end external sound card. Its components, and the implementation of those components, make it more capable than what might be built into a computer, not to mention the benefit of moving those sensitive components outside and away from the potentially noisy interior of your computer. All of this means that the signal your speakers receive will be clearer, with a lower noise-floor. Also, the signal will have a more pronounced dynamic range over your internal sound card.
Some computer headphone outputs are noisy and have poor audio quality. If this is your computer, try our W3 wireless adapter (basically a wireless DAC with an analog output) or our D1 or D3 wired DACs for 24-bit playback.
Here in the Audioengine offices, we’ve been using TIDAL and think it’s a great service, especially for those who want to stream high quality audio. TIDAL tracks and albums are streamed at 1411 Kbps instead of 256-320 Kbps (used by Apple Music, Spotify and others). There’s more bits in the stream, so you hear details and ambient cues that are missing on lower bit services. Tidal is a true music lovers dream featuring over 35 million tracks and 75,000 high definition videos. You can even download as much music as your devices can handle and listen off-line.
At this time, we are actively collecting information to answer inquiries about Airplay 2 and Homekit. Please stay tuned for more info by signing up for our newsletter here:
There shouldn’t be. Both mini-stereo and RCA send out the same analog signal, just in a different way.
We’ve partnered with a company called LINK and as a result, we now offer LINK brand cables on our webpage. LINK cables are high quality cables hand-assembled here in the States using quality materials. If you’re wanting to upgrade your audio cables, LINK cables are definitely a solid choice!
If you’re running into noise issues with nothing plugged into your speakers, it’s possible this could be due to interference from a nearby wireless source, such as a modem or phone; typically this presents itself as a hum or buzz. One thing we’d recommend is turning off nearby components one by one to see how that affects things; this can help narrow down the culprit. If a particular component, like a nearby modem, is causing interference with the speakers, we’d recommend experimenting with placement of either the device or the speakers to see if moving things around alleviates the problem.
If you continue to have problems, don’t hesitate to open a support ticket at the main support page.
Yes! All of our refurbished products carry the same three-year warranty as our new products.
Here’s how to find the serial number of your Audioengine product:
On powered speakers (such as the A5+, A2+ HD6, HD3, S8, and B2) you can find the serial number on the back of the powered speaker underneath the barcode.
- The P4s will have a white sticker located near the binding posts on the back of either speaker, which will have the serial number underneath the barcode.
- On products like the D1, B1, and D2, you can find the serial number on the bottom of the unit after “Serial Number”.
- On the W3, the serial number can be found on the white sticker on the packaging on both the outer and inner box.
- The N22 serial number can be found on the silver sticker on the back of the amplifier.
With the exception of the D1, B1, D2, and both the DS1 and DS2 desktop stands, you can also find the serial number on the packaging on the white square sticker.
Audioengine powered speaker models have a built-in power amplifier in the left speaker so you won’t need a stereo receiver or other extra components for power.
There are a few notable differences but both designs function basically the same. “Active” and “powered” speakers refer to speakers with power amplifiers built into either one speaker or both. Audioengine speakers were designed with the power amps in the left speaker to make connections easier as they only require one power cord and all connections are on the same speaker.
We use non-polarized 2-Pin IEC 320-C7 cables. These are fairly standard cables, and you should be able to find them locally if needed. You can also find them in the Accessories section in our store.
Sure! You will need about 100-120 watts.
Yes, just switch the voltage selector on the rear panel to match the AC power for the country you are in before powering them on. We recommend changing the fuse when using a different voltage. For 220 volts, here’s the value you would need:
5mm x 20mm – 1.6 amps @ 250 volts.
The power cable is detachable on our powered speakers which makes it convenient to replace the AC plug with a different type if you don’t want to use an adapter plug.
Not necessarily. Audioengine speakers and amplifiers are very efficient and designed together as a system so therefore we get more volume output than stereo receivers or amplifiers that might higher wattage or power numbers. Due to this tuning we achieve big sound outputs with a fraction of the power required by other systems.
There are different theories but rooms and tastes are different so it’s tough to specify a correct placement. We suggest you experiment with different locations to see what works for you. As a general rule of thumb for the best sound stage balance, the speakers should be equidistant from side walls and a different distance from rear walls. Our rear-ported speakers (such as the A5+, HD6, and HDP6) pretty forgiving when it come to being placed near walls, but we do recommend keeping them at least a few inches from the rear wall for adequate ventilation.
Sure. For the best audio performance we’ve included 6.5 feet of 16 gauge wire with each powered speaker system but any “stranded” speaker wire will work. The speaker binding posts on the back of each cabinet will accept bare stranded wire, however you can also use wires terminated with spade lugs, banana plugs, or pins.
Swapping sides will not have any negative effect on the soundstage or quality/clarity of the speakers. This will simply give you the reverse of what the artist intended for you to hear.
Yes, and we recommend that you position each so the tweeters are facing outward.
Some of the features we feel make our products better are overall ease of setup, high-quality audio components and design, as well as high interference tolerance – all the good stuff that’s important for a wireless product to be of any real use.
Audioengine Bluetooth products also features a higher signal-to-noise ratio due to the inclusion of a 24-bit high-performance DAC and much better wireless range than most Bluetooth products – up to 100 FT in most cases.
Absolutely! Use the computer’s headphone output, soundcard, or DAC audio output from your Mac or PC directly into Audioengine speakers and you’re good to go. PC, Mac, laptop or any computer.
Audioengine speakers were specially designed and tuned to make MP3 and other digital music files sound great. We spent many months tuning each speaker and almost exclusively used various compresses and lossless files types encoded at different bitrates during this process. Even though we are big fans of digital music, your turntable or reel-to-reel tape player will sound equally great.
Some computer headphone outputs are noisy and have poor audio quality. If this is your computer, try streaming wirelessly to your A5+ Wireless. Or, check out our D1 or D3 wired DACs for 24-bit playback.
Because Audioengine active speakers already have an amp built in, you never want to connect it to the amplifier output of a stereo amp or AV receiver that would typically connect with bare speaker wire or banana plugs. If you want to use an existing AV receiver as an input switcher and that system has preamp outputs (these would typically be RCA), you could connect these to the RCA inputs on your Audioengine powered speakers.
Absolutely! Audioengine self-powered speakers include multiple analog inputs (in addition to digital inputs like USB, optical, or Bluetooth). These analog inputs are “open,” or active, meaning there isn’t any sort of switching built into the speakers; if both sources were playing while connected to the speakers, both would be audible. This makes it so you can leave 2 analog audio sources plugged in at the same time with no need to flip any switches!
Every setup is different, so some experimentation will be necessary to find your prefered settings, but around 11 or 12 o’clock is a good starting place if you plan on using your music source (smartphone, computer, TV, etc.) as the master volume control.
Yes! We’ve been notified that several Android IR Remote Apps support Audioengine remote commands. So if you have a phone with an IR blaster, you can use the App to raise or lower the volume on your A5+/A5+ Wireless or HD6 speakers with your phone! Simply download one of the many IR Remote Apps on Google Play, and test them out.
Check out our W3 Wireless Adapter set. These adapters allow you to stream wireless audio from any program/website/player to our speakers and subwoofer.
Apple’s AirPort Express, the SONOS Connect, and Google’s Chromecast Audio are other options that can be added to Audioengine speakers. Where the W3 is a self-contained solution, these products instead rely on your existing home network to send music to multiple speakers at once.
Yes, absolutely. All your A/V gear with an RCA or mini-jack 1/8″ connector (even a headphone jack) will work great with Audioengine powered speakers.
Audioengine speakers can be easily connected to the audio output on your TV set. Any of our speakers will provide an easy setup and a greatly enhanced TV audio experience with a wider soundstage and better imaging than most sound bars!
We are firm believers that two quality speakers will always sound better than one or more speakers together in a single cabinet, regardless of the amplifier or sound enhancing technology used. There are some decent one-piece speaker systems that simulate stereo and surround sound from a single source, but most fall way short as they can’t accurately duplicate a wide sound stage with imaging as complete and rich as Audioengine speakers.
Although many TVs have only one L/R audio output, which typically defaults to fixed, this setting can be sometimes be changed via the on-screen menu so please check your manual to see which outputs are variable. If your TV has multiple audio outputs, the most commonly variable output would be the headphone output. If your TV doesn’t have a variable output at all, no worries; for larger speakers like the A5+ and HD6 we include a remote control that can adjust the volume of the speakers directly for just such a purpose.
One of the reasons Audioengine active and passive speakers have such amazing bass in such a small package are the designs of the bass ports on each speaker. These aren’t just holes or slots in the cabinets, but specifically shaped openings with tubes designed with precise calculations. The result is incredible low end with minimal audible air turbulence. These are effectively mini-subs built into each speaker, allowing Audioengine speakers to be used with or without a separate subwoofer. It’s also worth mentioning that we don’t use any enhancement circuits to add fake bass, so what you’ll hear is real bass- low and clean.
Even though the final amp stage is shut down during sleep, the pre-amp stage is still powered up so a slight hiss is not uncommon. If you have an analog audio cable plugged in to the speakers but not into anything else, it’s also possible this could be picking up some noise as well.
Hum or buzz in the speakers is usually caused by something external to the speakers which is coupling noise into the speaker system (either through the AC lines, cordless phone, wireless router, or directly from the source input). A common reason is that the entire system is set up such that a “ground loop” results. Basically, a ground loop occurs when the AC power grounds and the system signal grounds are not at the same electrical potential. Refer to our online Setup Guides for a list of things to try.
Even though the final amp stage is shut down during sleep, the pre-amp stage is still powered up so a slight hiss is not uncommon. If you have an analog audio cable plugged in to the speakers but not into anything else, it’s possible this could be picking up some noise as well.
Our woofers are made of aramid fiber and the tweeter domes are silk. Both of these materials are very robust and can handle quite a bit, therefore we decided against grill covers for most of our speakers as they tend to negatively color the sound. The HD6 and HD3 speakers do come with magnetically attachable grills for customers to decide whether or not they would like to use them!
Even though Audioengine speakers have big and tight low end (which will easily fill a room and rival floor standing speakers many times their size), you can also connect an external sub if you wish. You can do so by connecting your Audioengine speakers to your sub’s line-level input, or you can even add our W3 wireless adapter for a wireless subwoofer!
Every setup is different, so some experimentation will be necessary to find your preferred settings, but putting the volume knob around 11 or 12 o’clock is a good starting place if you plan on using your music source (smartphone, computer, TV, etc.) as the master volume control.
In your TV menu verify that “PCM STEREO” is selected and “DOLBY DIGITAL” is off.
Technically, yes. But thankfully, it won’t really be noticeable! Our Bluetooth implementation only has a latency/delay of ~30ms (milliseconds). So for example, you can watch videos from apps like YouTube and stream the audio through your speakers without any noticeable lag. Your source does play a role in the latency response time though.
There are different theories, but rooms and tastes are different so it’s tough to specify a “correct” placement. We suggest you experiment with different locations to see what works for you. As a general rule of thumb for the best sound stage balance, the speakers should be equidistant from side walls and a different distance from rear walls. Our front-ported speakers (such as the A2+, A2+ Wireless, HD3, and P4 speakers) do not need any rear panel clearance for better bass but recommend keeping them a few inches from the rear wall for adequate ventilation.
Absolutely! It’s tough to protect speakers and electronics from extreme changes in temperature and humidity. Due to that, we don’t recommend the permanent installation of our speakers outdoors. It’s fine though (encouraged even) to bring them outside with you all day, and our speakers are simple to set up and take down, making them perfect for this!
Nope! Audioengine powered speakers have amplifiers built-in. This means you don’t need any extra equipment, other than a source to play music on (smartphone, tablet, computer, CD player, turntable, etc). Just plug your source directly into the inputs on the rear panel of the left speaker with the included cables, or connect to them via Bluetooth, and voila! You’re listening to music!
If the speaker wire connections on one side are swapped, this can result in a sound that is “scooped” where the lower frequency sounds that are mostly equal between the left and right speakers are reaching you out of phase with one another. This can result in the speakers sounding like they are lacking in bass. To check for this, make sure that the speaker wires are connected to the same color 5-way binding post on each side.
It’s not possible to completely disable Bluetooth, but when in Pair or Discovery mode (when the button is flashing) Pair mode will automatically turn off after 5 minutes. Your speaker/B1 will be undiscoverable to unpaired devices but will remain visible to any device previously paired, so you can easily connect and disconnect from your phone, computer, or tablet.
If you want to pair more devices, you can wake up Bluetooth again by pressing the Pair button on the speaker or B1, which will then start flashing to indicate it’s ready to pair.
Connecting the speaker wire
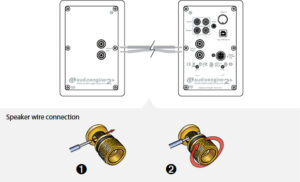
1. Use your thumb and finger to unscrew the connectors.
2. Insert each speaker wire into the holes on the side of connectors.
3. Retighten the connectors with your fingers.
4. The bare portion of the wire should be secured firmly in each connector.
Repeat the procedure to connect the other end of the speaker wire to the other speaker. Check to make sure none of the speaker wire strands have come in contact with a nearby connector.
As the A2+ speakers have the power amplifiers built inside, do not connect the speaker terminals to the speaker outputs of a stereo receiver.
Our silk dome tweeters and woofers are made of a synthetic silk that performs much better than real silk would. This also means that no animals are harmed in the making of our products!
If the LED indicator on your power supply is off, then you may simply need a replacement power supply.
You can find replacement power supplies for the original A2s and N22 here:
https://dev-v2.audioengine.com/
Also, you can find A2+ or HD3 replacement power supplies here:
https://dev-v2.audioengine.com/
However, please contact customer support if the LED indicator on your power supply is blinking on and off. This may indicate an issue with the speakers.
No. Amazon will allow the use of any stored method of payment, but gift card balances can only be used on purchases made directly on Amazon.
Don’t worry! Your Audioengine product is most likely not the problem. Audioengine Bluetooth products are designed to have very low latency (<30ms).
It’s important to know that your source device has an impact on latency as well. Issues with the sound being out of sync can sometimes happen when your source’s software is not up-to-date; so, be sure to update your source’s operating system (OS) if an update is available. Rebooting your source and speakers can help correct issues with sound delay as well.
There are a few things that could cause this issue.
You may need to adjust the counter balance weight on your turntable’s tonearm. If there’s too much or too little tracking weight, this can cause issues like distortion. It could also be bad for your records!
You can also test your speakers with a different source. This would help you confirm whether the issue is with the speakers themselves or the turntable. If you find that the issue persists across different types of devices, be sure to reach out to our customer support team for assistance!
Don’t worry! No change is necessary! When an order is placed, it often will show the same address for both billing and shipping on our end. But again, don’t worry. Since the payment went through PayPal, Bolt or Amazon Pay, the payment itself is the only part that must have the correct billing address to submit successfully. This means that you would have had to have entered the correct billing address at the time of the payment for the order to go through. As long as the shipping address is correct, we will get it to the right place.
Yes! Our amplifiers are all analog “class A/B”, which run at higher temperatures than other amp designs. Because of this, they sound SO MUCH better! The active speaker’s rear panel may get hot to the touch, but it’s certainly within safety agency standards. If it’s truly overheating, (which is extraordinarily rare) you will likely notice a metallic smell. Then, the speakers will likely auto power off. If this happens, please contact customer support right away.
There are several common causes to static popping with desktop speaker setups. While our systems are magnetically shielded, interference and perceived popping/static can still come through. Here are some things to check:
Audio Cables: Ensure your cables are fully inserted into the audio ports as partially inserted cables are susceptible to static and buzzing. Try a different cable if the issues persist.
Wireless Interference: Another common cause is the proximity to devices like cell phones, wifi routers, halogen lamps, ect whose interference could cause a crackling sound. Try moving the system away from these devices to see if it clears up.
*If you’re home music system is near a router/modem and you’re unable to move the speakers, you can also try upgrading your ethernet cable to Cat 8 as it has significantly improved shielding from EMI*
Dirty Volume Pots: If this occurs when adjusting the volume, the crackling/popping could be the result of a dirty volume pot! To clean it, Try this – unplug the power cord and interconnects from your active speaker or N22 and turn the volume knob quickly from 0% to 100% 20-30 times. After that, plug it back in and give it a listen. If this shows any noticeable improvement, it can be repeated and should restore the set back to normal after a few cycles. If the issue persists, please let us know and we will be happy to help you out!
All Audioengine speakers are video and magnetically-shielded, however “GSM buzz” cannot be blocked by magnetic shielding. What actually causes this is your phone being in 2G or “EDGE” instead of 3G or 4G. For best results when using your phone as a music source, ensure that it’s operating on 3G (or 4G).
Don’t worry! It will fit. Some of our speakers include speaker wire that is terminated with “banana plugs”. It’s important for this connection to be very tight; so, the metal ends of the banana plugs make good contact against the inside of the 5-way binding post. It’s for this reason that the Banana plugs we use on the included speaker wire utilize a spring style connection. The ends may appear too large to fit in the hole at the end of the 5-way binding post, but the plug will compress as you insert them. Some amount of force may be necessary to get the plug to go in, but know that this is normal, and won’t damage the plug or the 5-way binding post. Click here to view a video demonstration.
No. There is not a way to do this wirelessly. Our speakers require speaker wire to connect the left and right channels together.
‘-Make sure your speakers are not sitting on the same surface as your turntable as this can cause distortion in the audio.
-Check your tone arm to assure it is calibrated and balanced.
-If your turntable has a grounding cable, make sure it’s attached to a nearby metallic source like an external phono preamp/stereo receiver/etc.
-If your turntable has a built-in bluetooth transmitter, make sure it is not both hardwired and bluetooth-connected to your Audioengine speaker system as this will cause a feedback loop. You can manually disconnect any bluetooth-connected source from your Audioengine speakers by holding down the bluetooth LED button for a few seconds till it starts blinking.
Although we do not require a PIN for pairing to any of our products via Bluetooth, there are instances in which Windows requests this info. Entering ‘0000’ should resolve this issue when you are prompted to do so.
You may have a loose volume pot. This can happen when the nut that holds the volume pot in place becomes loose. This can be easily accessed and tightened without opening the speakers up. Try this:
1) Pull the plastic volume knob off the volume pot. Depending on how tight it’s on, you might be able to pull it off with just your fingers. If not, you may need to cover the knob with a soft cloth and pull out with pliers.

2) Use a deep well 10mm socket (or socket driver) to tighten the nut around the volume pots shaft.

3) Press the plastic volume knob back over the volume pot’s shaft, and retest.

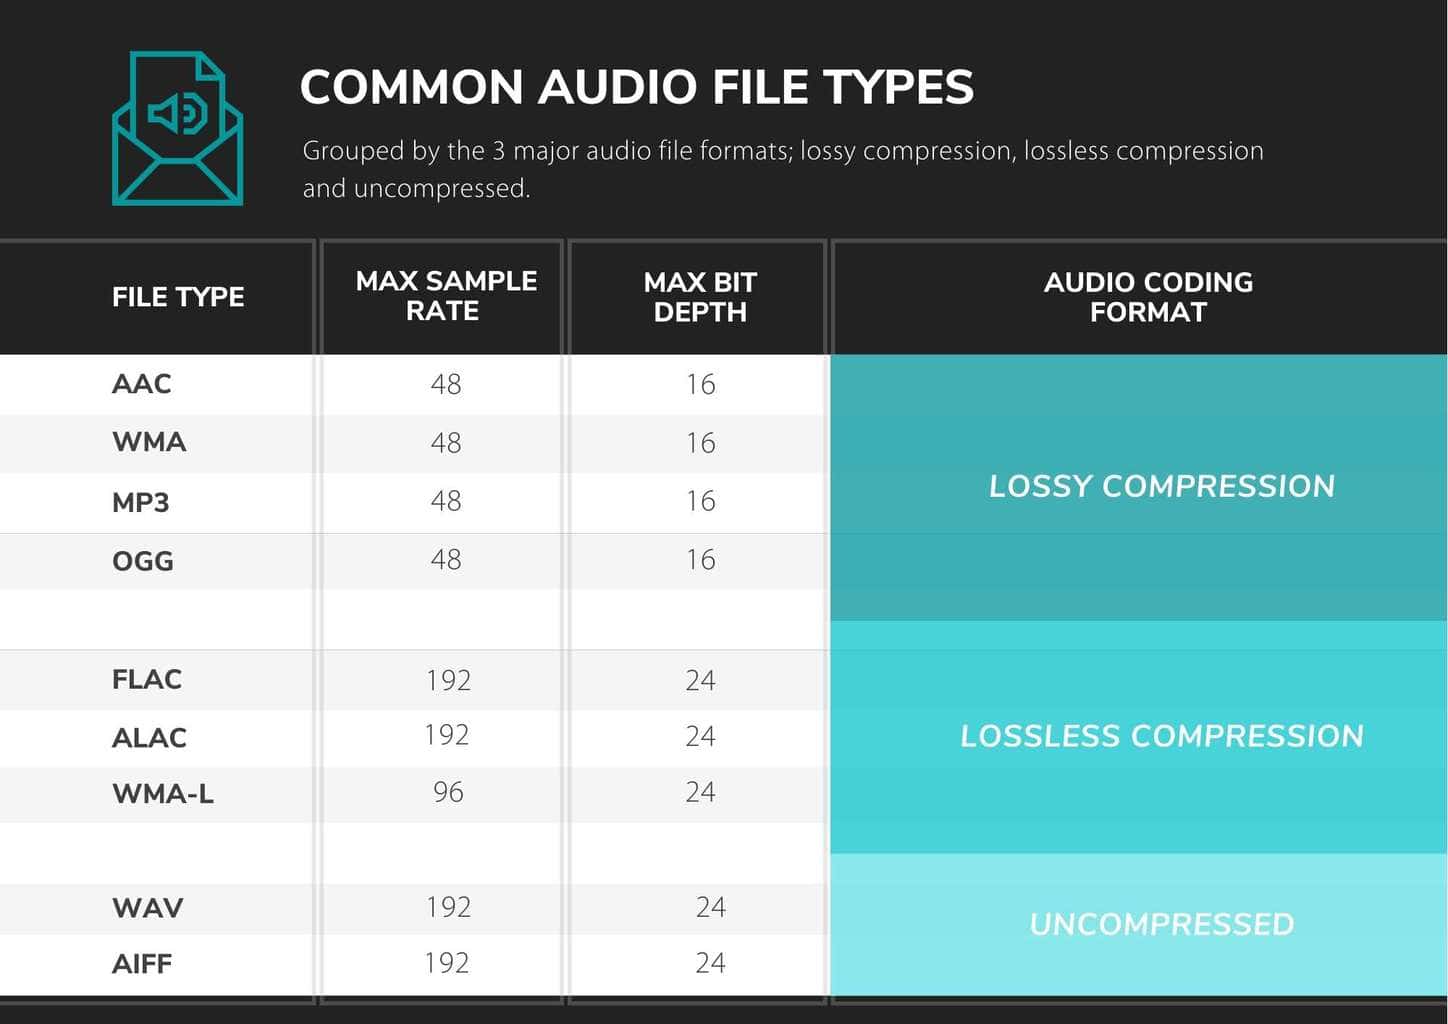
AAC
AAC (Advanced Audio Coding) refers to digital audio coding standard that represent audio files based on lossy audio compression. It was launched as successor of MP3 file format. AAC achieves better sound quality as compared to MP3 at the same bit rate. The format was adopted as default media format by YouTube, iPhone, iPod, iPad, Apple iTunes and several other platforms.
WMA
A .WMA file is a Windows Media Audio file. WMA is an acronym for Windows Media Audio. The files that contain the .wma extension are audio files that are used mostly for music. The WMA file format is proprietary to Microsoft. WMA files are compressed, similar to MP3 files. A lossless version of WMA does exist (WMA-L), but most WMA files use a lossy compression system.
MP3
The MP3 format is a compression system for music. The goal of using MP3 is to compress a CD-quality song by a factor of 10 to 14 without noticeably affecting the CD-quality sound. With MP3, a 32-megabyte song on a CD compresses down to about 3 MB. This lets you download a song much more quickly, and store hundreds of songs on your computer’s hard disk. MP3 files are commonly used to store audio tracks, podcasts, lectures, sermons, and audiobooks.
OGG
An OGG file is a compressed audio file that uses free, unpatented Ogg Vorbis audio compression. It is similar to an .MP3 file, but sounds better than an MP3 file of equal size, and may include song metadata, such as artist information and track data. OGG files are supported by many software music players and some portable music players.
Vorbis is the most popular and common type of .ogg file, but there are numerous others. In addition to the .ogg extension, you may also see .ogv, .oga, .ogx, .ogm, .spx, and .opus.
FLAC
A FLAC file is an audio file compressed in the Free Lossless Audio Codec (FLAC) format, which is an open-source lossless audio compression format. It is similar to an .MP3 file, but is compressed without any loss in quality or loss of any original audio data.
ALAC
The ALAC file extension is short for Apple Lossless Audio Codec (ALAC). These files use M4A format because ALAC is a codec used for encoding audio data and not an audio file container format like an MPEG-4 file. These are audio files used for storing digital music in lossless format without losing any sound quality from the original audio data.
WAV
A WAV file is a raw audio format created by Microsoft and IBM. The format uses containers to store audio data, track numbers, sample rate, and bit rate. WAV files are uncompressed lossless audio and as such can take up quite a bit of space, coming in around 10 MB per minute with a maximum file size of 4 GB.
WAV files are generally going to be much larger than other popular audio file types, like MP3, due to the fact they are typically uncompressed (compression is supported, though). Because of this, they’re mainly used in the professional music recording industry to retain the maximum quality of audio.
AIFF
An AIFF file is an audio file saved in the Audio Interchange File Format (AIFF). It contains high-quality audio saved in an uncompressed, lossless format. AIFF files may also be saved as .AIF files or .AIFC files (if they are compressed).
Unlike .MP3 files, AIFF files are uncompressed. Because AIFF files’ data is not compressed, AIFF files typically contain higher-quality audio than similar MP3 files. However, the files also take up more disk space since they contain more data.
It’s important to note that your source device (whatever you are using to send audio TO your speakers) can impact the volume of the speakers as well. For instance, if you have them connected to a computer/laptop/tablet, you would need to make sure your device’s system volume is raised. If it’s only set to 25% or 50%, that will limit how loud the speakers can get. This is true when using either a wired connection or when connected via Bluetooth.
If you are using the speakers with a turntable that has a built in pre-amp, then double check and make sure the switch is set to “line” instead of “phono.” If you do not have a phono pre-amp, you would need to pick one up to properly connect our speakers to the turntable.
Our options for connecting speakers to the TV are likely more limited, depending on what kind of audio output options the TV has. Most older televisions have an analog audio output, and this can be connected to any of our powered speakers. However, most newer TVs have removed the analog output option and only provide optical or HDMI Arc outputs. Many also have Bluetooth.
If you are OK using Bluetooth for the TV, any of our Bluetooth capable speakers would work. That said, depending on the implementation on the TV, there is the possibility of lag and you may have to manually connect each time you turn off the TV.
For a wired connection, only our HD6 speakers have an optical input. These were designed to provide easier connectivity to a TV, and to be used as medium to large room speakers. For a wired connection from the TV to any other speakers we make, an external digital to analog converter (DAC) would be needed to convert the optical output to analog, and then that could be connected to our powered speakers. The drawback of using the optical output is that normally it is a fixed output and the TV remote will not control the volume. The volume would have to be controlled at the speakers or at the DAC if a separate one is being used.
There are no EQ controls on Audioengine speakers, but EQ can be controlled in software for your digital audio sources, and from preamp EQ hardware, legacy receivers, etc. for analog sources.
Here are the upgrades made to the A2+:
- USB digital-to-analog converter (DAC)
- Variable audio output (connect a subwoofer or wirelessly send audio to other speakers with our optional W3 wireless adapter)
- Upgraded speaker connectors
- Upgraded power supply
- Upgraded accessory cables
We researched adding a bamboo version to the A2+ line, but found that the speaker size is actually too small and costly to produce them in bamboo using the same process as with our A5+ and P4 speakers.
Sure, for A2+ you will need an inverter that can supply about 50-60 watts.
Some turntables will need a preamp before being connected and others may have one built-in. With that in mind, it is best to check the turntable manufacturer’s website, the turntable’s user manual, or you can even try your turntable without the preamp first to see how it operates.
Yep, an AC wall outlet near the A2+ is all you need to power the AW3 wireless Receiver.
In the new A2+, we’ve included a linear limiter which will manage the bass at the point where bass distortion starts to occur. Being a linear limiter, it will not chop the signal but instead retains the shape of the waveform, not allowing it to go into distortion. This means if you listen to the A2+ at higher levels you’ll notice the bass response is tamed and not as boomy. It’s important to note that the limiter will have no effect at normal listening levels.
You wouldn’t be able to use a pair of headphones directly with the A2+s; in order to use headphones with the A2+s, you would need to include something with a dedicated headphone amp, such as our D1. All you would need to do is plug the D1 into your computer (either with an optical or USB cable) and connect the D1 from its RCA outputs into either of the inputs of your speakers.
All you would need to do is connect the variable output of the A2+ into the input of your sub using RCA cables.
The A2+s do not include detachable magnetic grills.
Yes. You will need to pick up the USB Camera Adapter from Apple, which allows a USB connection to the iPad (and, as of iOS7, the iPhone). Then just hook up as you would from a computer.
While the DAC in the A2+ is better than what might be built in to most computers, adding a 24 bit DAC, like our D1 or D3, would still be a benefit to audio quality.
The A2+ is equipped with a power-saving circuit that turns off the final stage of the speaker’s amplifier when no input signal is detected, so you can absolutely leave them on when not in use. This activates right after you stop playing music, and is instantaneous (as soon as the input signal stops and it disengages automatically once an input in reintroduced), so there shouldn’t be a noticeable delay when resuming audio. It’s also fine to power off your speakers when not in use if you prefer.
Plug the W3 AC Power Supply (one adapter is included with the W3) into an AC outlet, connect the W3 Receiver into the adapter, and run the mini-jack cable from the Receiver to the A2+’s. If you’re not using your W3 transmitter with a computer, and need a second power supply for your setup, you can find extra power supplies here. You can also use spare USB phone or tablet chargers to power the W3, just make sure they can supply at least 500mA.
Yes, you can. The A2+ speakers use a switching power supply so it will automatically convert to the different voltage. The power cable is also detachable which makes it convenient to replace the AC plug with a different type if you don’t want to use an adapter plug.
 The HD3 includes a speaker wire with banana plugs on either end, so using them with the speakers should be a simple set up. The binding posts on the back of each speaker would need to be screwed down and the plugs would need to be inserted into the center hole (please refer to the picture for reference). You would need to make sure that each end matches with the color on the corresponding binding post; for example, if you inserted the red banana plug into the red binding post on one speaker, the same would follow suit for the other speaker. The spring style banana plugs provided with the HD3s may look like they won’t fit, but they will actually compress to fit into the posts on the speakers, so some amount of effort will be needed to insert them.
You should be able to use multiple sources with the HD3 Next Gens just fine. The analog inputs on the HD3 Next Gen are always active. They will play at the same time as the Bluetooth or USB input. Bluetooth and USB share the DAC though, so you can only listen to one at a time, and Bluetooth takes priority. If you’re using USB for example, and start using Bluetooth, USB will mute and Bluetooth will take over. If you pause or disconnect from Bluetooth the speakers will automatically switch back to USB after a few seconds.
The HD3 Next Gen’s USB interface handles up to 16-bit, and sample rates up to 48kHz, though the bit-depth will be padded internally to 24-bit. Your system will generally default to these settings when you hook up the HD3 Next Gen. If you mainly use 44.1K files, you might set this as the default in your system to ensure minimal sample-rate conversions. Many system players like JRiver and Amarra will default to the proper sample rate automatically.
Absolutely! This is especially useful for connecting wired with newer iPhones that do not have a headphone jack output. You will need to pick up the USB Camera Adapter from Apple, which allows a USB connection to the iPad (and, as of iOS7, the iPhone). Then just hook up as you would from a computer. If you’d like to be able to charge your iPhone or iPad while you use them like this, you can use the USB 3 version of Apple’s USB camera adapter, which also allows passthrough charging at the same time.
Some computer headphone outputs have poor audio quality, so if this is your computer, try connecting from the USB port to your with HD3 or connect wirelessly via Bluetooth.
Type
Powered Bluetooth aptX HD speaker system
Amplifier Type
Class AB
Rated Power Output:
15W RMS per channel at 4 ohms (measured in compliance with 16 C.F.R. § 432.3)
Peak Power Output:30W per channel at 4 ohms (AES)
Total Peak Power Output: 60W (AES)
Drivers
2.75” aramid fiber woofers
0.75“ Silk dome tweeters
Inputs
3.5 mm stereo mini-jack, RCA L/R, USB, Bluetooth
Outputs
RCA variable line-out, 3.5 mm mini-jack headphone out
Input Voltages
110-240 V 50/60 Hz auto-switching
SNR
>95 dB (typical A-weighted)
THD+N
Less than 0.05% at all power settings
Crosstalk
<50 dB
Frequency Response
65 Hz-22 kHz ±2.0 dB
Frequency Response w/ Bass Reduction Switch selected
100Hz-22kHz ±2.0dB (<5dB down)
Analog Input Impedance
N/A
Nominal Impedance
N/A
Input Impedance
5K ohms unbalanced
Crossover Frequency
N/A
Protection
Output current limiting, thermal over-temperature, power on/off transient protection
Power Consumption
Idle: 10W
Standby Consumption
N/A
Phase
N/A
Recommended Amplifier Power
N/A
Battery Life
N/A
Battery Charge Time
N/A
Internal D/A Converter
PCM 5102
Internal BT Receiver
N/A
Input Bit Depth
24 bit (padded)
Bluetooth Receiver Type
Bluetooth 5.0
Supported Codecs
aptX HD, aptX, AAC, SBC
Supported Bluetooth Profiles
N/A
Wireless Operation Range
Up to 100 ft (30 m) typical
Input Data Rate
Determined by Bluetooth
Wireless Latency
~30 milliseconds (ms)
Connector Type
USB-C
USB Device Class
USB 1.1 or above
Input Bit Depth
24 bit (padded)
Input Sample Rate
44.1 kHz/48 kHz
Headphone Amp Type
OPA2134
Full-scale Headphone Output Level
2.0 V RMS
Output Impedance
2 ohms
Recommended Headphone Impedance Level
10 ohms to 10K ohms
Dimensions (HWD)
Each speaker – 7″(17.8 cm) x 4.25″ (10.8 cm) x 5.5″ (14 cm)
Weight
Left (powered) – 4 lb (1.8 kg)
Right (passive) – 3.4 lb (1.5 kg)
Total Shipping Weight
10 lb (4.6 kg)
Shipping Box Dimensions (LWH)
11.75″ (30 cm) x 8.8″ (22.5 cm) x 11.6″ (29.5 cm)
Operating temperature: 32 degrees F to 95 degrees F
Non-operating temperature: -4 degrees F to 113 degrees F
Relative humidity: 5% to 95% non-condensing
0.7″ (18 mm) thick MDF cabinets with real wood veneer
0.75″ (20 mm) silk dome tweeters with neodymium magnets
2.75″ (70 mm) aramid fiber woofers with advanced voice coils
To minimize unwanted resonances and distortion, Audioengine cabinets have thick high-resin MDF walls with extensive internal bracing. Heavy internal sound-damping material is used to reduce unwanted sound reflections inside the cabinet. All cabinet edges are rounded which look great and reduce high-frequency diffraction effects on the front baffles. The HD3 Next Gen cabinet contains tuned, front-port slots.
Take wireless sound to new levels.
When you finally take the plunge and purchase a new wireless Bluetooth speaker system, you’ll be surprised at the type of sound quality you can get from such a compact source when you have the tools you need to optimize it.
The main thing to keep in mind when shopping for a wireless Bluetooth speaker system is how you will be using. This will help you decide what to buy and how you’ll set it up to fit your listening preferences. Luckily, our wireless speakers have the added benefit of a decent range, which means that even after you set them up in your home or office, your device can still remain paired up with the speaker while you move around and go about your day.
All of our wireless speakers include simple instructions to get you started:
- Position your speakers in the best location for your listening needs and plug them into the nearest outlet.
- Open the settings menu on your phone, tablet or computer. From there, you can go ahead and turn on your Bluetooth options, then select the named speaker.
- When the speaker’s pair light goes solid, you’re paired up and ready to jam!
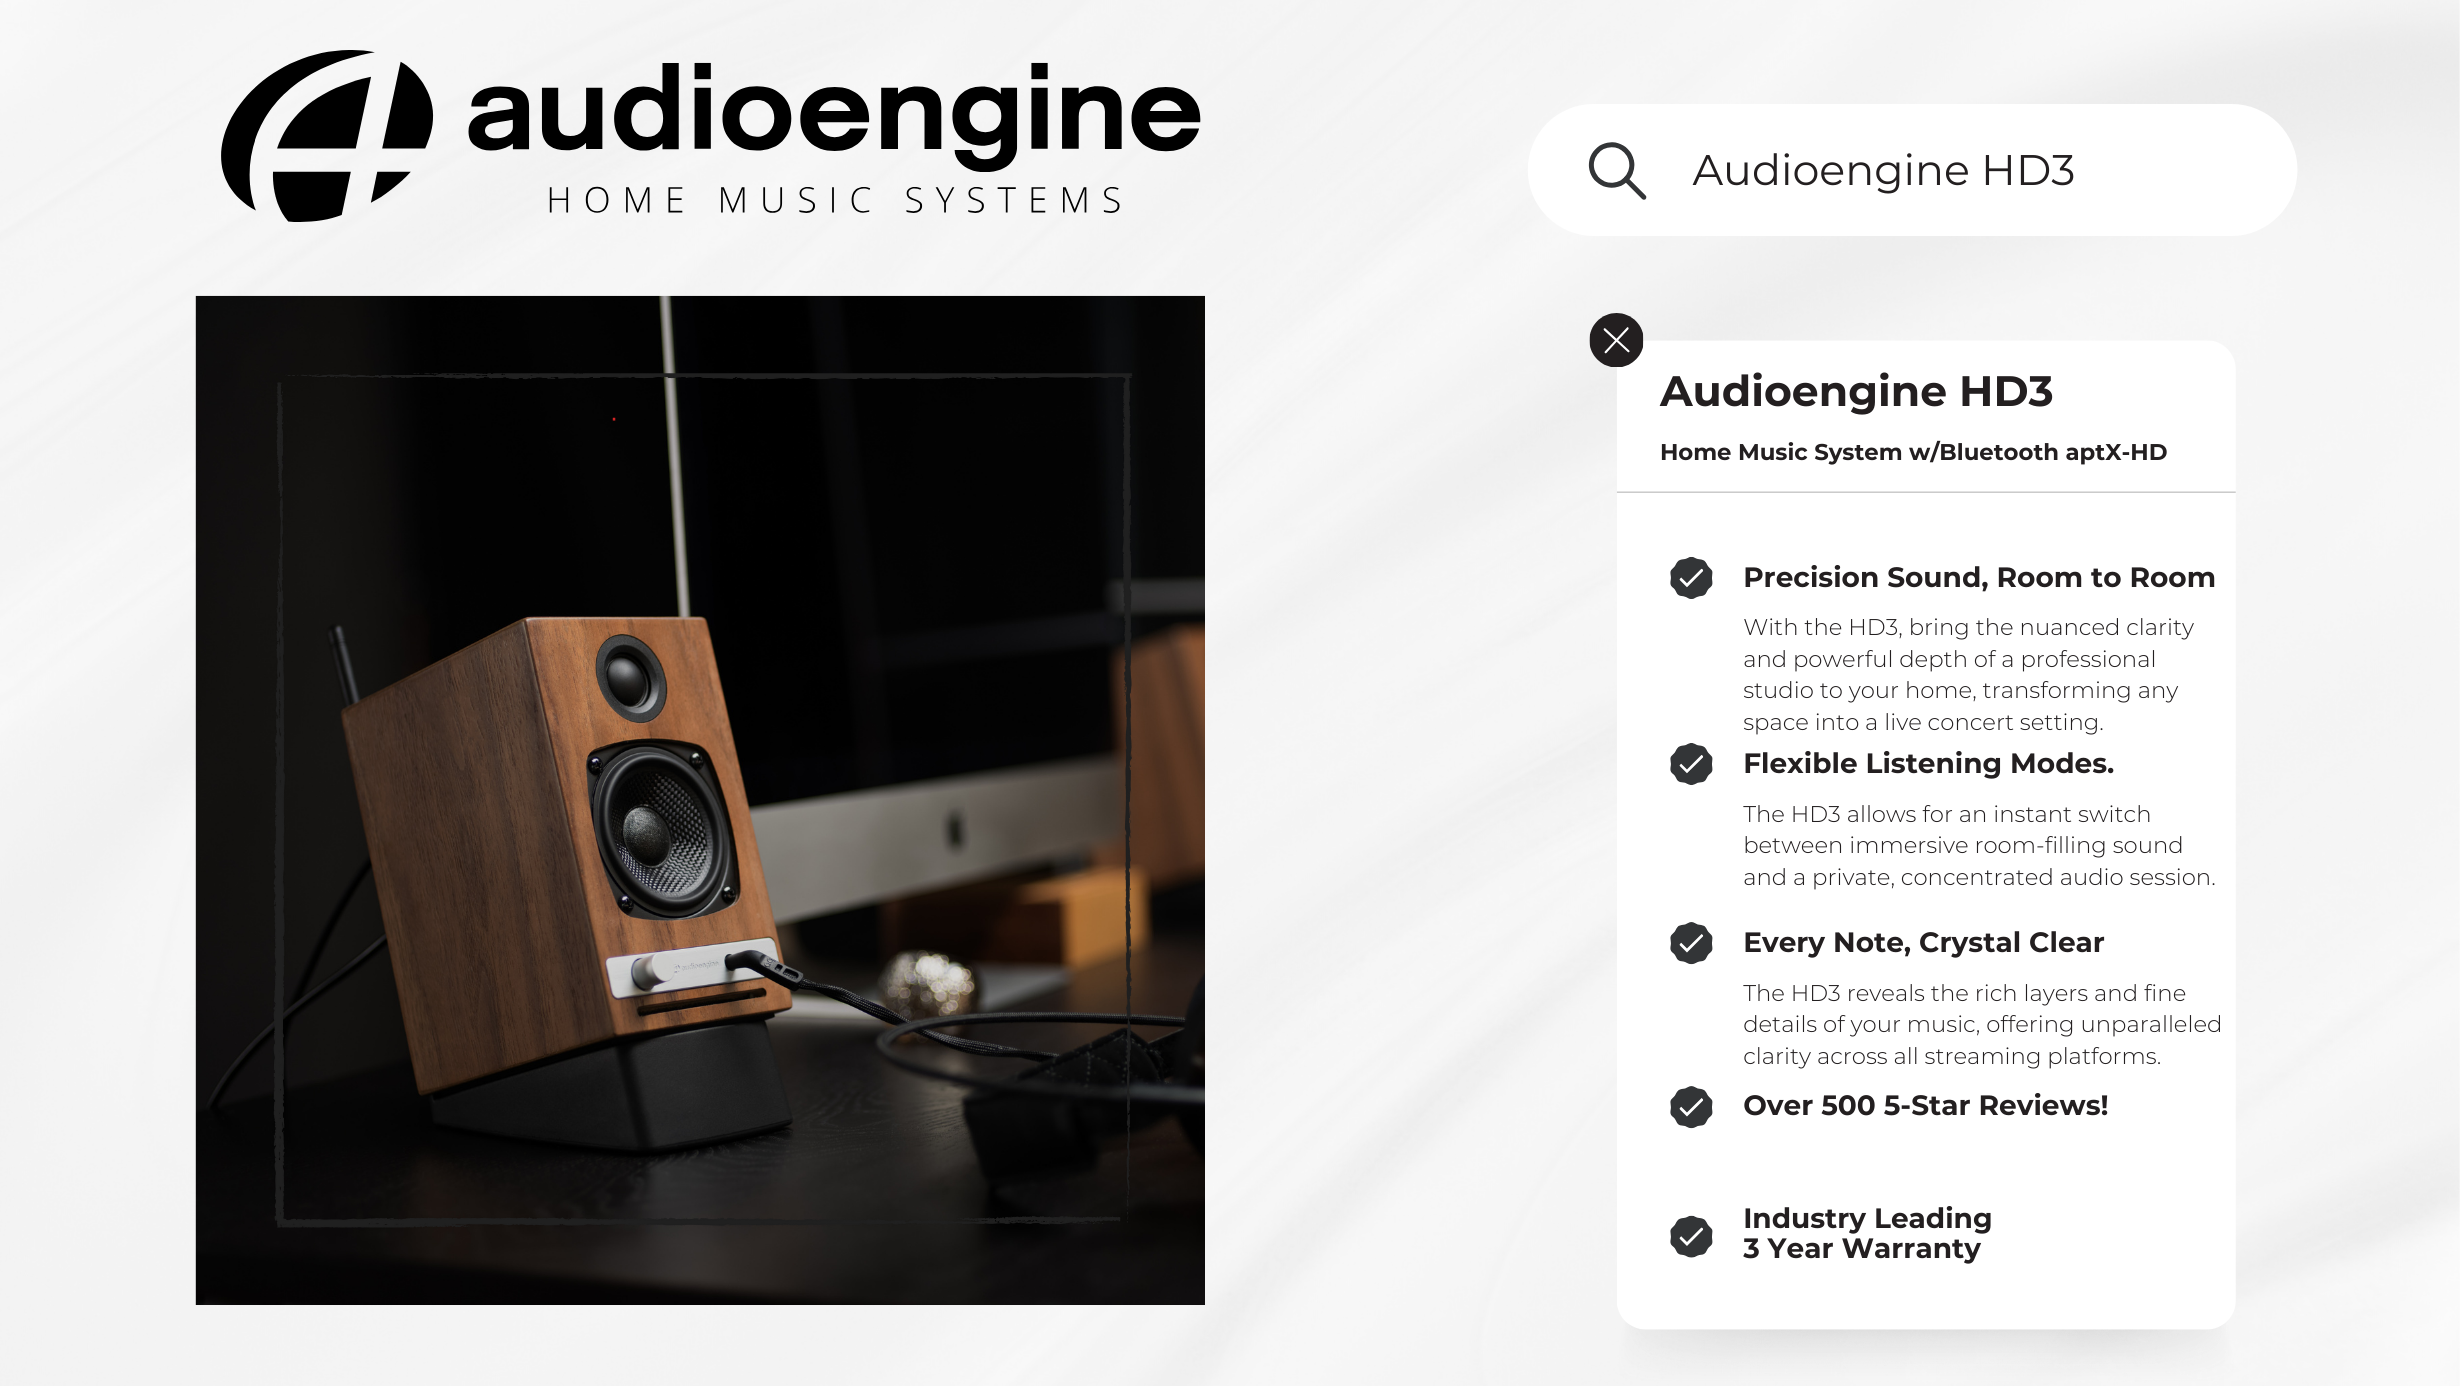
If you purchase products like Audioengine’s HD3 Next Gen wireless speaker set, you will have a versatile setup at your disposal that is capable of connecting and blasting out great tunes using a wide variety of sources. The HD3 Next Gen wireless speakers can also be used directly with your computer, any product with line level RCA and mini-stereo outputs, as well as all Audioengine digital-to-analog converters and wireless audio adapters. You could even stream audio to the HD3 Next Gens via Bluetooth and use either analog input at the same time. You can also add a subwoofer to the mix for the perfect low-end extension. After all, what’s the harm in adding more bass to your listening experience?
Wireless Bluetooth speakers are typically some of the more adaptable products out there, especially when they’re as compact as our B2 wireless speaker. Since the B2 is a single-cabinet Bluetooth speaker, there isn’t the need for an AV receiver or oversized speakers, making it the perfect mini-music system. Even this smaller speaker has multiple connection options – including any music system with an analog audio output – in addition to being the perfect companion for audiophiles and novices alike.
Our technology
Here at Audioengine, we like to give you plenty of options for all of your listening needs. That’s why we offer wireless Bluetooth speakers and other speaker sets that are compatible with most smartphones, tablets, and computers, allowing for multiple connections and streaming sources. If you need the assistance of one our support reps or need more information about our products, check out our support page and find the answers you need!
Table of Contents
- Introduction
- Main Differences Between Audioengine HD3 Next Gen and Dayton Audio MK402BTX
- Key Specifications
- Key Features
- Overall Design
- Playback Capabilities
- Dayton Audio MK402BTX Overview
- Audioengine HD3 Next Gen Exclusive Advantages
- Pros and Cons
- Audioengine HD3 Next Gen
- Dayton Audio MK402BTX
- Conclusion
Introduction
When choosing a Home Music System, the difference in quality and features between models can greatly influence the listening experience. The Audioengine HD3 Next Gen offers premium sound quality and aesthetic design, while the Dayton Audio MK402BTX caters to those looking for functional simplicity. This comparison will detail how these models meet the needs of audiophiles and casual listeners alike.
Main Differences Between Audioengine HD3 and Dayton Audio MK402BTX
The Audioengine HD3 Next Gen Home Music System is celebrated for its superior sound quality and compact, handcrafted design, featuring high-quality Bluetooth connectivity and versatile audio inputs. Conversely, the Dayton Audio MK402BTX focuses on basic functionality with its straightforward Bluetooth connectivity and lacks the refined audio clarity and design sophistication of the HD3 Next Gen.
Key Specifications
Audioengine HD3 Next Gen:
- Amplifier Type: Class AB (Analog)
- Power Output: 60 Watt Peak Power Total
- Connectivity: Bluetooth aptX HD, USB, Analog Inputs
Dayton Audio MK402BTX:
- Woofer Type: 4″ treated-paper woofer
- Power Output: 40 Watts Output
- Connectivity: Bluetooth 4.2, Auxiliary Input
Key Features
The Audioengine HD3 Next Gen showcases a comprehensive suite of connectivity options, including advanced Bluetooth aptX-HD technology, which supports high-fidelity wireless streaming. This feature ensures superior audio transmission quality, preserving the integrity of sound through wireless connections. In contrast, the Dayton Audio MK402BTX provides only basic Bluetooth functionality, lacking support for high-definition codecs like aptX-HD. This limitation means that the MK402BTX may not deliver the same level of audio clarity and detail that HD3 Next Gen users enjoy, specifically in wireless setups.
Overall Design
Audioengine’s HD3 Next Gen stands out with its use of handcrafted, hand-painted real wood cabinets, significantly enhancing both aesthetics and acoustic performance. This commitment to high-quality materials and craftsmanship underlines Audioengine’s dedication to superior standards. Conversely, the Dayton Audio MK402BTX uses standard MDF cabinets, which, while functional, lack the craftsmanship and enhanced acoustic properties offered by the HD3 Next Gen’s real wood construction.
Playback Capabilities
Equipped with a Class AB amplifier, the Audioengine HD3 Next Gen excels in delivering a rich, nuanced sound that maintains detail and depth across all volume levels. This sophisticated amplification not only enhances the audio fidelity but also ensures a dynamic range that preserves the subtleties of the music, making every listening session an immersive experience. On the other hand, the Dayton Audio MK402BTX, while equipped with a built-in amplifier, does not achieve the same level of sound quality. Its amplifier is less capable of handling complex audio tracks without losing clarity, especially at higher volumes, which results in a comparatively flat and less engaging audio experience.
Dayton Audio MK402BTX Overview
The Dayton Audio MK402BTX is engineered for straightforward audio delivery, prioritizing basic functionality and ease of use. This speaker system is ideal for users seeking straightforward sound output without additional features as it falls short of providing the nuanced listening experience that audiophiles seek. The MK402BTX’s design focuses on general utility rather than audio excellence, making it adequate for casual listening but not for those who appreciate depth and detail in their audio experience, areas where the Audioengine HD3 Next Gen excels significantly.
Audioengine HD3 Next Gen Exclusive Advantages
- Superior handcrafted, hand-painted design with real wood cabinets
- Enhanced sound quality through Class AB amplification
- Advanced connectivity including Bluetooth aptX-HD for hi-res streaming
- Built-in headphone amp with a 24-bit DAC
Pros and Cons
Audioengine HD3 Next Gen:
- Pros: Superior audio quality; hand-crafted and hand-painted design; versatile connectivity; excellent customer support.
- Cons: Higher cost, but reflects the superior quality, customer service, and features offered such as the built-in headphone amp and superior DAC.
Dayton Audio MK402BTX:
- Pros: Cost-effective; straightforward functionality.
- Cons: Compromised audio quality due to basic amplifier capabilities; lacks advanced connectivity options; lacks craftsmanship in design.
Conclusion
For audiophiles and discerning listeners who value top-tier audio quality and design, the Audioengine HD3 Next Gen is the clear choice. It provides a comprehensive audio solution with its superior craftsmanship and sound engineering. While the Dayton Audio MK402BTX offers a viable option for basic listening needs, it cannot match the HD3 Next Gen’s overall fidelity and aesthetic appeal.
The HD3 Next Gen speakers do include detachable magnetic grills. The grills have thin rubber pads to prevent marks or damage to the finish or the cabinet, so your HD3 Next Gen’s will keep looking great even if you like to remove / replace them frequently!
While the HD3 Next Gen has a fantastic 24-bit DAC, you can always run your own external DAC to the speakers by connecting to the analog inputs.
Some turntables will need a preamp before being connected and others may have one built-in. Check the turntable manufacturer’s website or user manual.
Yes, there are multiple audio inputs on Audioengine powered speakers and both inputs are “open” or active so you can leave your audio sources connected at the same time.
Yes, you can. The HD3 Next Gen speakers use a switching power supply so it will automatically convert to the different voltage. The power cable is also detachable which makes it convenient to replace the AC plug with a different type if you don’t want to use an adapter plug.
Sure, for HD3 Next Gen you will need an inverter that can supply about 50-60 watts.
Each speaker is 7″H x 4.25″W x 5.5″D
This is normal. The HD3 Next Gen’s USB interface can only accept a 16-bit format; however, the HD3 Next Gen’s DAC will automatically pad the bit depth to 24-bit internally during playback, for lower noise and better dynamic range.
Yes, an AC wall outlet near the HD3 Next Gen is all you need to power the W3 or D2 wireless receiver. Simple.
Audioengine speakers have a low end which will easily fill a room and rival floor standing speakers many times their size, but you can also connect a subwoofer (or connect Audioengine speakers to your sub’s line-level output). You can add our W3 wireless adapter for a wireless subwoofer! It’s also worth noting that the HD3 includes a bass cut switch, to help them blend even better with an external subwoofer.
The HDP6 is a very efficient speaker and designed to work well with digital hybrid amplifiers (Class-D, Class-T, etc.) as well as most stereo receivers, integrated amps, tube amplifiers, and whole-house music systems such as the Sonos ZonePlayer 120. The HDP6s have an amplifier power rating of 10-150W per channel, so any amplifier that outputs that power should work great!
The lower the speaker impedance, the more current (amperage) your amp or receiver will need to provide, but most separate power amps have more than a sufficient power supply and power amp sections for driving 4 ohm loads with ease. In fact many amps will perform better with a 4 ohm load as opposed to 8 ohms if their design is robust enough to supply the extra current. A quick web search will bring up more information on this subject.
The dimensions of each speaker is 11.75″H x 7.2″W x 9.4″D
Yes! You would just need an amp to supply power to the HDP6 speakers and connect to the S8.
The HDP6 came about from requests from customers that already have our powered speakers and/or have a music system and needed speakers but wanted the same Audioengine sound from a passive speaker.
The N22 can work with the HDP6s, but we would recommend using the speakers with an amplifier that can provide more power to the speakers than the N22 can provide.
There’s not really a right or wrong when it comes to volume settings. I’d recommend setting it up whichever way is more convenient, and dialing in a combination of settings to give you the smoothest ramp-up. If you intend to use the D1’s volume as your main control for example, try this: set the speakers to zero volume, and the D1 to max volume. Then with music playing, adjust the speakers up until the volume is as loud as you would want to listen to it. Then simply adjust from the your D1 to mood.
The D1 is a USB Plug-and-Play audio device. which means that the drivers it uses are developed and provided by the developer of your computer’s operating system. Because of this, you shouldn’t need to download or upgrade any drivers to use your D1.
When connected via USB with a computer, the D1 acts like a USB sound-card. Because of this, once it’s set as your default playback device, it should work with any application on your computer playing audio, and with any file format the software supports.
Yes, the output will mute and audio will only play through your headphones.
These RCA outputs are variable, adjusting the volume on the D1 will adjust the output of any speakers or amp connected to this output. This makes the D1 a handy way to control the volume of both your speakers AND headphones.
The D1 includes a headphone amplifier based around the ES9601C SABRE low noise opamp. This headphone amp is able to provide low-impedance, high-fidelity audio to a wide range of headphones and supports headphones with impedances 10 ohms and higher.
Yes, however, note that 24/96 HD digital audio pushes the limits of USB 1.1 speeds. Due to this it’s highly recommended that you connect to a higher-speed USB 2.0 port.
The D1 is asynchronous, which means it controls the data streams timing using its own internal clock to minimize jitter.
Yes! You will need an Apple USB 3 camera adapter. What you would need to do is connect the D1 and its USB cable to the USB A port on the Apple USB 3 camera adapter, and then the male lightning end of the Camera Adapter to your iOS device. You will also need to have a power supply that can power enough to the D1 and your device. Apple’s USB C Fast charger is recommended for this.
Absolutely! We’ve had a lot of really good feedback from our customers on this, and it’s really easy to add to an existing Airplay setup. You can connect your Airport Express into the D1’s optical input using a mini-Toslink to Toslink cable to pass a digital signal to the D1. Like other setups without a computer you’ll still need to connect the D1 to a USB connection for power – Either a USB AC adapter like we offer in our accessories, or a nearby USB port capable of delivering a minimum of 500mA. Please note that the USB port on the Airport express is intended only for lower powered or self powered devices (like a printer) and will not reliably power the D1.
Optical and USB outputs are all digital, so both Windows and Mac OS X will disable the system volume control when they are in use. You can still control the volume directly in iTunes (or any media player), with the front panel volume control on the D1, or with the volume control on your audio system.
It’s normal for USB B connections to have a little play as well as some of the metal to be showing when they are plugged in, so no need to worry. It will be fully connected once you feel and hear the click noise from the connection.
Both USB and Optical should provide the same high-quality digital signal to your D1. In most cases where both USB and optical are available, we usually recommend USB since it’s a shorter signal path. The only real difference is that the optical input on the D1 can support up to 192KHz input if your source supports it. We’d certainly recommend trying both if you have them available to see if you can notice any difference in your setup, and with your audio files.
Unfortunately that is not how the D1 is designed, as the optical connection will take priority. You may be able to have the optical and USB connected to different devices, but it depends on the how the optical device operates. Some devices will deactivate their optical out when no media is playing. Others will leave it active and send an empty signal when no audio is playing, in that case you will want to shut the optical source off. It can be bypassed when using something like an optical switcher so that you can toggle between the optical source and the USB input.
You can use Audioengine DACs with your original A5s, no problem. You would simply use a standard RCA cable and the RCA to mini-jack adapter that came with the A5 to connect the RCA output from the DAC in to one of the mini-jack inputs.
When using the optical input of the D1 DAC or the HD6 speakers, you’ll need to make sure your TV’s audio output is set to PCM (not Dolby, DTS, or 5.1/surround). Special hardware is needed to process Dolby audio signals. If your TV is set to Dolby, it’s likely you’ll hear some audio but it will be intermittent in nature with dropouts. Once the output is set to PCM, this should resolve the issue. Check with your TV manufacturer for directions on how to make this adjustment.
Audioengine D1, D1P and DAC3 Reviews from Top Publications
What are the differences?
The Audioengine D1, D1P, and DAC3 each offer a distinct approach to enhancing your music. The D1 is a classic choice for desktop setups, transforming ordinary computer audio into something rich and clear. It’s designed for those who want to elevate their home listening without the hassle of complex equipment.
The D1P takes the D1’s strengths and packs them into a more portable form. It’s ideal for those who need high-quality sound on the go, without sacrificing performance. The D1P’s compact size makes it easy to carry, but its sound remains powerful and precise.
Then there’s the DAC3, the most advanced of the three. It delivers studio-quality sound in a sleek, portable package, perfect for those who demand the best audio performance no matter where they are. The DAC3 is versatile, connecting easily to modern devices while ensuring every note is captured with perfect clarity.
Each model serves a purpose, whether you’re setting up at home, traveling, or simply wanting the best sound possible. Audioengine has designed these DACs to meet the needs of every listener, ensuring that your music always sounds its best.
On this collection page you’ll find detailed reviews from industry experts and major publications that applaud Audioengine’s D1, D1P, and DAC3.
These reviews collectively affirm the top-tier performance and reliability of our digital-to-analog converters and headphone amplifiers. Each piece is celebrated for its precision engineering and outstanding audio fidelity, offering users an unrivaled listening experience.
Audioengine D1 vs. D1P: Key Differences
The Audioengine D1 and D1P are both 32-bit digital-to-analog converters designed for outstanding audio performance, but they cater to different preferences and use cases.
Audioengine D1 is equipped with the PCM5102 DAC chip, making it a robust choice for desktop audio setups. It features USB and S/PDIF optical inputs and provides outputs for headphones and powered speakers. This makes the D1 an ideal solution for users looking to enhance their home audio systems.
On the other hand, the Audioengine D1P is built for portability without compromising sound quality. It features the ESS ES9219C DAC chip, supports high-resolution audio formats, and offers MQA rendering. The D1P includes a toggle switch for easy switching between headphone and line-out modes and is powered via USB-C, ensuring compatibility with various modern devices like laptops and smartphones. This makes the D1P a versatile choice for audiophiles who seek premium sound quality in a compact design.
By offering features tailored to different applications, both the Audioengine D1 and D1P maintain the brand’s commitment to providing high-fidelity audio solutions, whether at home or on the go.
Audioengine D1P Professional Review:
NEW Audioengine D1P DAC and Headphone Amplifier
For those demanding the best sound quality, the D1P enhances music streaming to high-fidelity, exceeding the capabilities of traditional audio equipment.
It bypasses the limitations of standard device sound cards, ensuring that your favorite tracks from platforms like Tidal, Apple Music, or Spotify are delivered in studio-level quality. Supporting high-resolution audio formats — including PCM up to 32bit 384KHz, DSD up to 256, and MQA files — the D1P allows you to immerse yourself in the full depth of your music, unveiling every note with clarity and detail.

Audioengine DAC3 and Headphone Amplifier
Professional Review by The Honest Audiophile
More Professional Reviews:
Best DAC and Headphone Amplifier of 2024: Audioengine D1
C-Tech by CalCalist
“The D1 by Audioengine has been honored as the “Best DAC and Headphone Amplifier of 2024″ by C-Tech by CalCalist. This prestigious accolade highlights our dedication to excellence and innovation in audio technology. The D1 is praised for its superior sound quality and advanced features, making it the preferred choice for audiophiles seeking the ultimate in audio performance and convenience.”
Audioengine HD3 – Hi-Fi Stereo Desktop Speakers w/ Built-in 10K OHM Headphone Amplifier
Reddit R/Headphones
“The HD3 features a PCM5102 DAC and a OPA2134 headphone amp that’s separate from the main speaker amp…The 3.5 mm headphone output does exactly what it’s supposed to do: power your headphones without coloring the sound.
There was no noticable hiss or distortion at either end of the volume range. All you get is clean power with no coloration.
At $399 — $319 refurb — the HD3 is an awesome value that rolls 2 channel powered speakers, a DAC, a headphone amp, and Bluetooth receiver all into compact and attractive package.”

You can, but we recommend not using USB hubs as the hubs can lead to a reduction in data flow rate which may not be fast enough for higher-resolution audio. Additionally, when using a USB hub, you are adding in the possibility of internal noise being picked up. For example, wireless mouse/keyboards may negatively impact the audio quality.
If using a Mac, open the Audio MIDI Setup utility in Applications->Utilities, under Audio Devices, choose “Audioengine D1″ and check that the format is set to 96 and the bit depth is set to 24bit. On a PC, open the sound options through the control panel. Then choose Speakers – Audioengine D1” and select Properties. You can select the output format from the dropdown in the advanced tab.
Your D1 will sound great out of the box and will get better over time, however, it’s best to play music for 40 to 50 hours first before doing any critical listening.
In the Foobar control panel, under Preferences->Output, set the buffer length to minimum. A few customers have mentioned that WASAPI mode is more stable when used under WinAmp, so try that as well.
Try removing all other USB devices temporarily, and try each USB port on your computer one at a time to see which one works best in your setup. USB audio needs quite a bit of bandwidth, so for best results ensure your D1 is on a “High-Speed” bus and not a “Full-Speed” bus.
DAC type
USB and Optical
Inputs
USB Audio
S/PDIF Optical
D/A converter
ESS ES9018
USB transfer mode
Asynchronous dual clock
USB controller
CT7601CR USB streamer
USB device class
Type 1.1 or above
Input bit depth
Up to 32 bits
Input sample rate (USB)
32kHz-96kHz native playback
188.2kHz & 192kHz re-sampled to 96kHz
Input sample rate (optical)
32kHz-192kHz native playback
Outputs
Analog RCA L/R stereo
Analog 3.5mm mini-jack stereo
Full-scale output level
2.0V RMS
Output impedance
2 ohms
Recommended headphone impedance range
10 ohms to 600 ohms
Headphone amplifier
ES9601C SABRE
Optical receiver
CS8416
Frequency response
10Hz-25KHz (+/- 0.5dB)
SNR
(DC to 20 kHz) >110dB
THD+N
(1kHz FS 96kS/s) <0.0025%
Crosstalk
-85db
Power requirement
USB 5V DC, 200mA
USB power filtering
2-stage redundant regulation
Product dimensions
3.5″ (8.9 cm) x 3.75″ (9.5 cm) x 1″ (2.5 cm)
Shipping weight
1.0lbs (0.5kg)
Environmental
Operating Temperature: 32 to 95 degrees F
Non-operating Temp: -4 to 113 degrees F
Relative Humidity: 5% to 95% non-condensing
Included accessories
USB cable
Setup guide
Microfiber bag
D1 DAC
The D1 uses the ESS ES9018 DAC, which is well regarded for its low noise and high fidelity. Due to the high signal-to-noise specs of the ES9018 and the added benefit of double redundancy power source conversion and filtering, the D1 presents impressive low noise and low distortion characteristics. The D1 can process digital audio at any bit depth up to 32-bits and any sample rate up to 96kHz (192kHz using optical)
D1 Headphone Amplifier
The D1 includes the ES9601C SABRE headphone driver amp with circuit protection and is designed for a wide range of headphones that will satisfy even the most critical listeners.
D1 Power
The D1 is powered directly from the USB input and passed through two stages of regulation to ensure no USB power variations affect the audio quality. Because of the efficiency of the D1, it can even be powered by a phone or tablet.
D1 Preamp
The audio line-out preamp connects to powered speaker systems, amplifiers, or other external decoders with an analog or optical output.
D1 Volume Control
Volume for headphones and line-out is controlled directly from the D1 front panel via the digitally-controlled analog potentiometer. Smoothly adjust volume levels at fine increments without any undesirable noise or channel imbalance at lower volumes.
Yes! You will need an Apple USB 3 camera adapter. All you would need to do is connect the D3 and it’s USB cable to the USB A port on the adapter and then the male lightning end of the Camera Adapter to your iOS device. You will also need to have a power supply power enough to power the D3 and your device. Apple’s USB C Fast charger is recommended.
The D3 is a USB Plug-and-Play audio device. This means that the drivers it uses are developed and provided by the developer of your computer’s operating system. In the case of a Windows PC for example, these drivers are provided by Microsoft, and are a part of Windows.
The primary volume adjustment for D3 is the system volume. This interacts directly with circuitry in the D3 to control volume at the output. You can also use the volume control of your media player, but this (if implemented incorrectly) can potentially affect the digital signal out from your computer, so is considered less desirable.
The D3 is asynchronous, using dual clocking circuits to provide the greatest possible isolation between the system clock and the D3 DAC clock.
Yes, however, note that 24/96 HD digital audio pushes the limits of USB 1.1 speeds. Due to this it’s highly recommended that you connect to a higher-speed USB 2.0 port.
If using a Mac, open the Audio MIDI Setup utility in Applications->Utilities, choose “Audioengine D3” under audio devices and check that the format is set to 96 and the bit depth is set to 24bit. Also a quick check is to simply observe the HD indicator on the D3 while music is playing. If the data rate of the digital signal being sent to the D3 is above 48K, then the HD indicator will be lit.
In the Foobar control panel, under Preferences->Output, set the buffer length to minimum. A few customers have mentioned that WASAPI mode is more stable when used under WinAmp, so try that as well.
When connected via USB with a computer, the D3 acts like a USB sound-card. Because of this, once it’s set as your default playback device, it should work with any application on your computer playing audio, and with any file format the software supports.
It is normal for the D3 to be warm/hot to the touch as the outer case was designed to work as a heat-sink.
Yes, you can use multiple W3 sets (up to 8) to send stereo audio to different locations or up to 3 receivers with one sender unit.
The W3 is a great way to make your S8 subwoofer wireless!
The W3 kit comes with a sender unit and receiver unit. For use with an AV Receiver or Stereo Amplifier, you’ll need to connect the sender unit to the SUB or LFE output of your AV receiver. This is usually done with a 3.5mm stereo-mini to RCA “Y” cable. You can connect either RCA to the SUB / LEF out, and just leave the other side unplugged. Then, you’ll connect the W3 receiver to your S8 Powered Subwoofer, using a 3.5mm stereo mini to RCA “Y” cable, normally. If you’re using a different sub that only has a single RCA, connect the same color RCA that you used for your AV Receivers SUB / LFE out, and leave the other unplugged. Both W3s will need power. In this configuration you will need a USB AC adapter for each W3 unit.
You can also do this using powered speakers like our A5+s, A2+s, HD6s, or HD3s, instead of an AV Receiver. For this, you’ll connect the W3 sender to the RCA output on the left speaker, using a 3.5mm stereo-mini to RCA “Y” cable. Then connect the W3 Receiver to the input on your S8. You can either use a 3.5mm stereo-mini to stereo-mini cable for this, or another 3.5mm stereo-mini to RCA “Y” cable; either will work fine. Both W3 units will need to be powered from a USB port. You can use USB AC power adapters, or if the powered speaker you’re using is an A5+, you can use the USB port on it’s rear panel for the W3 sender.
Yes, connect the W3 Sender to the line-leve outputs or headphone jack of the TV and the Receiver. You’ll need a second USB power adapter or iPod charger for this application. These power supplies are inexpensive and can be found at your local Radio Shack or electronics store.
DAC type
Dual mode USB and analog (via CS5343 ADC) wireless DAC
Inputs
USB audio, mini-jack analog
Outputs
analog mini-jack
DAC
CS4344
ADC
CS5343
Full scale output
1.0Vrms
Output impedance
470 ohms
Power source
Sender: USB from computer or adapter
Receiver: USB power adapter
Power requirements
Sender: 180mA, 5V
Receiver: 150mA, 5V
SNR
95dB
THD+N
0.01%
Crosstalk
-65dB
Frequency response
20Hz to 20KHz, +/- .2dB
Input bit depth
up to 16 bits native
Input sample rate
up to 48KHz native
USB device class
type 1.1 or above
Wireless operation range
Up to 100ft (30m) typical
Latency
<20ms
Receivers supported
up to 3
Product dimensions
100x30x10mm (LxWxH)
Shipping weight
1 lb
Included accessories
minijack cable (20″), minijack to RCA adapter (12″), USB power adapter
Environmental
Operating Temperature: 32 to 95 degrees F
Non-operating Temp: -4 to 113 degrees F
Relative Humidity: 5% to 95% non-condensing
Advantages of wireless
The W3 wireless system transmits bit-perfect PCM-stereo simultaneously to up to 3 receivers. Because the USB controller in the Sender and the DAC in the Receiver are segregated by the wireless subsystem, various anomalies which plague many wired DACs such as jitter, grounding, and induced cable noise are greatly reduced. In addition, the W3 allows the user to physically isolate a potentially noisy computer from the sensitive audio components in your system.
W3 USB
The W3 utilizes the TI CC8520 PurePath™ USB wireless system-on-a-chip solutions, TI’s newest offering to the wireless audio arena. The Sender can be powered directly from the USB bus or from the included external power adapter.
W3 DAC
The W3 Receiver utilizes the CS4344 DAC, a solid, well regarded industry mainstay. Due to the CS4344’s’s high signal-to-noise specs, the W3 presents impressive low noise and low distortion characteristics.
Make the transition to a wireless system across the board.
So you’ve decided to integrate wireless speakers into your home or office… Awesome! Wireless speakers provide convenience and mobility without sacrificing sound quality.
When it comes to setting it up, though, you might be concerned as to whether or not all of your devices will connect seamlessly with your new speakers. Luckily, Audioengine’s wireless speakers are pretty user-friendly and can be connected to various types of devices.
For most mobile applications, such as streaming music from your smartphone or tablet, connecting to your speaker system is a simple matter of going into your device’s Bluetooth settings and connecting to the proper device. From there, your device will be able to reconnect with the wireless speakers at any time.
TVs and desktop computers can be a bit more complicated in terms of avoiding the usage of pesky wires and cables, which you probably wanted to eliminate when you opted to buy wireless speakers in the first place; however, there are a few options to make setting up your system easier, such as using wireless adapters with your sources. Wireless adapters, such as our W3 Wireless Adapter and D2 24-bit Wireless DAC, enable wireless connectivity in devices not previously built for wireless connections. You can still make use of those cables, of course, if you are uninterested in purchasing additional pieces for your audio system; since our wireless speakers feature analog inputs, they can easily be connected to them by simply connecting their line level outputs to the input of these speakers..
Our technology
Audioengine’s wireless speaker systems and adapters make it possible for you to tune in from almost any device. Most of our products can also connect to multiple different types of brands or sources, so whether you prefer iPhones, iPads, or even Android devices, we have the wireless system components that will best accommodate you and your lifestyle.
Our woofers are made of aramid fiber and the tweeter domes are silk. Both of these materials are very robust and can handle quite a bit, therefore we decided against grill covers for the A5+ Classic as they tend to negatively color the sound. Even though our speakers do not have grills they are still cat and kid-friendly!
The A5+ Classic was designed with the user’s listening experience in mind and are not marketed as pro audio mixing monitors. However, Audioengine has its roots in the studio monitor world and the A5+ Classic is quite good for this purpose. We’ve had customers tell us they use these for nearfield listening and music editing with excellent results.
Yes, just switch the voltage selector on the rear panel to match the AC power in your country before powering them on. We recommend changing the fuse when using a different voltage. For 220 volts, here’s the value you would need:5mm x 20mm – 1.6 amps @ 250 volts – slow blow fuse. The power cable is detachable on our powered speakers which makes it convenient to replace the AC plug with a different type if you don’t want to use an adapter plug.
Sure, for A5+ Classic you will need about 100-120W.
You wouldn’t be able to use a pair of headphones directly with the A5+ Classic; in order to use headphones with the A5+ Classic, you would need to include something with a dedicated headphone amp, such as our D1. All you would need to do is plug the D1 into your computer (either with an optical or USB cable) and connect the D1 from its RCA outputs into either of the inputs of your speakers.
The A5+ Classic is not officially supported by any universal remotes. It is possible to use a third party remote, but that remote needs to support IR learning. This is a feature that allows a universal remote to learn commands directly from the remote we supply. The Logitech Harmony remote, for example, is supported by the A5+ Classic.
Each speaker is 10.75″H x 7″W x 9″D
– The process for replacing a volume encoder begins with pulling the volume knob straight back from the encoder shaft
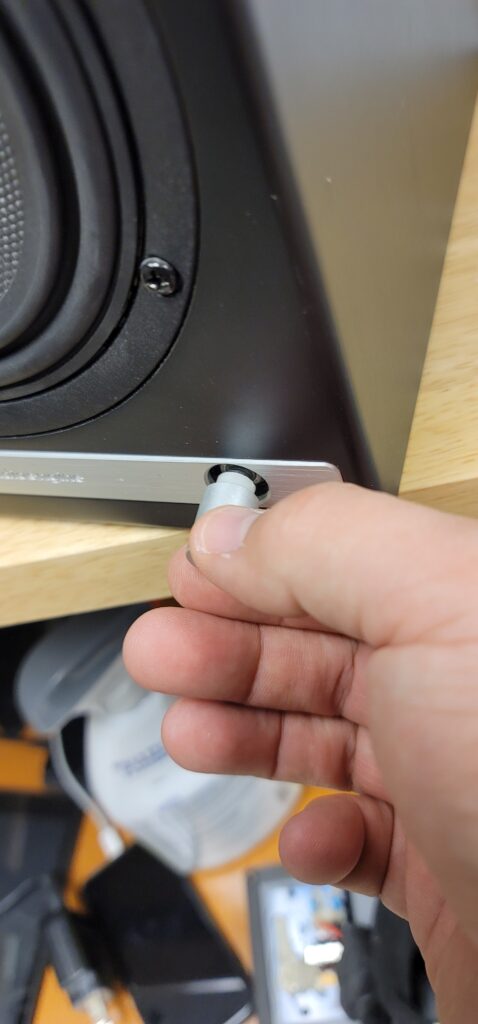
– Make sure the rubber insert stays with the volume knob –
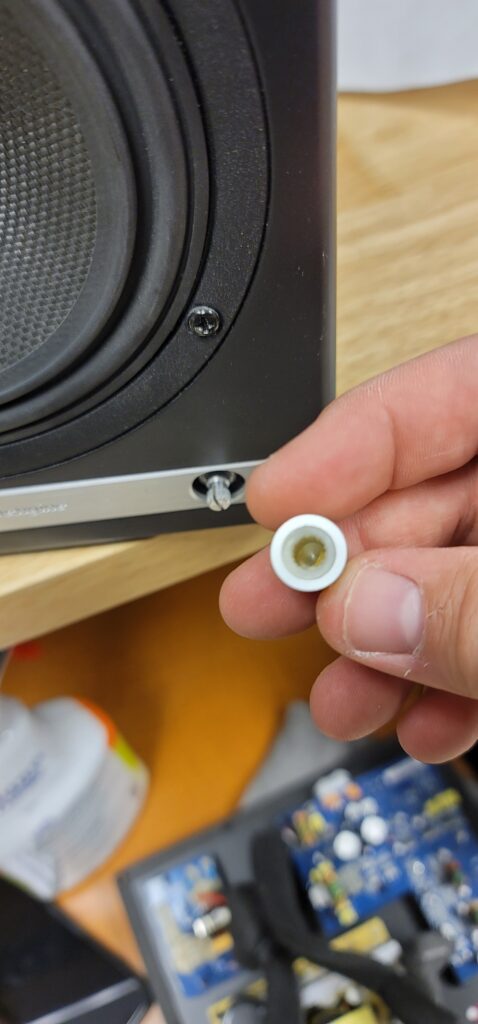
– The volume encoder shaft should look like so before proceeding –

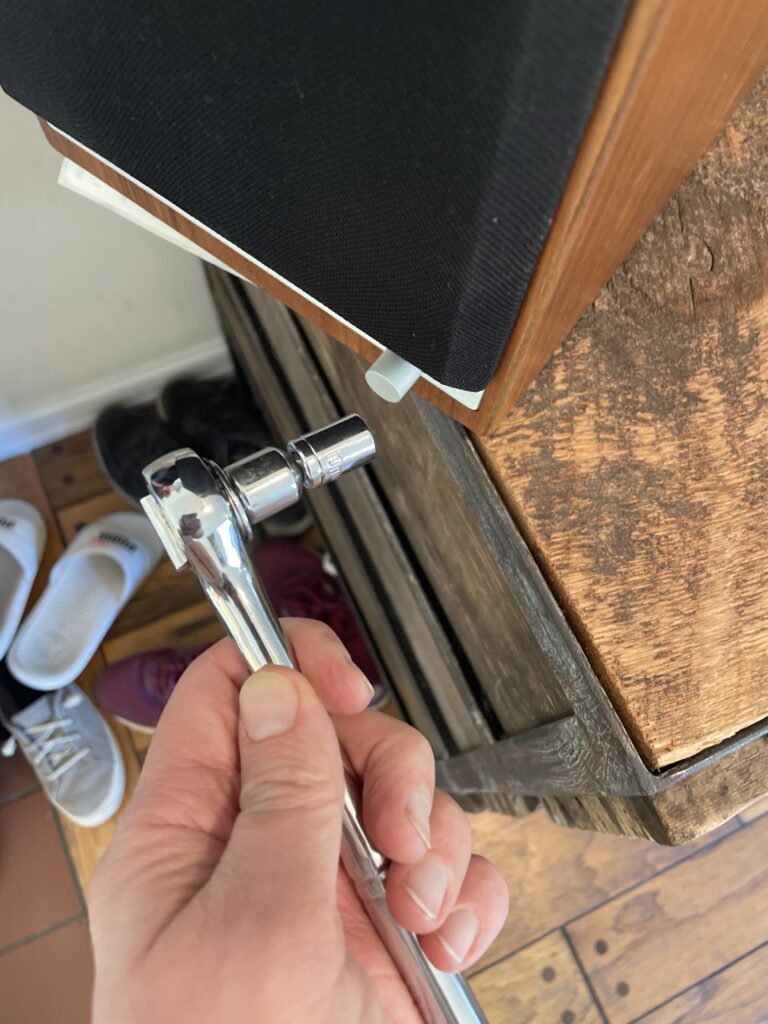
– Using a thin-walled 10mm socket, remove the lock nut fastening the encoder to the front of the speaker cabinet –
– Once you have removed the amp backplate on the back of the active speaker, make sure to remove the encoder wiring terminal clip from the amp circuit board. You can then fully uninstall the encoder assembly by pulling back the encoder shaft from the inside –
– Finally, the IR receiver can be removed by using a long-necked Phillips PH1 screw driver to remove the 2 screws fastening the IR receiver on the inside of the cabinet –
After fully removing the faulty encoder, the replacement can be installed following these steps in reverse order before finally connecting the wiring clip to the amp circuit board and fastening the amp backplate back onto the active speaker.
The process can be a bit cramped if you wish to do as little disassembly as possible, or a bit easier if you are comfortable moving parts to give yourself more workspace. The sound damping insulation normally overlaps at the bottom of the active cabinet. This can be peeled back similar to the reference picture attached. The crossover is mounted underneath this insulation (If process being done on an HD6) and is perhaps the most obtrusive part when replacing a volume encoder. This has two Philips head screws mounting it to the base of the cabinet along with an adhesive pad to reduce noise vibration. It is possible to remove the two screws and lift the adhered crossover up from the base of the cabinet momentarily to get better access to the IR receiver and volume knob assemblies at the front. If you’d rather not risk damaging anything, the IR receiver can still be unscrewed from the inside of the cabinet with a long-necked Phillips PH1 driver. The volume knob is loosened from the outside of the cabinet with a thin-walled 10mm socket found by pulling the volume knob straight back from the encoder shaft. Ample lighting will also make this work easier
This is normal; the volume control for the A5+ series is a digital encoder, and uses a micro-processor to attenuate the volume. The light on the front of the speakers should flash as you adjust the volume up and down; once the speakers have reached minimum or maximum volume, the light will remain solid and won’t flash.
The USB port can provide around 500mA, which is standard for high powered USB 2.0 devices; these are perfect for using a W3 or B1 for instance.
However, when trying to charge a iPad or iPhone for example, they require around 1000mA to charge with the screen on (the iPad’s included USB charger actually provides around 2100mA to speed up charging with the screen on). If your device is at a higher battery level it should work fine to plug it in to the USB power port to maintain the battery while listening to music (with the screen on it will always show “not charging”). If the battery is low though, we’d recommend plugging it into the charger that came with it.
Yes, We do use solid bamboo for these speakers! The bamboo cabinets were tuned to sound the same as the MDF speakers, but the density of bamboo will give it natural acoustic advantages over MDF material.
You may have a loose volume pot. This can happen when the nut that holds the volume pot in place becomes loose. This can be easily accessed and tightened without opening the speakers up. Try this:
1) Pull the plastic volume knob off the volume pot. Depending on how tight it’s on, you might be able to pull it off with just your fingers. If not, you may need to cover the knob with a soft cloth and pull out with pliers.
2) Use a deep well 10mm socket (or socket driver) to tighten the nut around the volume pots shaft.
3) Press the plastic volume knob back over the volume pot’s shaft, and retest.
In countries such as the US, Canada, and Japan the fuse is a 110-120V AC power is a 5mm x 20mm 3.15 amp @ 250 – slow blow fuse. If you are outside those mentioned countries, please use a 220-240v is a 5mm x 20mm 1.6 amp @250 – slow blow fuse.
Table of Contents
- Introduction
- Main Differences Between Kanto YU6 and Audioengine A5+
- Key Specifications
- Design and Build Quality
- Sound Performance and Playback Capabilities
- Kanto YU6 Overview
- Audioengine A5+ Exclusive Advantages
- Customer Service and Warranty Comparison
- Pros and Cons
- Conclusion
Introduction
In the competitive market of Home Music Systems, discerning listeners look for more than just mere volume; they seek clarity, depth, and a design that complements their space. The Audioengine A5+ and Kanto YU6 both strive to dominate the realm of premium sound systems, each offering unique features to appeal to specific tastes and preferences in audio quality and functionality.
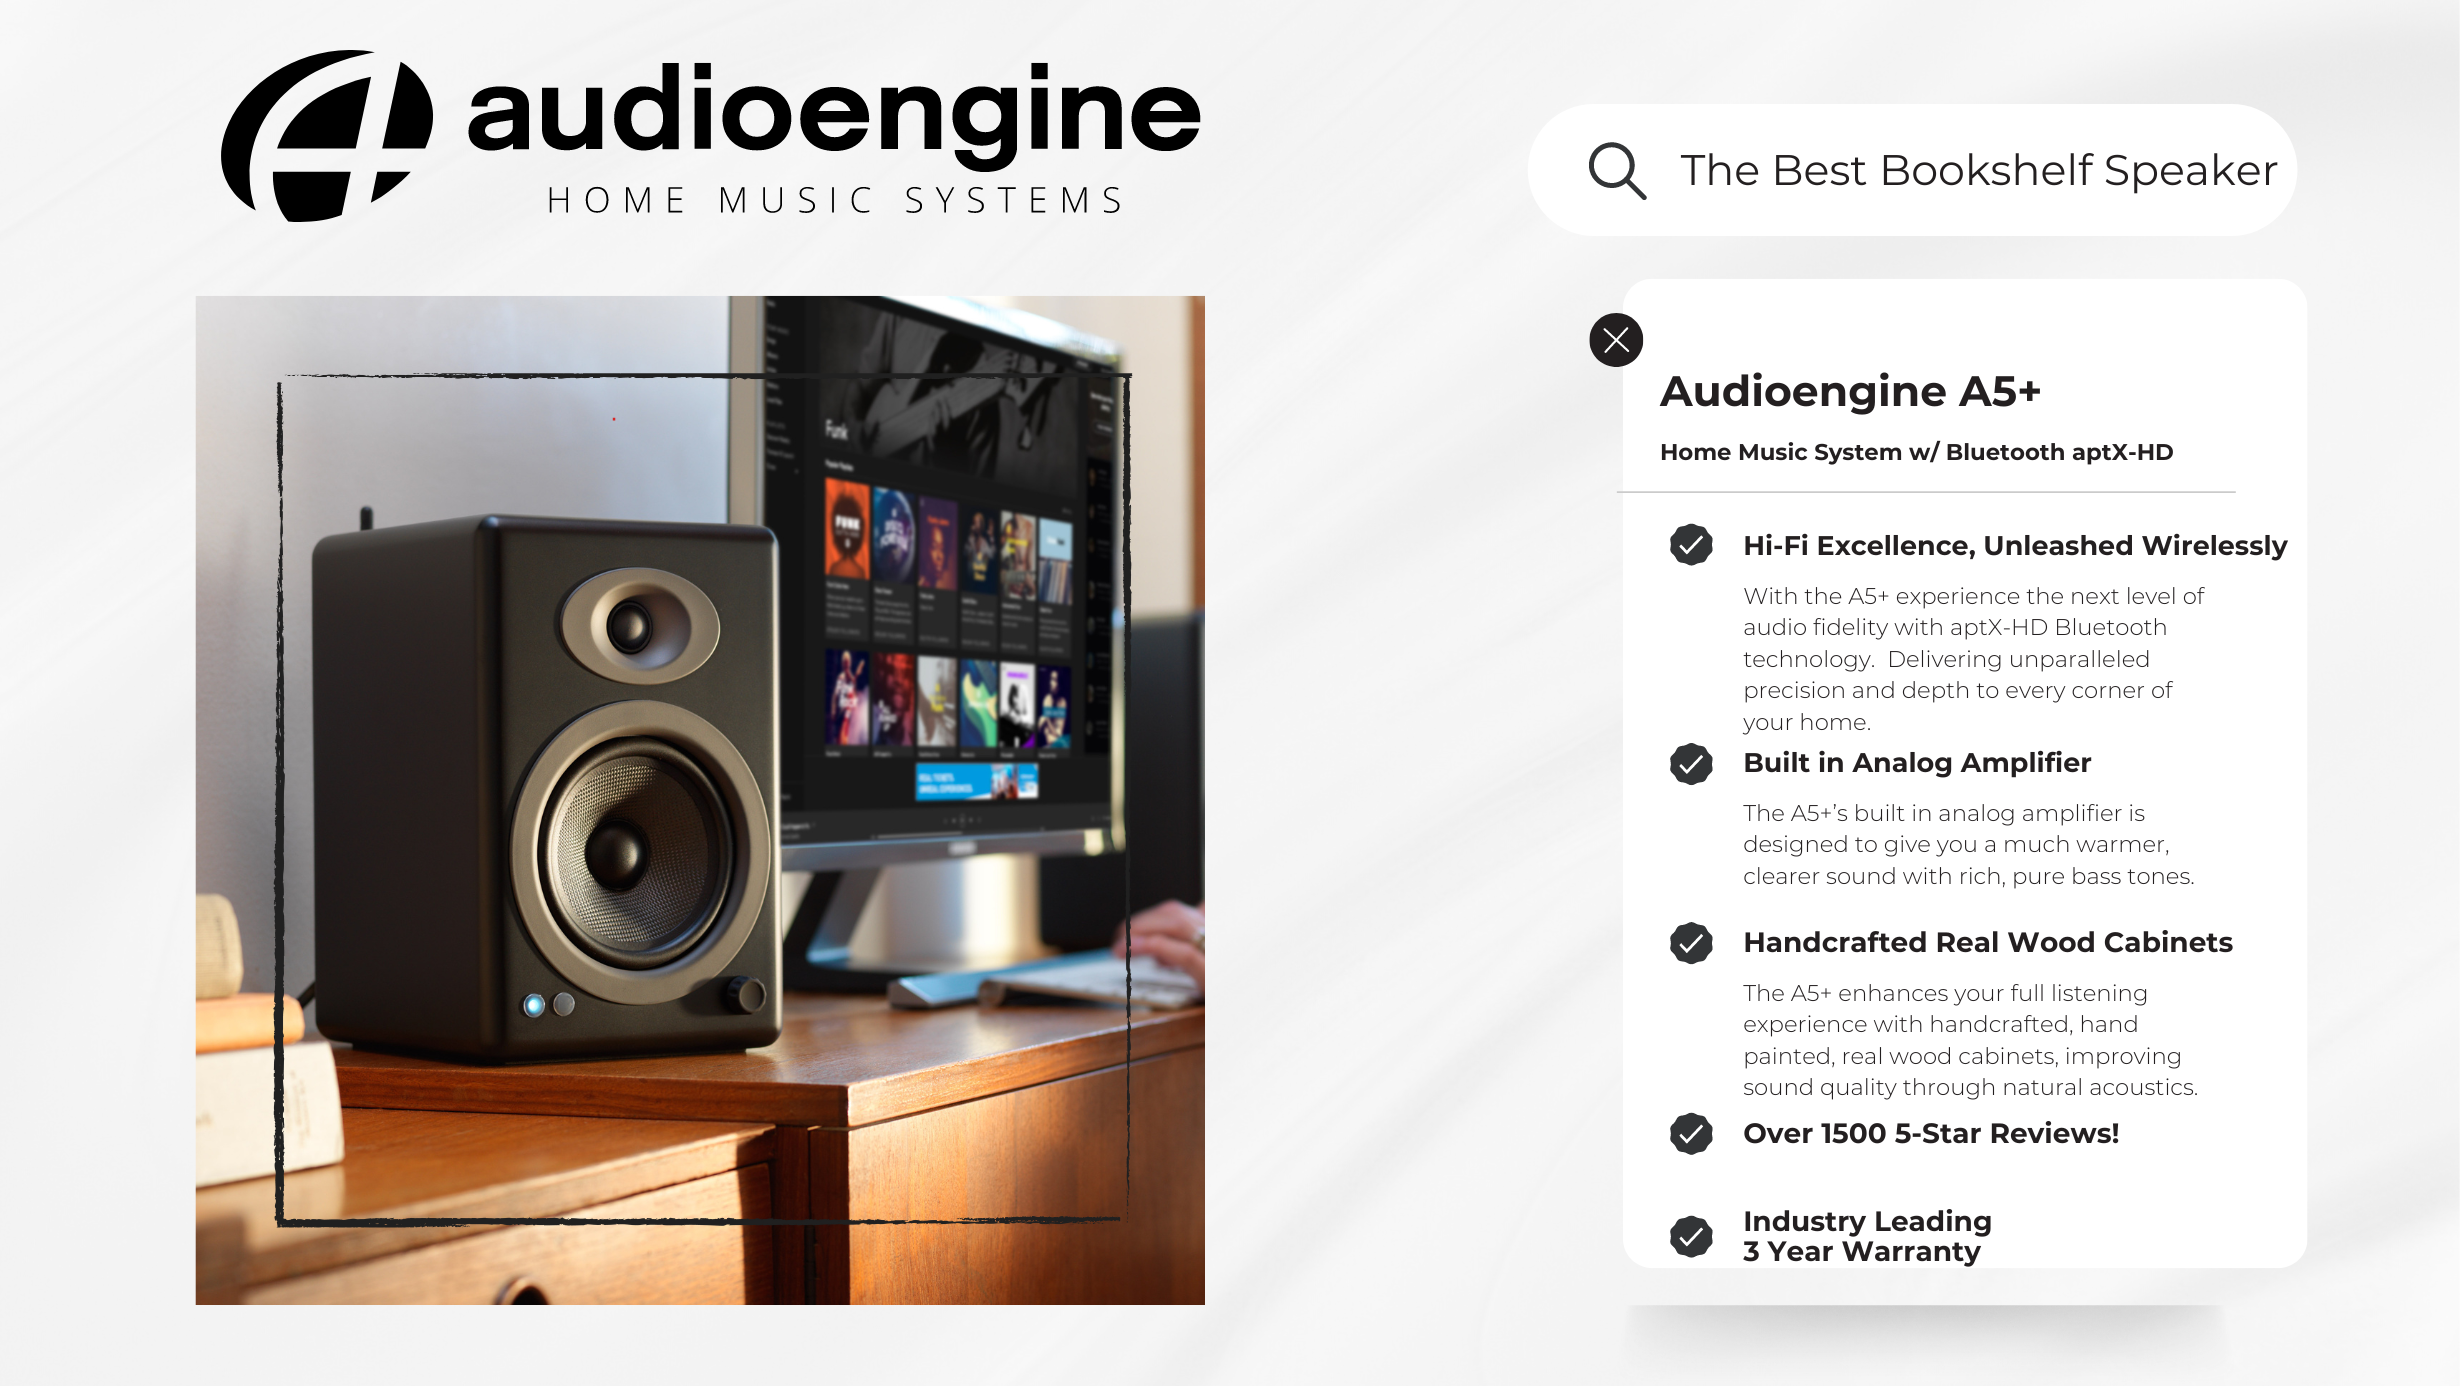
Main Differences Between Audioengine A5+ and Kanto YU6
The Audioengine A5+ is renowned for its high-quality build and acoustic performance, powered by a Class AB amplifier that ensures richer, more detailed sound reproduction. The Audioengine A5+ integrates Bluetooth aptX-HD, which allows for superior wireless audio quality that appeals to consumers preferring lossless audio streams. In contrast, the Kanto YU6 operates with a Class D amplifier, suited for energy efficiency but potentially compromising on the audio purity at higher volumes. It employs Bluetooth 4.0, which, while reliable, does not support higher-quality codecs like Bluetooth aptX-HD.
Key Specifications
- Audioengine A5+:
- Amplifier Type: Class AB
- Power Output: 150W peak power total (75W RMS per channel)
- Inputs: 3.5 mm stereo mini-jack, RCA L/R, Bluetooth aptX HD
- Kanto YU6:
- Amplifier Type: Class D
- Power Output: 200W Peak Power (100 Watts Total RMS)
- Inputs: 3.5mm mini-jack AUX, RCA with Phono Switch, Optical, Bluetooth 4.0
Design and Build Quality
The Audioengine A5+ is distinguished by its handcrafted and hand-painted real wood cabinets that not only enhance the visual appeal of the system but also contribute to its superior acoustic performance. These cabinets help to dampen resonance and provide a warmer, more natural sound. The Kanto YU6, while well-built, uses more conventional materials and lacks the detailed craftsmanship found in the A5+, focusing instead on a simplistic design.
Sound Performance and Playback Capabilities
The A5+ leverages its superior Class AB amplifier to deliver expansive, detailed sound across various genres and volumes without distortion. Its Bluetooth aptX-HD connection ensures that streaming audio maintains its quality, just as the artist intended. The Kanto YU6, while capable of producing significant volume, does not maintain the same clarity or depth when pushed to its limits, due to its Class D amplifier’s limitations.
Overview of Kanto YU6 Features
The Kanto YU6, while a competent competitor in the Home Music System market, is designed with basic functionality in mind. The Kanto YU6 offers multiple input options and a built-in phono preamp, making it suitable for desktop environments that require multiple connections. However, it lacks the detailed feature set and acoustic fidelity that define the A5+.
Exclusive Advantages of Audioengine A5+
The A5+ not only excels in sound quality but also with user-friendly features such as high-quality Bluetooth aptX-HD, multiple input options, and a subwoofer output, ensuring seamless connectivity across devices. This ease of use extends to the system’s operation, where inputs are always ready to accept signals without the need to toggle between sources manually. The A5+ has evident attention to detail in its design and construction, as the handcrafted and hand-painted real wood cabinet uses the same 13-step process as a baby grand piano.
Customer Service and Warranty Comparison
Audioengine is dedicated to exceptional customer service and reliability, offering a comprehensive 3-year warranty on all products, which far surpasses the industry standard. This commitment is highlighted by the unique 30-day audition period, allowing customers to experience the quality of the A5+ in their own space. Moreover, Audioengine prides itself on US-based customer phone support where clients can speak directly to knowledgeable staff who work collaboratively to resolve any issues. This contrasts with Kanto’s offering, which includes only a 2-year warranty, reflecting a lesser commitment to customer assurance and product longevity.
Pros and Cons
- Audioengine A5+:
- Pros: Exceptional sound quality due to class AB amplifier, high-quality Bluetooth connectivity, handcrafted and hand-painted real wood build, and superior customer service.
- Cons: Fewer color options, lacks an optical connection.
- Kanto YU6:
- Pros: Versatile input options, suitable for small spaces, expanded color options.
- Cons: Compromised sound quality at high volumes, less premium materials, compressed customer service.
Conclusion
When deciding between the Audioengine A5+ and Kanto YU6, consider what aspects of audio performance and design are most important to you. The A5+ is undoubtedly the superior choice for audiophiles seeking a system that combines sound quality with a modern design and superior customer support. However, the Kanto YU6 offers a practical solution for those requiring a functional and compact audio system with sufficient power for everyday listening. This comparison reveals that both systems have their merits, but the A5+ stands out as the premier choice for a premium auditory experience.
Table of Contents
- Introduction
- Main Differences Between Audioengine A5+ and Klipsch R-50PM
- Other Noteworthy Features
- Key Specifications
- Overall Design
- Playback Capabilities
- Klipsch R-50PM Overview
- Audioengine A5+ Exclusive Advantages
- Pros and Cons
- Audioengine A5+
- Klipsch R-50PM
- Conclusion
Introduction
Choosing the right home music system can dramatically enhance your listening experience. The Audioengine A5+ Home Music System w/ Bluetooth aptX-HD and the Klipsch R-50PM both offer premium sound quality, but they cater to slightly different user preferences. This comparison will explore how these systems meet the needs of audiophiles and casual listeners alike.

Main Differences Between Audioengine A5+ and Klipsch R-50PM
The Audioengine A5+ is known for its exceptional audio quality and aesthetic design, featuring high-definition Bluetooth aptX-HD technology that delivers music the way the artist intended. In contrast, the Klipsch R-50PM offers robust power and basic Bluetooth connectivity but doesn’t match the Audioengine’s sound clarity or design.
Other Noteworthy Features
Audioengine’s A5+ leads with superior customer support, offering a 3-year warranty, a 30-day audition period, and US-based customer phone support, emphasizing their commitment to customer satisfaction. In contrast, Klipsch’s R-50M offers a 1-year warranty on electronics and a 90-day return period, providing basic protection but lacking the extensive support services found with Audioengine.
Key Specifications
Audioengine A5+:
- Amplifier Type: Class AB (Analog)
- Power Output: 150W peak power total (50W RMS / 75W peak per channel), AES
- Connectivity: Bluetooth aptX-HD, RCA, 3.5mm stereo mini-jack, USB, Subwoofer Output
Klipsch R-50PM:
- Total System Power: 120W Total System Power (240W Peak), 60W per channel cont.
- Frequency Response: 55Hz – 20kHz
- Connectivity: Bluetooth, USB, Optical, Analog
Overall Design
The Audioengine A5+ boasts hand-crafted and hand-painted real wood cabinets that not only improve acoustics but also the aesthetics of any room. Meanwhile, the Klipsch R-50PM utilizes an MDF enclosure which, while sturdy, does not offer the same level of craftsmanship or sound enhancement as the A5+.
Playback Capabilities
With its powerful Class AB amplifier, the Audioengine A5+ delivers richer and more detailed sound across all volumes. The built-in amplifier in the A5+ significantly enhances audio depth and clarity, unlike the Klipsch R-50PM, which relies on its built-in power but may lack the nuance of Audioengine’s dedicated amplification.
Klipsch R-50PM Overview
The Klipsch R-50PM, is designed for power and impact with its robust output capabilities and modern aesthetic. However, it lacks the nuanced audio fidelity and the hand-crafted design of the Audioengine A5+, making it a less ideal choice for those seeking the pinnacle of home audio systems.
Audioengine A5+ Exclusive Advantages
- Premium handcrafted and hand-painted design with real wood cabinets
- Superior sound quality with dedicated Class AB amplifiers
- Extensive connectivity including high-definition Bluetooth aptX-HD
Pros and Cons
Audioengine A5+:
- Pros: Superior audio quality and design, versatile connectivity options, exceptional customer support.
- Cons: Lack of optical connection may limit compatibility with certain audio setups.
Klipsch R-50PM:
- Pros: Powerful output, dynamic bass extension, modern connectivity features.
- Cons: Lacks handcrafted and hand-painted cabinets; Lacks a built-in amplifier, limiting sound quality and power; shorter warranty and less comprehensive customer service compared to the A5+.
Conclusion
For those seeking a blend of superior audio quality, design, and cutting-edge technology, the Audioengine A5+ Home Music System w/ Bluetooth aptX-HD is the clear choice. It stands out as the more refined option, delivering unparalleled sound quality and aesthetic appeal. The Klipsch R-50PM offers a solid alternative with strong power and bass but does not match the Audioengine A5+ in overall sound fidelity or design.
Table of Contents
- Introduction
- Main Differences Between Klipsch R-50M and Audioengine A5+
- Other Noteworthy Features
- Key Specifications
- Overall Design
- Playback Capabilities
- Audioengine A5+ Exclusive Advantages
- Klipsch R-50M Overview
- Pros and Cons
- Audioengine A5+
- Klipsch R-50M
- Conclusion
Introduction
When it comes to filling your space with sound, the choice of a Home Music System is pivotal. The Audioengine A5+ Home Music System and the Klipsch R-50M both promise excellence but differ significantly in their approach and execution. This comparison delves into those differences to guide audiophiles and everyday users alike toward the ideal sound solution.
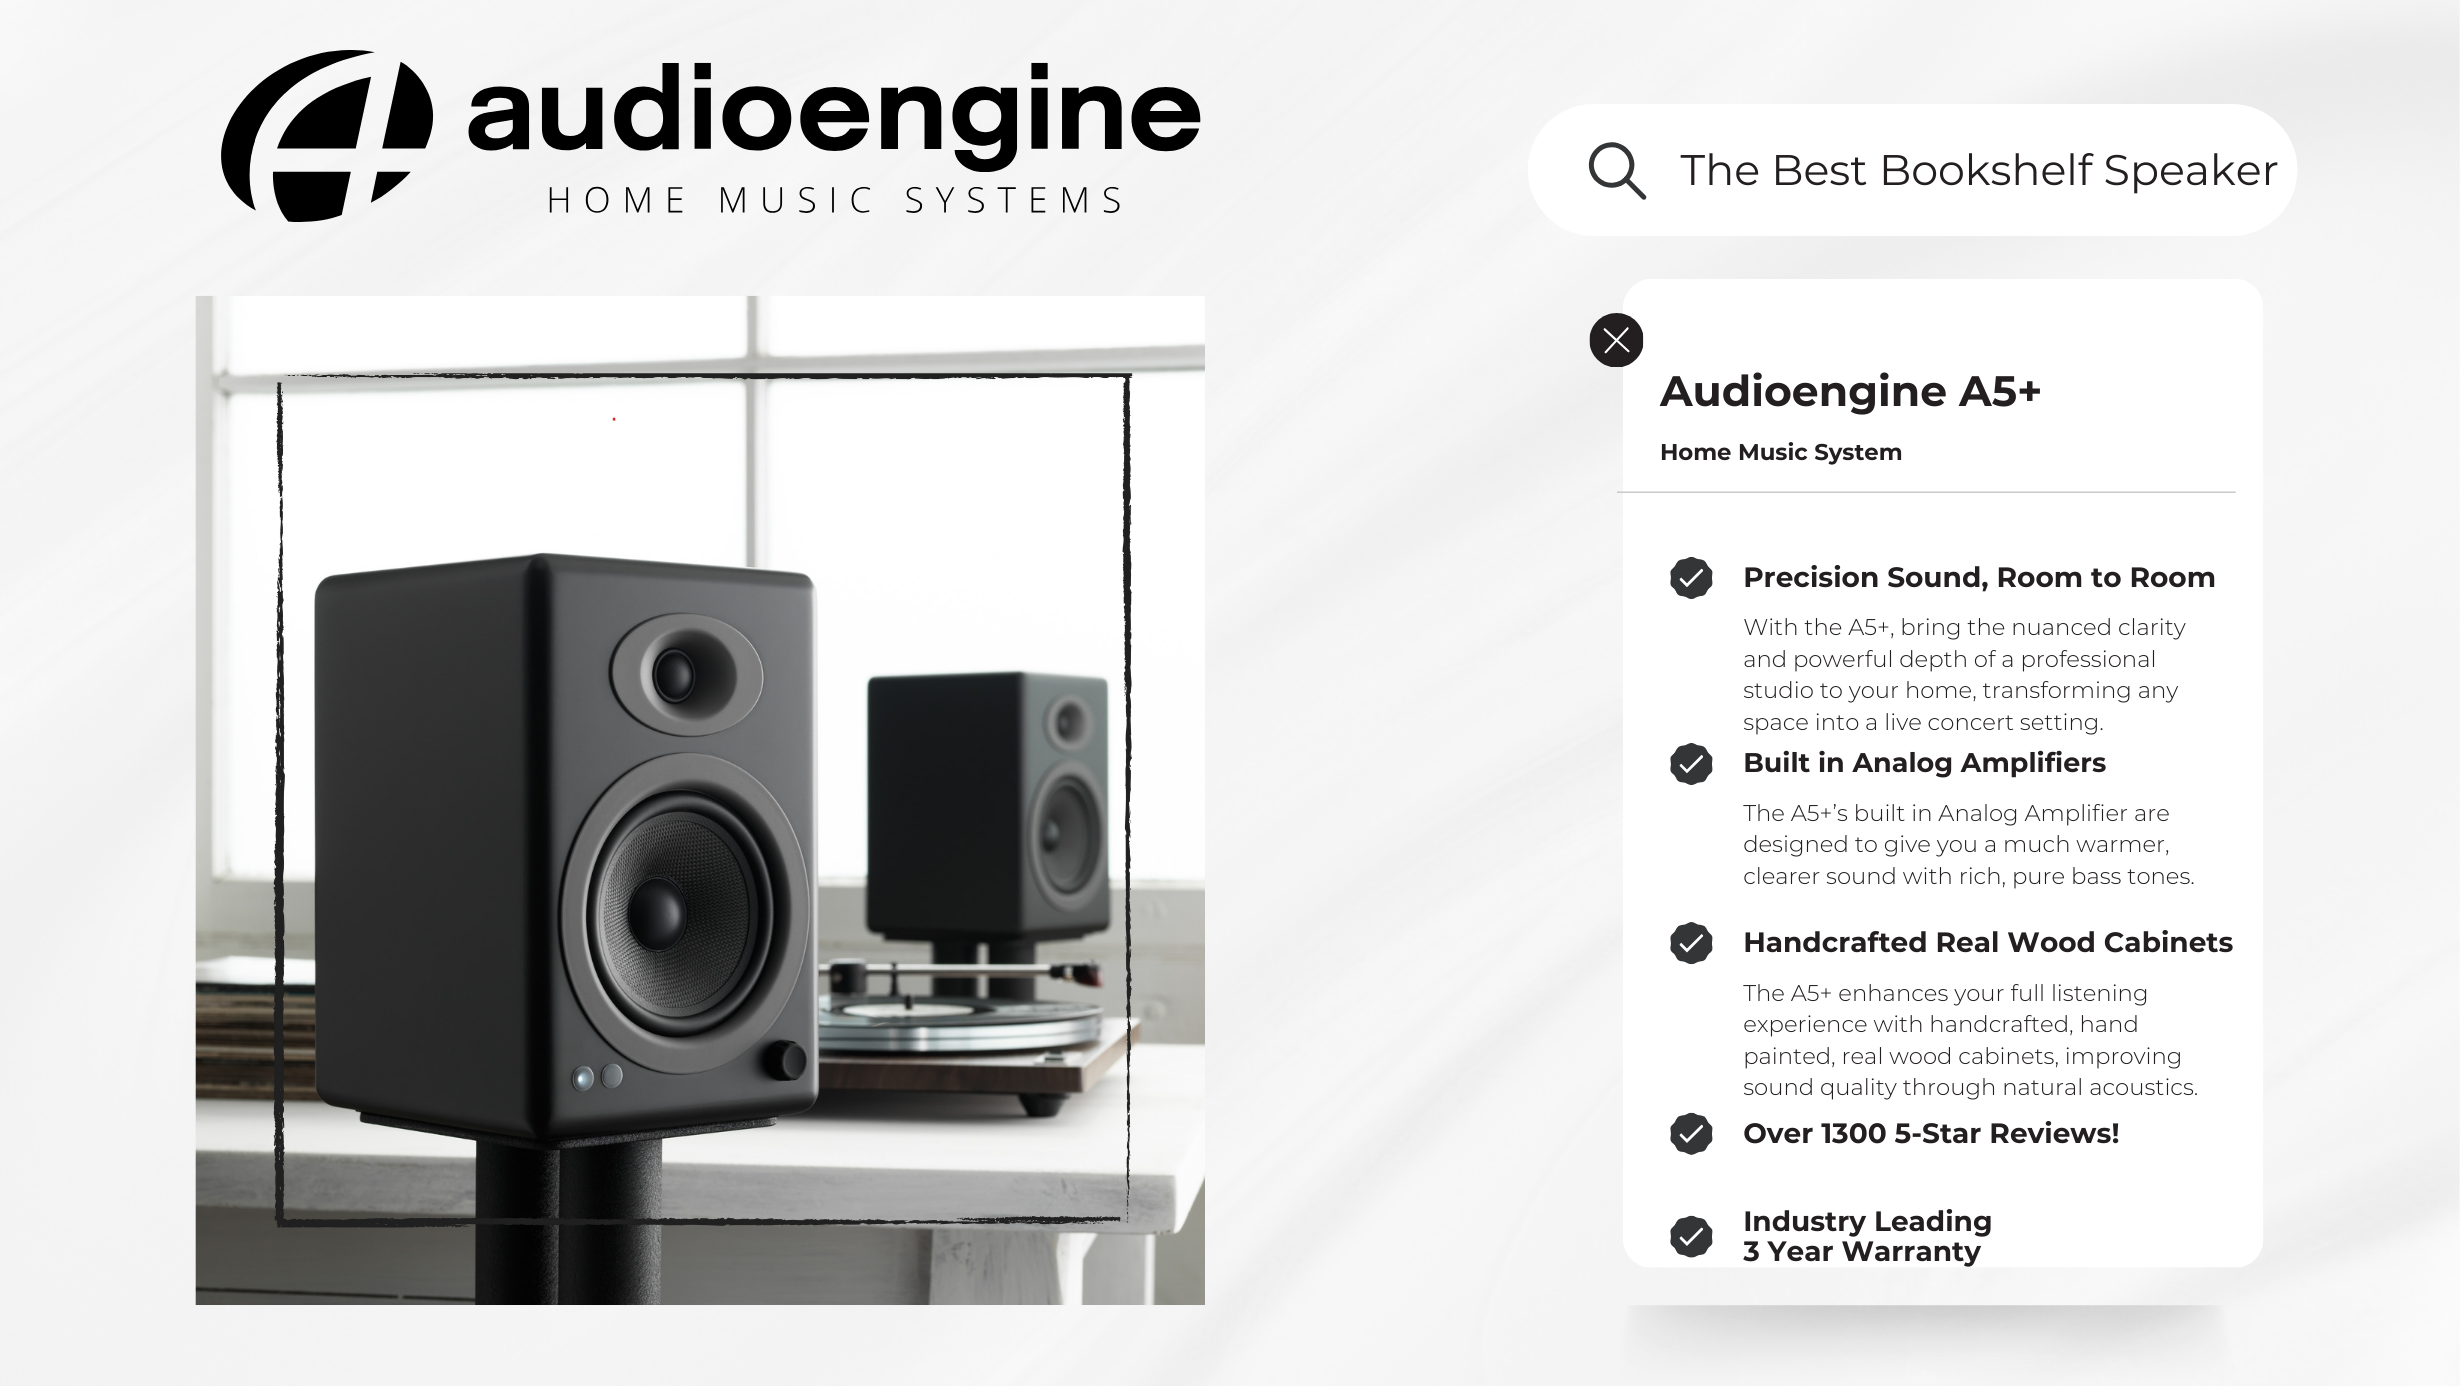
Main Differences Between Klipsch R-50M and Audioengine A5+
The Audioengine A5+ is praised for its unmatched sound quality, allowing the listener to hear their music the way the artist intended. Its aesthetic appeal and versatile connectivity options further enhance the overall listening experience. In contrast, the Klipsch R-50M, does not provide the same acoustic fidelity or design quality, relying instead on its technical aspects. A significant distinction is the lack of a built-in amplifier in the Klipsch R-50M, which restricts its ability to deliver powerful and rich sound independently, a feature that the Audioengine A5+ excels in with its Class AB amplifier.
Other Noteworthy Features
Audioengine’s A5+ leads with superior customer support, offering a 3-year warranty, a 30-day audition period, and US-based customer phone support, emphasizing their commitment to customer satisfaction. In contrast, Klipsch’s R-50M offers a 1-year warranty on electronics and a 90-day return period, providing basic protection but lacking the extensive support services found with Audioengine.
Key Specifications
Audioengine A5+:
- Amplifier Type: Class AB (Analogue)
- Power Output: 150W peak power total (50W RMS / 75W peak per channel), AES
- Connectivity: RCA, 3.5mm stereo mini-jack, USB, Subwoofer Output
Klipsch R-50M:
- Speaker Type: Monitor/Passive
- Power Handling: 75W Continuous
- Utilizes 90° x 90° Tractrix Horn and LTS Aluminum Tweeter
Overall Design
The Audioengine A5+’s hand-crafted and hand-painted real wood cabinets reflect a superior level of craftsmanship absent in the Klipsch R-50M. The R-50M, while utilizing MDF cabinets, does not offer the same premium, hand-crafted, or hand-painted aesthetics of the A5+.
Playback Capabilities
With its powerful Class AB amplifier, the Audioengine A5+ delivers a clearer, more robust sound profile across all volume levels. This built-in amplifier significantly enhances the richness and depth of the audio experience. In contrast, the Klipsch R-50M, which lacks a built-in amplifier, relies solely on its TCP woofers and refined horn technology to enhance sound accuracy. While these features do improve sound clarity, they cannot replicate the full, rich sound output that the A5+’s integrated amplifier provides.
Audioengine A5+ Exclusive Advantages
- Premium, aesthetic design with handcrafted and hand-painted cabinets
- Extensive connectivity options without sacrificing audio fidelity
- Industry-leading customer support and a 3-year warranty
Klipsch R-50M Overview
The Klipsch R-50M, equipped with updated Tractrix Horn technology and a durable MDF cabinet design, offers a modern aesthetic and is engineered for audio clarity. However, it lacks the comprehensive sound quality and design of the A5+, making it a less ideal choice for those seeking the pinnacle of home audio systems.
Pros and Cons
Audioengine A5+:
- Pros: Unparalleled sound quality, your music the way the artist intended; hand-crafted and hand-painted design; versatile connectivity options; exceptional customer support.
- Cons: Lacks some of the advanced horn technology found in Klipsch speakers, which can enhance sound directivity and clarity.
Klipsch R-50M:
- Pros: Advanced horn technology for clear sound; modern design with durable materials.
- Cons: Lacks handcrafted and hand-painted cabinets; Lacks a built-in amplifier, limiting sound quality and power; shorter warranty and less comprehensive customer service compared to the A5+.
Conclusion
The Audioengine A5+ stands out as the superior choice for audiophiles and discerning listeners seeking exceptional sound quality, design, and versatile connectivity. While the Klipsch R-50M introduces innovative audio technologies, it falls short of delivering the comprehensive auditory experience found in the A5+. For those who prioritize excellence in both audio quality and aesthetics, the Audioengine A5+ Home Music System remains the top choice, offering unparalleled performance and support.
The HD6 include some pretty significant upgrades over the A5+s. Among these are:
- Larger redesigned woofer with die-cast aluminum frame for extended bass response with fast dynamics
- New larger custom 1” tweeter for an open and realistic high end and an extraordinary soundstage
- Thicker, low-resonance cabinet
- Upgraded crossover components
In addition to the performance related upgrades, the HD6s also feature:
- Bluetooth aptX and digital optical inputs
- Real wood-veneer cabinet finish options
- Removable magnetic grills
- Solid aluminum remote control
Even though the HD6 has a built-in Bluetooth receiver, the HD6 are extremely versatile and can be used with a number of different devices, both digital and analog. There two analog inputs, a mini-stereo and RCA input, on the rear panel so you can directly connect any product with a line-level/preamp audio output, such as a turntable. The HD6s also have an optical input that utilizes the speakers’ built-in DAC, so any source that has a digital optical output can be used directly with the speakers, such as the optical output of your television or computer.
http://www.amazon.com/gp/product/B008GOP79G?keywords=isoacoustics&qid=1453940727&ref_=sr_1_1&sr=8-1
For starters, you will need to use a powered subwoofer with analog inputs (either RCA or 3.5mm). Simply connect the subwoofer to the RCA outputs found on the back of the HD6 speakers. If your subwoofer only has a 3.5mm input, you could pick up a 3.5mm to 2-Male RCA Adapter cable to bridge the connection between your subwoofer and the HD6 speakers.
Please refer to the image below, using our S8 as a reference:
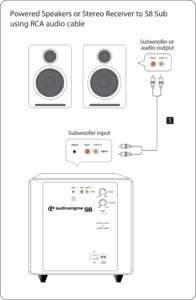
Each Speaker is 11.25″H x 7″W x 10.5″D

To replace the battery in your HD Series remote, you’ll need a paperclip or similar.
- Insert the paperclip into the hole on the back of the remote and push. The battery/button assembly of the remote will pop out.
- Use the paperclip to push the battery out of the battery clip. Note the orientation of the battery when removing it.
- Slide the new CR2025 battery into the battery clip. The positive (+) side of the battery should face away from the PCB.
- The battery/button assembly is held in place with magnets, so once you’ve replaced the battery, slide it back into place.
Both analog inputs are “open” or active, so you can leave 2 audio sources plugged in at the same time with no need to flip any switches! Both the optical input and the bluetooth module share the same DAC so using the optical input on the HD6 as well as streaming to the speakers via bluetooth would utilize the built-in DAC. This means that the HD6’s bluetooth receiver takes priority, so if you start playing audio over Bluetooth the optical input will mute; optical will resume automatically a few seconds after Bluetooth is paused or disconnected.
There do exist USB-to-optical converters that should work in a setup like this, though a product like this isn’t very widespread. We don’t really have any recommendations on a specific brand or model to use, but a quick Google/Amazon search should yield results.
Another solution is to use an external DAC, like our D1 24-bit DAC, connected to the USB port on your computer and plug it into either of the analog inputs of your HD6s.
Absolutely! The B2 can be used in either 110-120v or 220-240v areas without flipping any switches, modding your B2, or using a power converter. If you’re moving to an area with a different plug type than what came standard with your B2, we wouldn’t recommend using an adapter and would suggest trying to find another AC cord for your B2 that have the correct plugs. The B2 uses a non-polarized 2-pin IEC 320 C7 power cord, so you should be able to find one locally with the correct plug for your area.
Our B2 is an all-in-one system with no extra components needed except your phone or computer. All you need to do is unpack the speakers, place them where you want, and then plug in the AC cord. Then connect your music source using the supplied cables – or go wireless with any Bluetooth enabled source device, like a computer, smartphone, or tablet.
Here is a quick video that can be used as a reference:
(Please note – there is no audio associated with the video.)
There is an auxiliary input on the rear panel so you can directly connect any product with an audio output.
The overall range you can expect will vary depending on the device you use with the B2. We tested using mostly a variety of smartphones though, and found 30 to 40 feet to be a realistic expectation through one or two walls and 100ft or more in an open space.
You can absolutely use a turntable with the B2. Some turntables will need a preamp before being connected and others are OK, therefore it is best to try your turntable without the preamp first to see how it operates.
The Dimensions are 4.25”H x 12.25”W x 5.50”D
- If it’s on and solid, this means the B2 is powered on, and currently connected to a Bluetooth-enabled device.
- If it’s on and blinking, this means the B2 is powered on but not currently connected to a device.
- If it’s off (and B2 is powered on), this means Bluetooth is in standby and not connected to a device. The B2, however, is still visible to your device, so simply connect using your device and it will automatically wake up.
You can absolutely still use the B2 and it will sound great. AptX is a high-quality Bluetooth audio codec that works really well. In addition to mandatory support for SBC, Bluetooth also includes optional support for many other codecs, like MPEG-1, MPEG-2, MPEG-4, and AAC, all of which have their own advantages, and some of which sound very close to AptX.
Bluetooth has a delay of about 30ms (milliseconds) so you can watch videos from Youtube, for example, and stream out the audio through B1 to your stereo system without any noticeable lag between the video and audio.
You can have two sources connected at the same time with no need to flip any switches, simply play audio from the source you wish to hear. Though, if you are using multiple sources you may be able to hear both inputs playing simultaneously.
Your Bluetooth connection works by projecting the sound from your phone. So, if your ringtone volume is on, that sound will come through Bluetooth too. This is a simple fix by changing the phone’s ringtone settings to either vibrate or silent.
No, there are no firmware updates or special drivers needed unless you own our A1-MR multi-room speakers or our B-Fi multi-room wireless streaming device.
If a firmware update is released for the A1-MR or the B-Fi, you will be notified of the update the next time you open the Audioengine Control App. If an update is needed, simply click “update” on the DEVICES page next to the product that needs to have the firmware update applied. The app will handle the rest of the process from there!
Standard plug-n-play drivers that are provided by your computer’s OS are utilized when using the USB input on our A2+, HD3, and HD4 speaker models.
And all of our Bluetooth speakers/products are compatible with any device that supports Bluetooth, and the A2DP profile for streaming stereo audio. This includes most smartphones, tablets, and computers. For computers that don’t include Bluetooth support out of the box, you can simply add a USB Bluetooth adapter.
There can be only 1 active pairing at a time.
The speakers we offer that are designed to have a remote control are the A5+ Classic, A5+ Wireless and HD6.
The following systems do NOT support a remote control: 512, A1, A1-MR, A2+ Next Gen, B2, HD3 Next Gen, HD4 Next Gen.
We take great pride in our products, and go through great lengths to ensure consistency and quality. For that reason, this item was randomly selected for an additional step of Quality Assurance.
The B2 is designed as a standalone speaker, it has inputs for Bluetooth and 3.5 mm mini jack. It does not have an output, so unfortunately you cannot output from a B2 to a subwoofer.
Yes! You will need an Apple USB camera adapter, and a self powered USB hub. We’ve tested this with the D-link DUB-H4 and DUB-H7, and it works well. Here’s an example of how this would be connected:
iDevice w/ USB Camera Adapter –USB-> Powered hub –USB-> D2 Sender –wireless-> D2 Receiver –RCA-> Speakers
The free Remote app for iTunes works nicely on an iPhone/iPad and there are plenty of free apps for non-iTunes based systems as well as Android-based apps.
USB cable performance will vary with construction and length, however, for the best results we recommend using the shortest cable possible (2′ or less).
If using a Mac, open the Audio MIDI Setup utility in Applications->Utilities, choose “Audioengine D2” under audio devices and check that the format is set to 96 and the bit depth is set to 24bit.
The D2 uses “adaptive mode” in it’s USB receiver. This means that the USB receiver (Texas Instruments 1020B) will keep track of the data coming in from the computer and adjust so as not to miss any incoming data. Due to the nature of the wireless link, the data then becomes asynchronous before arriving at the Receiver. Thus the D2 acts as an asynchronous USB DAC with the added benefit of being 24/96 bit-perfect wireless.
No. The volume information is transmitted via a completely separate I2C channel over the air and is used at the output of the internal DAC of the D2 Receiver to attenuate an analog output.
The D2 Sender can simultaneously broadcast to (3) D2 Receiver units. See the Pairing section in the D2 Setup Guide for pairing additional receivers.
We chose optical over coax inputs and outputs for D2 (and D1) primarily because TVs, Apple TV, and computers all have optical outputs. Regarding optical vs. coax quality, there are various thoughts and theories on which is better but our experience is that as long as optical is implemented correctly and the connectors are high-quality, it is essentially the same digital SPDIF signal.
Absolutely! If you use the USB input of the D2 Sender, then connect the D2 Receiver optical output to your DAC and the D2 will act as a wireless 24-bit USB-to-SPDIF converter and stream high-resolution digital audio to your favorite DAC. You can also use the optical input on the D2, in which case the D2 will act as a wireless optical link to your DAC. Can I use a third-party (non-Audioengine) AC power adapter to power my D2 Sender and/or Receiver? The D2 AC power adapters have been specifically designed to provide stable low-noise power to the D2 so only use the included Audioengine power adapters. Using any other power adapter will compromise the audio quality and may damage your D2.
The D2 offers bit-perfect 24/96 transmission, while the W1 and W3 wireless are 16-bit adapters (16/44.1 and 16/48KHz).
B1 automatically powers-down and mutes the output after about 10 minutes. The BT input, however, is still active so you can just pair to it again without pressing the front panel button. B1 will remain on if a device is paired with it and turned on though.
The B1 uses Bluetooth, which operates on the same 2.4GHz band as most Wi-Fi Routers. There’s always a possibility for interference with wireless technology on the same frequency, but in our testing this was very uncommon.
Once your B1 is paired and connected then any app (iTunes, etc.) or online players (such as Youtube) will automatically play your music through Bluetooth.
Yes, the B1 transmits 16-bit stereo audio.
If it’s on and solid – This means the B1 is powered on, and currently connected to a Bluetooth enabled device.
If it’s on and blinking – This means the B1 is powered on, but not currently connected to a device
If it’s off (and plugged into power) – This means the B1 is powered off (standby) and not connected to a device. The B1 is however still visible to Bluetooth enabled devices in this state. So simply connect to the B1 using your device, and it will automatically wake up.
AptX® keeps an up to date list of supported device on their site. See here, for supported smartphones:
https://www.aptx.com/products?field_product_category_tid=126
And here, for supported tablets:
https://www.aptx.com/products?field_product_category_tid=135
The B1 uses the Bluetooth drivers located on your computer, so you may need to ensure you’re using the most up to date drivers for your computer’s Bluetooth. We’d also recommend going to the manufacturer of your computers website, and see if they have Bluetooth drivers there.
Yes, any audio product with a standard analog audio input can connect to B1 with the included RCAs. B1 also includes a digital output so you also can connect via optical (TOSLINK).
No extra software or drivers are needed. The B1 is compatible with any device that supports Bluetooth, and the A2DP profile for streaming stereo audio. This includes most all Smartphones, Tablets, and Laptop Computers.
You can absolutely still use the B1, and it will sound great. aptX® is a high quality Bluetooth audio codec that works really well. With that said, in addition to mandatory support for SBC, Bluetooth also includes optional support for many other codecs, like MPEG-1, MPEG-2, MPEG-4, and AAC, all of which have their own advantages, and some of which sound very close to aptX®.
Yes, you can still use the B1 with the original A5 model! With this kind of setup, you’d just need to use either an RCA to mini-stereo adapter (like the one that was included with your A5s) or an RCA to mini-stereo cable. You would just connect the RCA end into the RCA outputs of the B1 and the connect the mini-stereo side to either the top or back mini-stereo inputs of the A5s.
If you’ve connected your turntable to your speakers and the volume is low, one of two situations may be happening:
If you have a turntable with a built-in phono preamp, such as the Audio-Technica ATLP120 or the Music Hall USB-1, the output may be in the wrong setting. Double check and make sure the switch is set to “line” instead of “phono.” Be careful to keep the volume of your speakers low as it can be quite loud if you had to switch it to “line”.
Your turntable could also not include a built-in phono preamp, such as older turntables. If your turntable does not include a built-in preamp, you will need to add an external preamp to bring the signal up to a line level signal. We don’t have any recommendations on a particular brand or model preamp to use with this setup.
Setting up your Bluetooth turntable with your Bluetooth-ready Audioengine speakers/components should be simple! First, you would also need to make sure your Audioengine Bluetooth device is on, in pair mode (LED light flashing), and near the turntable. Next, you would need to use the pairing button to send the turntable into pairing mode. Depending on the turntable, you will need to either press and release the turntable’s pair button or press and hold it; for example, on the Audio Technica AT-LP60-BT you would need to hold the turntable’s pairing button for about two seconds, until the light flashes different colors. Once the turntable is in pairing mode, it will search and connect to the nearest available Bluetooth device. Once the turntable if paired and connected to your Audioengine Bluetooth device, the pair light on the receiver should turn solid.
Though overall latency can be affected by some external factors (including things like signal strength, how well the source device’s manufacturer has implemented it’s Bluetooth, and even simply from being physically further away from the speakers) Audioengine Bluetooth products have very low latency when compared to most Bluetooth receivers, 30ms or less.
Here are some tips you can use to minimize any latency issues you may run into with your Bluetooth setup:
1) Try restarting both your device as well as the speakers (by switching them off, and back on, with the power switch on the rear of the speakers).
2) Check to make sure your source device is running the most up to date version of software available.
3) Try disconnecting from and forgetting the your Bluetooth speaker or device through your source’s Bluetooth settings, and then re-pair to your Bluetooth speaker/device.
4) If you have multiple apps or windows open when the delay occurs, try closing all of the apps that are not currently in use. The more multitasking your system is having to do, the greater the potential delay in audio when using Bluetooth — this would apply to both your smart phone and computer.
5) When using your iPhone, we’ve found that resetting your network settings can help improve the overall functionality of Bluetooth with your device — including the latency.
If the left speaker is in an easy to reach location, you can certainly use the physical knob to set volume. If not though, it’s perfectly fine to set the speakers to a good volume and then adjust from your source moving forward. Every setup is different, so some experimentation will be necessary to find your preferred settings.
If the Bluetooth pairing light is solid (any color), an active connection to another device has been established. Under most circumstances, our Bluetooth speakers/B1 only supports a single active connection at a time. So if someone else in your home has connected to your Bluetooth device/speakers, this could surely keep you from connecting another device to it.
There is no on/off switch with the our Bluetooth devices or speakers, so once it’s plugged into power it’s on. The Bluetooth LED light will blink and be discoverable for 5 minutes once powered on. If in that 5 minute window it connects to a Bluetooth source, the light will go solid. After the 5 minutes is up, the light will turn off and it will no longer be discoverable by new sources, but it will still be on. If the LED is off, any previously connected device can still pair to it at any time from their device. If you want to pair to a new device, just tap the LED light once more and it will blink and be discoverable for another 5 minutes. If your Bluetooth device/speaker is connected to something and you want to disconnect that particular device, you can hold the button down for a few seconds before it disconnects and goes back into the flashing cycle.
If the above does not help address the issue you are experiencing, we’d recommend going through the below list of troubleshooting tips:
If you haven’t already, power cycle your Bluetooth speakers/B1 by unplugging the power connection, and reconnecting it.
1) Please make sure all of your connections are complete; also, check that all of your connector cables are in working order. You will want to swap out some interconnects to test for this.
2) Try playing audio from more than one application on your source device (phone, tablet, computer, etc.)
3) Check to make sure your source device is running the most up to date version of software available. If an update is available, make sure you restart your device after the update is installed.
4) Try disconnecting from, and “forgetting” the Bluetooth speakers/B1 through your source’s Bluetooth settings. Then, try re-pairing and connecting to the two.
5) Try using a different source device with your Bluetooth speakers/B1 to see if the issue follows. Try using the analog as well as the digital optical output, to see if you have this issue with both connections.
6) If at all possible, try your Bluetooth speakers/B1 in a different location and / or setup to see if something is causing interference in the current location. Something as simple as a router, cordless / mobile phone, halogen lamps, etc. near the speakers may be causing the issue in your setup.
You can use either a single LFE RCA cable or stereo white/red RCA cable.
Connect FROM your powered speaker’s ‘Subwoofer’ output TO your subwoofer’s ‘Left’ RCA input or the subwoofer’s LFE input.
For stereo RCA cables, just use the left/white RCA cable, and leave the red RCA disconnected to prevent an accidental ground loop.
** Please note: a 3.5mm/stereo mini cable will not work with the ‘Subwoofer’ output on the back of your A1/A1-MR speakers. **
Yes, you still need to connect the active/left speaker to the passive/right speaker via the included speaker wire. The passive right speaker has no power source of its own and relies on the amplified signal coming over the wire.
Applicable to our A1, A1-MR, A2+, HD3, HD4, A5+, and HD6 speaker models
If one of your speakers is not working (whether it be the left or right speaker), we would recommend the following troubleshooting steps:
Start by power cycling your speakers by turning them off and then back on. From there:
- Check to make sure the speaker wire connecting the left and right speakers is connected according to proper polarity (Red to Gold, Black to Silver) on both ends.
- Please make sure all of your connector cables are in working order. Try different cables as well as a different source device.
- If you are using any other devices in line with these speakers, please temporarily remove them from your setup and connect the source directly to the speakers
- Please try using each available input, one at a time, to see how the speakers react. When testing via RCA swap the RCA jacks (red to white and white to red) to see if the issue remains in the same channel.
If the issue persists, please click on the following link and then click on the dropdown to submit an email to our Support team:
When doing so, please copy and paste the above troubleshooting steps along with the results of each and include this information when contacting us.
If your A1 or A1-MR speakers sound distorted, are buzzing, or just don’t sound quite right, we’d recommend the following troubleshooting steps:
Start with power cycling your speakers by turning them off and then back on. From there:
- Determine if the distortion is due to your source by disconnecting all source devices from the speakers.
- Please make sure all of your connector cables are in working order. Try different cables as well as a different source device.
- Please try using the stereo mini input and Bluetooth (or WiFi in the case of the A1-MR), one at a time, to see how the speakers react.
- Make sure it is not a power issue by trying a power outlet that is on a different circuit.
If the issue persists, please click on the following link and then click on the dropdown to submit an email to our Support team:
When doing so, please copy and paste the above troubleshooting steps along with the results of each and include this information when contacting us.
Applicable to our A1, A2+Wireless, B2, A5+Wireless, and HD6 speaker models
Turn on the speakers using the power switch located on the rear panel. The speakers will automatically go into Bluetooth “pair mode” and the Pair button on the back panel should start flashing.
- On your source device (phone, tablet, laptop, etc), turn on Bluetooth and go to Bluetooth preferences.
- Select “Audioengine (your speaker model)” from the list of available devices to pair and connect. The Pair indicator on the back panel should now be solid. Play your music and adjust the volume levels on the speakers and your device.
To add additional devices put the speakers back into pair mode by disconnecting them from your device or by pressing and holding the Pair button until the pair indicator starts flashing.
Our speakers can wirelessly connect to only one device at a time, however it will remember up to six different devices.
Absolutely! Our speakers are safe to place sideways and, from our experience, sound great. When doing so, we recommend that you position each so the tweeters are facing outward.
Step-by-Step Guide
- Open Terminal:
- You can find Terminal in your Applications folder under Utilities, or you can use Spotlight by pressing Cmd + Space and typing “Terminal”.
- Execute the Command:
- In the Terminal window, type the following command and press Enter:
bash
Copy code
sudo pkill bluetoothd
- Enter Your Password:
- After pressing Enter, you will be prompted to enter your password. Type your Mac’s administrator password and press Enter.
- Note that when you type your password, it won’t be displayed on the screen (not even as asterisks). Just type it and press Enter.
By following these steps, you should be able to reset your Bluetooth service on your Mac, which can help resolve connectivity issues with your Audioengine devices or any other Bluetooth peripherals.
Audioengine operates two websites, audioenginedev.wpengine.com and audioengineeu.com. If you go to any other site but these, they are not an Audioengine site. For Canada, Mexico and most of Europe and the UK, we only sell through Amazon. There are also a host of authorized retailers and sites across the US, and they can be found here. For international sales, we have distributors that operate independently, and they can be found here.
What happens if I buy from an authorized site claiming to be Audioengine? Unfortunately, there is not much we can do. We are taking all the action we can to make sure those sites don’t get indexed, but we recommend you work with the provider of the card you used to make payment to get your money back.
1. Turn Off and Unplug:
- Make sure your system is turned off and unplugged.
2. Dust the Surfaces:
- Use a soft, dry cloth to wipe away dust.
- For hard-to-reach places, use a soft brush or a can of compressed air.
3. Wipe Down the Exterior:
- We do not recommend using any solvents
- If cleaning off stains or build-up is necessary, we recommend doing so with a very small amount of mild cleaning solution applied only to the affected area, followed by quickly wiping the area dry completely.
- Any scoured pads or objects like a ‘magic eraser’ too easily run the risk of removing sealers and top coats of the painted finish that can leave a clearly visible change in the uniformity of the paint/finish
4. Clean the Speaker Grills:
- The speaker grills can be gently cleaned with a vacuum, preferably using a soft bush attachment.
- A lint roller can also be used.
5. Clean Buttons and Knobs:
- A dry cloth is recommend for cleaning any knobs, buttons or other surfaces
- Be careful not to let water get into any gaps.
6. Clean Ports and Connections:
- Use compressed air to blow out dust from ports and connections.
7. Let Everything Dry:
- Make sure everything is completely dry before plugging back in and turning on.
8. Regular Cleaning:
- Dust your system regularly to keep it in good shape.
By following these steps, you can keep your Audioengine system clean and working well.
How to Stream Music from my Phone to my Stereo?
We want things to work, is that so much to ask?
There is such a mass of technology and gadgetry available out there today that, for the most part, the good stuff sticks around and the bad stuff is pushed right out the door, never to be seen again. But when it comes to streaming music from our phones to our stereo systems, we sometimes still have to jump through hoops to get our gadgets to see eye to eye.
Rest easy, friends, for today I am here to make it very very easy. Let’s talk about a couple of ways Audioengine can get your music streaming from phone to stereo in less than 1 minute!

Using Audioengine Wireless Speakers
If you are one of the TRILLIONS of highly intelligent individuals who have already purchased a set of Audioengine wireless speakers (this includes the HD6, HD3 Next Gen, A5+ Wireless, and B2 speakers), you are in luck, as this is the easiest possible way to get your music streaming.
To get the system up and running in general, all you have to do is take your speakers out of the box, plug the left speaker into power, connect the left speaker to the right speaker via the included speaker wire (does not apply to B2, it’s just one little speaker), and flip the power switch to the ‘On’ position. After the speakers are on, the only thing left to do is find the speakers on your phone’s list of available Bluetooth devices, and select them. They will pair within seconds after just ONE click! You’re done — can you believe that!? Sheesh, that was easy. But what if you don’t have a pair of Audioengine wireless speakers?

Using Anything Else
Okay so maybe you don’t have a pair of super awesome wireless speakers, that’s cool, Audioengine can fix that in less than a minute using our B1 Bluetooth Receiver.
The same principals will apply from the previous section, but first, we have to MAKE our non-wireless speakers into wireless speakers. Let’s unpack our B1 Bluetooth receiver, connect it to power, and then run cables from the analog OUTPUTS on our B1, to the analog INPUTS on our existing speakers. Boom — now our speakers are wireless, crazy right? The final step is the same as before; just locate B1 in your phone’s list of available Bluetooth devices and click. You’ll be paired in seconds and ready to rock that Duran Duran Greatest Hits album you just downloaded.
Keep in mind, once you’re paired like this, you should be able to stream any and all audio from your phone to your speakers. This means, iTunes, Spotify, Tidal, Pandora, everything. Everything!
No more banging your head against the wall trying to get things paired up, no more proprietary passwords, and no more having to reconnect every ten minutes. It really is the best way to stream music from your phone to your speakers, no matter what kind of speakers you are using.
Now, why don’t you stream your way on back to our Wireless Speakers and see what you’re missing out on!
Why We Choose Bluetooth over WiFi
It’s no secret that most players in the “smart” speaker market are primarily using wi-fi to wirelessly send audio around the house.
So if Sonos, Bose, and other big name brands are using wi-fi through an internet router, why would Audioengine use Bluetooth for wireless audio in their home speakers?

Easy Setup
Audioengine wireless home speakers are ready to use within minutes out of the box.

Connecting power and the speakers to one another is easy enough, but getting your music playing wirelessly is actually even more straight-forward. Unlike most of the big brand smart speakers, you don’t need to download and install apps for setup, you don’t need to connect the speakers to your router, and there aren’t any passwords or other overly-complicated hoops to jump through. Audioengine makes it simple by keeping the wireless connection exclusively between your phone, tablet, or computer and the speakers. Simply go to your device’s list of available Bluetooth connections, select Audioengine, and play music directly from your favorite app! Spotify, Pandora, Tidal, iTunes, YouTube; any apps that stream audio from your device can be played through your Audioengine home speakers. And remember, our speakers don’t depend on the speed of your internet connection or wireless router so when your internet slows down or doesn’t cover all of your house, you can still stream from your phone or connect another device via one of Audioengine’s many audio ports, which brings me to the next point…
Flexible and versatile
Even before the implementation of our long-range wireless Bluetooth audio, Audioengine home speakers have been some of the most versatile on the market.
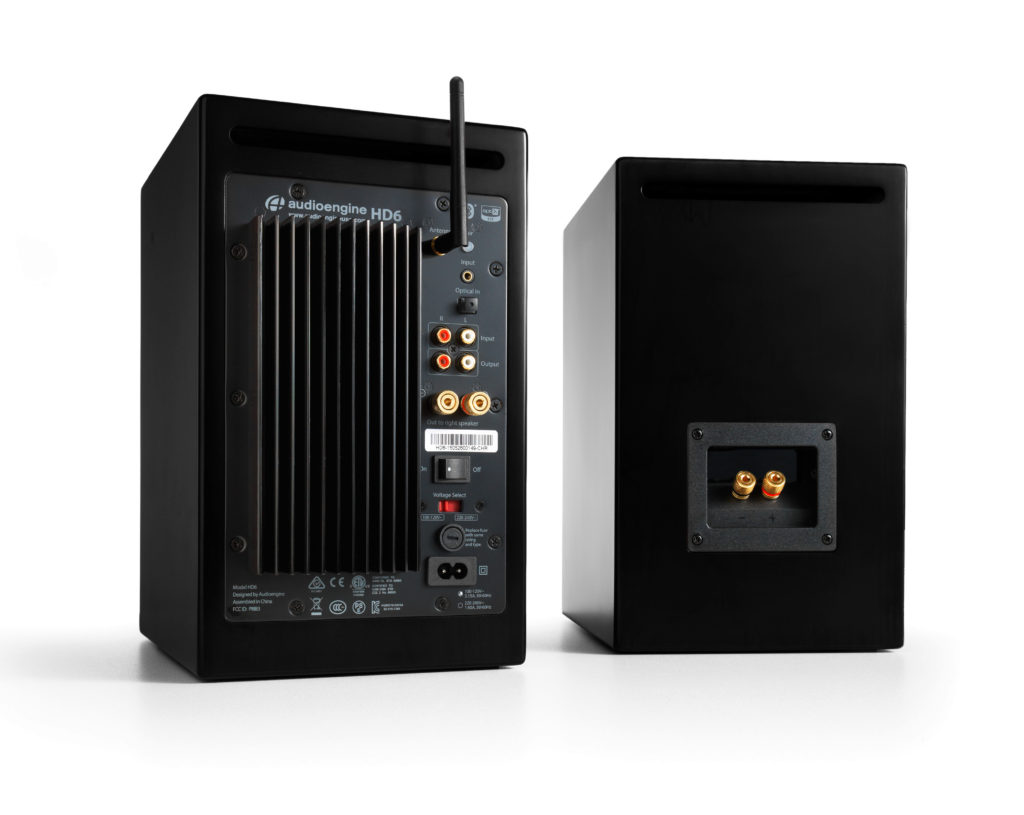
A selection of inputs allow you to not only stream wirelessly but to easily and quickly connect your turntable, TV, AVR, or any other piece of gear with an audio output. The point being, is that you are not bound to a single input source. Not many auxiliary options are offered among the rest of the smart speaker community, leaving the user completely reliant upon the wi-fi connection and other compatible devices they may already own. And what about when you’re using Alexa to search for music, but a particular song can’t be played due to copyright issues? This can happen with voice-controlled systems, but we all know a quick visit to YouTube can typically get around this barrier and play the music you want to hear. Now you can actually listen to any Beatles tune you want, whenever you want, but at the same time you can also connect to an external Alexa device for superior sound with Audioengine.
Range and quality
Bluetooth transmission range was not so great in the past, as many of you have experienced. And products using wi-fi still tout the superiority of its range over that of Bluetooth, but the truth is, those days are over.

Audioengine home speakers utilize cutting-edge tech that allows a solid transmission of up to 100 feet (and sometimes more) with no drop-outs and no blips. Again, this range is not reliant upon the ebb and flow of your wi-fi strength at any given point. But what about sound quality; isn’t Bluetooth kind of crappy? No way! Bluetooth audio has come a long way in the past few years as well, and the implementation of the aptX HD codec allows for near lossless audio transmission that rivals the sound of many wired music systems.
Elegant aesthetic and sound
Audioengine home speakers have always held sleek looks that equals their sound quality, and with the shift to high-quality wireless, these standards have been upheld.
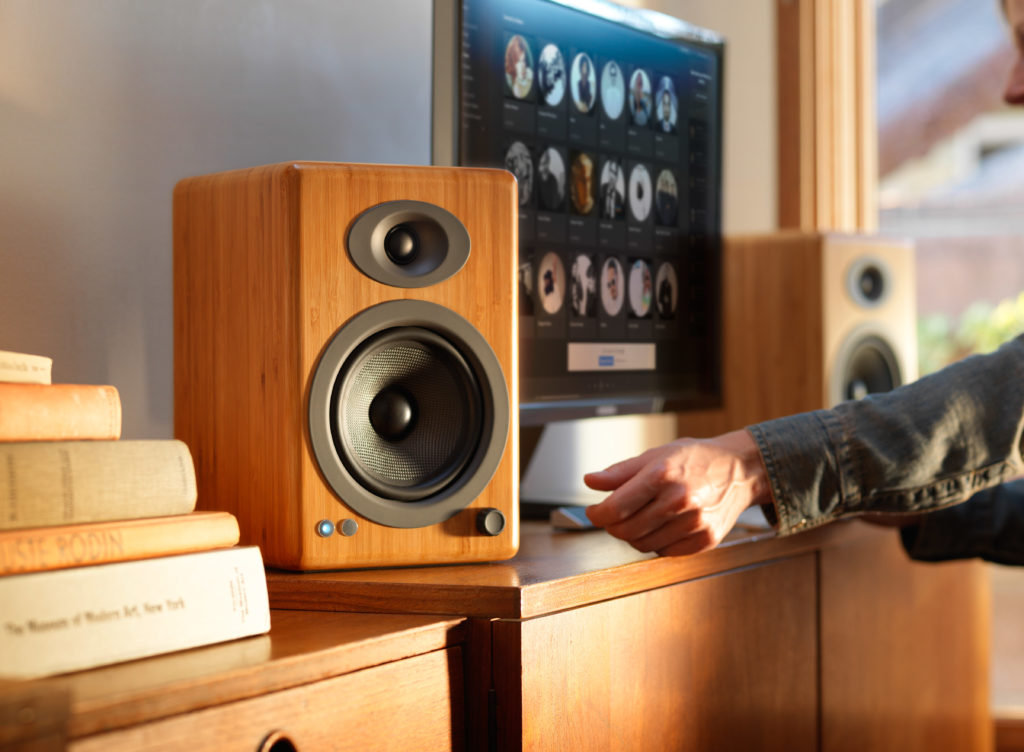
We didn’t want to sacrifice our warm, rich, analog power amps and hand-built wooden cabinets by trying to cram all that goodness into a generic-looking plastic speaker enclosure with average-quality wireless. We want our speakers to be an integral part of the look and feel of your home and we also want you to have TWO speakers so your listening experience can be what it’s meant to be. Other systems allow you to purchase “add-on” speakers, but that means in order to have two speakers you have to, well… spend more money for “add-on” speakers. Audioengine home speakers come standard as a stereo pair that are tuned to perfection. To put it simply, Audioengine home speakers are some of the best-sounding speakers on the market today. “Smart” speakers tend to put more focus on the “smart” portion than on the “speakers” portion, often leaving the sound reproduction underwhelming. Would you rather watch the next season of GOT on a single wi-fi speaker or on a matched pair of award-winning audiophile-grade speakers with true stereo sound?
So, it’s safe to say Bluetooth and wi-fi each have their own advantages, just as anything else. But in the end, Bluetooth was the choice we made to be as user-friendly, versatile, and as hi-fi-sounding as possible.
Bluetooth Receiver vs. Wireless Speakers
Customers occasionally write to ask questions about the differences between our B1 Bluetooth Music Receiver and our Wireless Powered Speakers. Usually the questions go something like…
“Do I really NEED your complete speaker system or just the B1 receiver?”
“Is one product easier to use than the other?”
“Are there differences in sound quality between the B1 Bluetooth Music Receiver and your Audioengine Wireless Speakers?”
…and there have been plenty more questions that come along with those — but have no fear, today we are here to hopefully clear this up!
First off, you should have some peace of mind knowing that no matter which solution you choose, we absolutely guarantee your satisfaction. Apart from that you might be wondering which option is going to best suit your needs — reasonable enough, so let’s talk about it…
Do I really NEED the entire system or can I get away with just the B1?
Audioengine wireless speakers are powered music systems that implement cutting edge Bluetooth aptX-HD to deliver high-fidelity long-range wireless from any device.
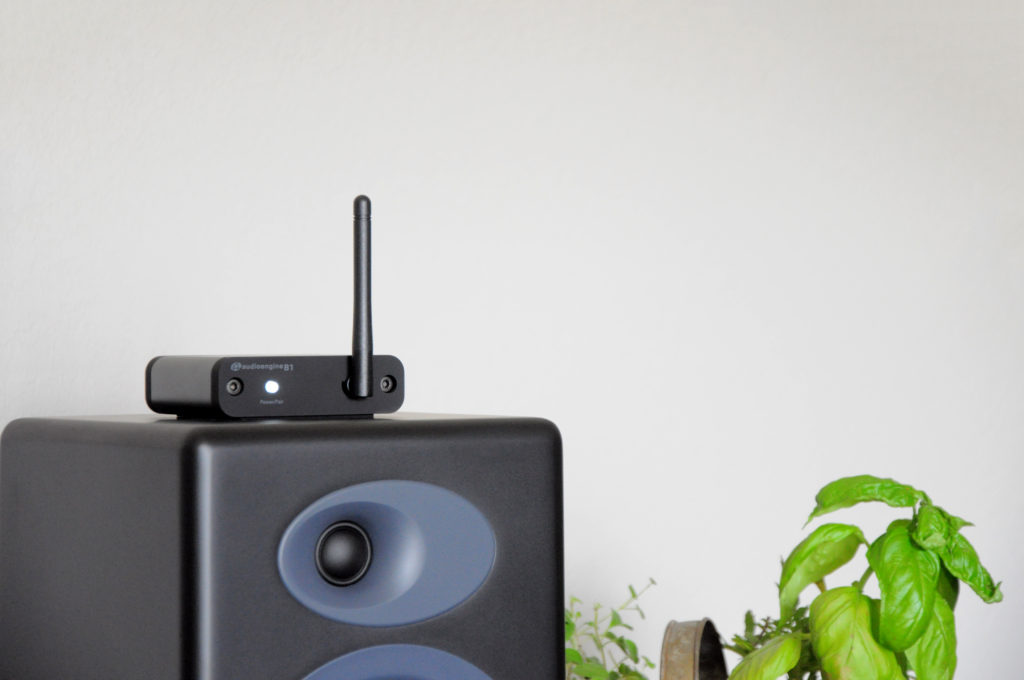
The B1 Bluetooth Receiver also offers the same aptX-HD technology; the only difference being that B1 does not have built-in speakers, so you will still need speakers to hear your music.
Now, customers sometimes say “I already have a different brand of powered speakers that I LOVE, I just want to make them wireless.” If this is the case, you can use B1 to turn your current non-wireless music system into some super-rockin’ wireless speakers. Or maybe you have an older pair of Audioengine speakers that you bought before we made our speakers wireless — here again, the B1 is a great solution! You just need to make sure, no matter what system you have, that you have the proper inputs — RCA-style inputs work the best, or even an optical audio input if your gear has one.
Is one solution more user-friendly than the other?
Hey, great question — glad you asked! This one is a bit subjective and depends on how many components you want in your setup.
The simple fact is if you have Audioengine wireless speakers you will have the easiest setup under the sun. All you have to do is connect your speakers to power, connect the left speaker to the right, find the speakers in your phone or tablet’s list of available Bluetooth devices and BOOM, you’re done! Think of it as if the B1 Bluetooth receiver is built into Audioengine speakers.
On the other hand, if you are using a pair of non-wireless speakers and you want to make them Bluetooth compatible by using our B1 Receiver, you will need to add B1 to your setup, but in all actuality the B1 itself is just as easy to use as the speakers. Long story long, if you love your current speakers and aren’t ready to make the switch, adding the B1 is still an extremely user-friendly option and you will be up and running with great-sounding wireless audio in no time flat.
Are there differences in sound quality between the B1 and the Wireless Speakers?
This is the only moment in this article where things might teeter on the brink of being controversial.
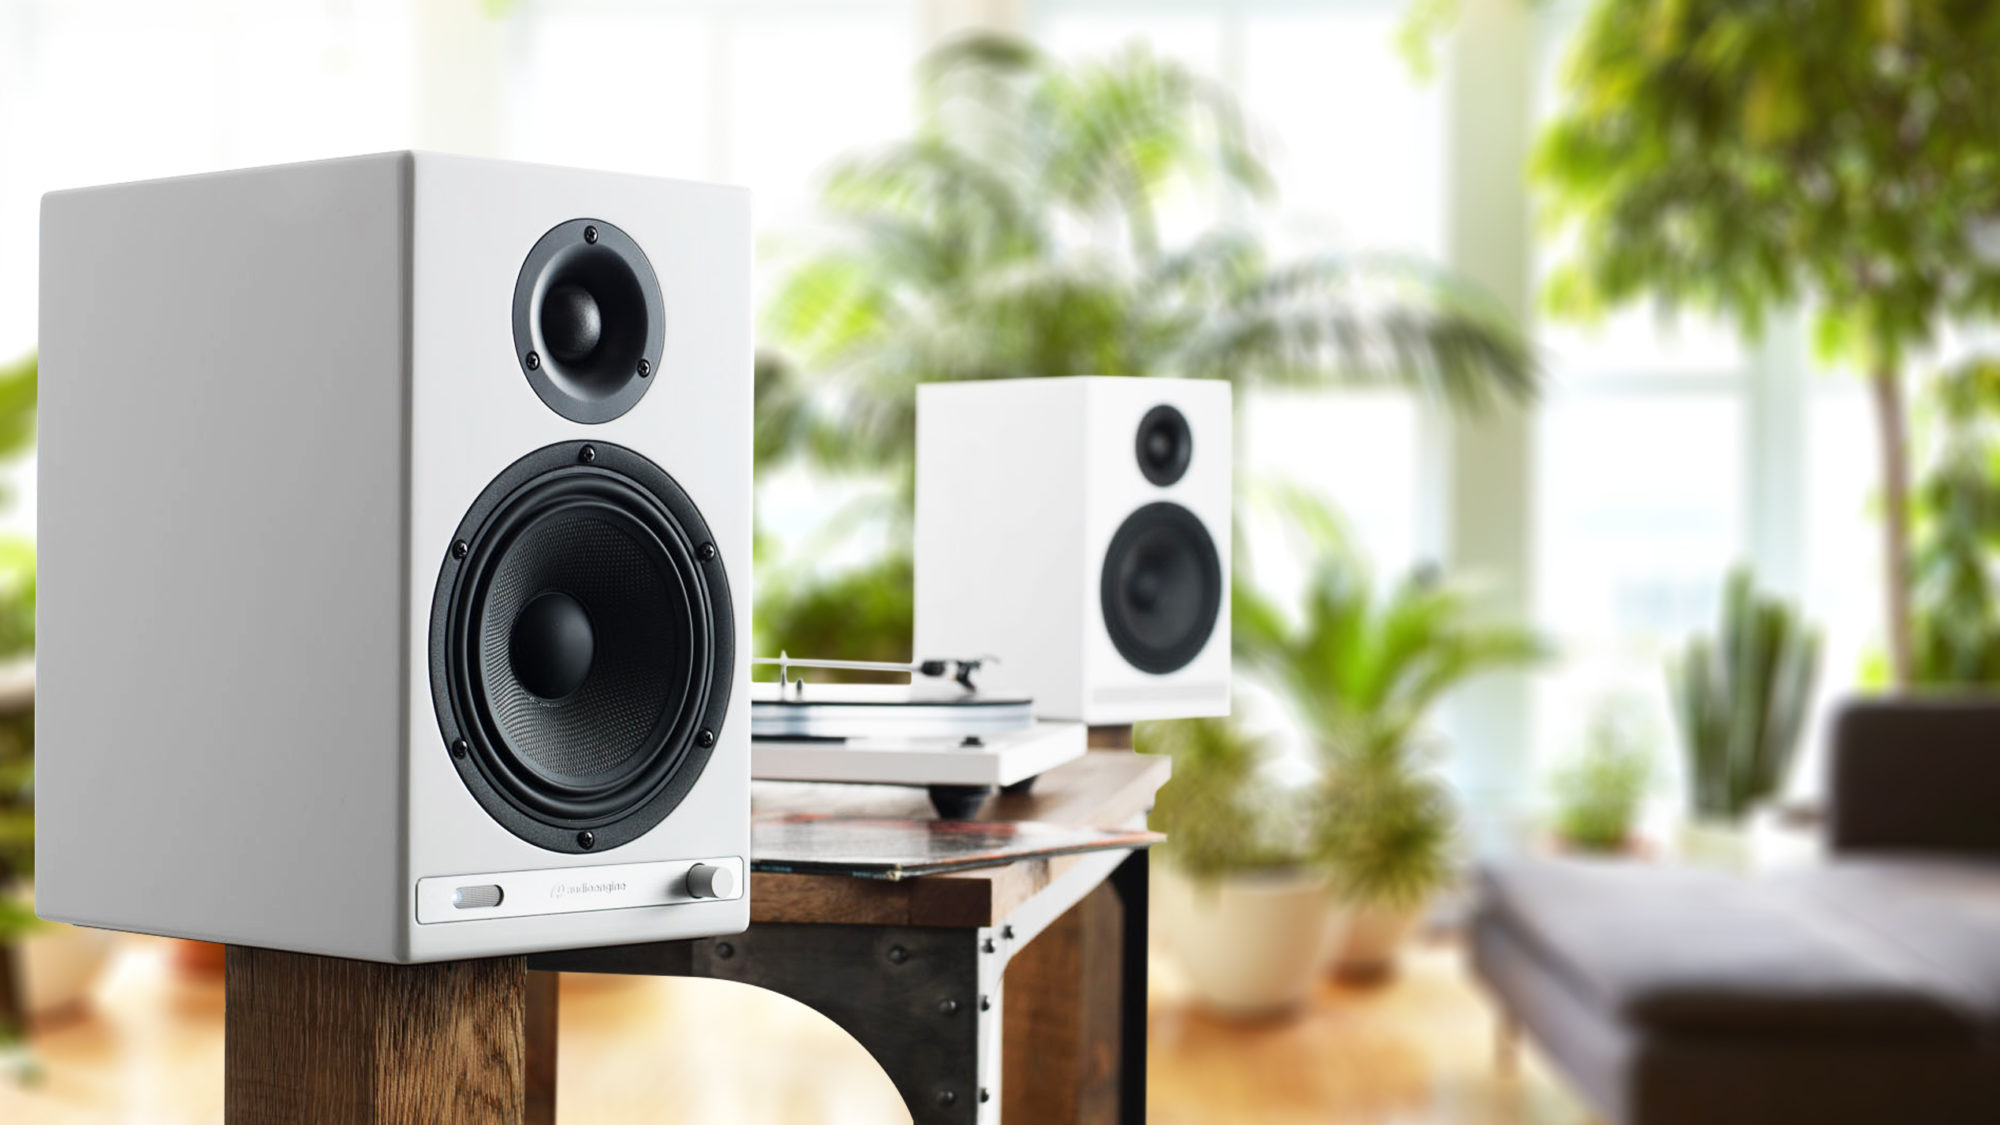
Audioengine’s Wireless speakers guarantee immaculate and highly satisfying sound quality, which is hard to beat. The B1 offers aptX-HD Bluetooth with 24-bit upsampling (which are the exact same Bluetooth specs as our wireless speakers), so the audio being SENT from your devices to the B1 is no different than the audio being SENT from your device to Audioengine’s Wireless Speakers; however, the B1 itself doesn’t have any speakers, so it has to rely on whatever speakers it is connected to. This is the only point at which your sound quality COULD suffer.

So let’s say you are sending the highest quality audio file from your laptop to the B1 Bluetooth Receiver. The B1 takes that super-high-quality file and handles it with such great care you may not be able to tell whether it was wireless or not…BUT, if you have your B1 connected to a crappy pair of speakers, guess what? No matter how pristine that audio file was, and no matter how skillfully the B1 handles that file, crappy speakers are going to make that audio sound crappy. BUT, if you are using the B1 to send audio to a pair of really great speakers that you love, the B1 will absolutely deliver the highest quality audio possible via Bluetooth, and it will do so with an extended range so you can bounce around the house and not worry about dropouts or inferior audio quality.
This was a ton of information so here’s a quick recap and summary…
The Bluetooth capability of Audioengine’s Wireless Speakers and the B1 is exactly the same. If you love your current speakers and aren’t ready to change brands, don’t sweat it, the B1 will give you beautiful wireless audio all the same. BUT, if you are looking to be truly reinvigorated by your music, you definitely need to try Audioengine’s Wireless speakers to take advantage of both our highly advanced Bluetooth technology and our unparalleled listening experience.
Bluetooth Audio and Codecs
If you’re curious about wireless audio and have found yourself doing some research, you’re probably awash in buzzwords like codecs, sample rates, bit rates, resolution, bandwidth and heaven knows what else.

Lest you throw up your hands at the complexity of it all let’s do our best to explain some of the basics of Bluetooth audio.
Bluetooth is a radio signal that sends data from a transmitter in your phone or computer, to a receiver in your headphones or speakers. In order to be sent from one device to another in an efficient manner, this data has to be encoded by the transmitter and then decoded by the receiver on the other end.
This is a big job, not to mention it all has to be done in a fraction of a second.

The problem here is that traditional Bluetooth codecs can’t process the amount of information necessary to recreate a faithful audio signal on the other end, so they have to compress the information. During compression, little bits of information are lost, and as we discussed earlier, the “information” in this case is YOUR MUSIC!
Think about that for a second!
Your devices can’t keep up with the amount of information your music requires, so they essentially throw it out; little bits of the frequency spectrum, dynamic range, etc. This may not sound like a big deal, but when you consider the idea that something like aptX HD can fix it, why would you settle for anything less?
Now before we dive into some of the technical aspects of what makes aptX HD so amazing, it’s important to discuss some of the older codecs so we can understand what aptX HD really brings to the table.
Think of the word “codec” as a combination of the terms “code” and “decode,” as these are the primary functions of all audio codecs; their job is to encode large information files so they can be more easily transferred, and then to decode that same file on the other end.

You’re familiar with MP3s, right? Well, an MP3 is just a type of codec… a very widely used type of codec, in fact. Since we have all used MP3s, we are probably all familiar with how dramatically they can degrade the quality of an audio file. Luckily, tons of codecs have been developed over the years, all with the goal of vastly surpassing the audio quality of a standard MP3. Some other codecs you may be familiar with are SBC, AAC, LDAC, and aptX. These are all considered superior to MP3s, but are also geared towards Bluetooth wireless audio.
So what’s the difference between standard aptX, and aptX HD?
For starters, aptX has actually been around since the 80s, and is currently much more widely used than aptx HD. Standard aptX has been used in phones, tablets, and laptops for a long time now so it’s likely that you’ve actually experienced Bluetooth transmission that features aptX. But for those of you who are looking for some numbers, here you go:
Standard aptX:
- Speed: 352 kbps
- Sample Resolution: 16-bit
- Sample Rate: 48kHz
Aptx HD:
- Speed:576 kbps
- Sample Resolution: 24-bit
- Sample Rate: 48kHz
Alright, let’s talk about that for a second.
The speed of these file transfers are measured in Kilobits-per-second (Kbps), and they define how quickly all of this audio information moves from one device to another. 48kHz denotes the sample rate of the audio data — the sample rate is measurement of how many samples of audio are carried from one end to the other end per second.
So this means aptX HD is providing audio information 48,000 times per second… and that’s a lot of times.
Next, 24-bit denotes the sampling resolution — sample resolution is a measurement of how many bits of information are included in each sample. Most Bluetooth codecs simply cannot provide this much information. Even if they could, they wouldn’t be able to encode it and decode it faithfully within 1 millisecond.
Long story short: aptX HD recreates your audio data more accurately and in greater detail than aptX and does this more quickly, efficiently, and with very low latency. Pretty impressive right?
Now I know Bluetooth audio has been pretty crappy in the past, but those days are over. Out with the old, in with the new! With Apple and Google doing away with headphone jacks on their phones, we are practically being forced to make the switch to Bluetooth — this is why aptX HD makes so much sense. If we are going to be forced to go wireless, why don’t we take advantage of some Bluetooth sound quality that surpasses even traditional wired headphone connections in some cases?
Which devices support aptX HD?
In order to take advantage of the benefits of aptX HD, you’ll need to make sure you have a device that supports it.
These devices will have a Bluetooth chip called the CSR8675, which is capable of supporting 24-bit audio from aptX HD.
With many modern audio speakers and systems adding wireless functionality to their list of features, you may wonder whether you are doing yourself a disservice by going wireless and ask yourself “is wireless audio quality any good?”
Believe it or not, wireless can sound just as good as a wired connection, meaning you won’t have to sacrifice quality for convenience.
Our wireless speakers utilize Bluetooth technology which definitely has its advantages; it’s fairly universal and, with its lack of proprietary software, is really easy to set up. There must be a catch, right? In the past, we felt that Bluetooth technology wasn’t up to snuff, both in terms of the range of the signal and the quality of audio. In recent years, however, Bluetooth technology has seriously done a lot of growing up; advances in the technology has increased the bandwidth and range, making it not only function great, but sound great. Bluetooth now has the capability of streaming up to CD quality, or 16-bit/44.1kHz, over the air, which means that right out of gate you’re able to send great sending audio without being tethered by cables.
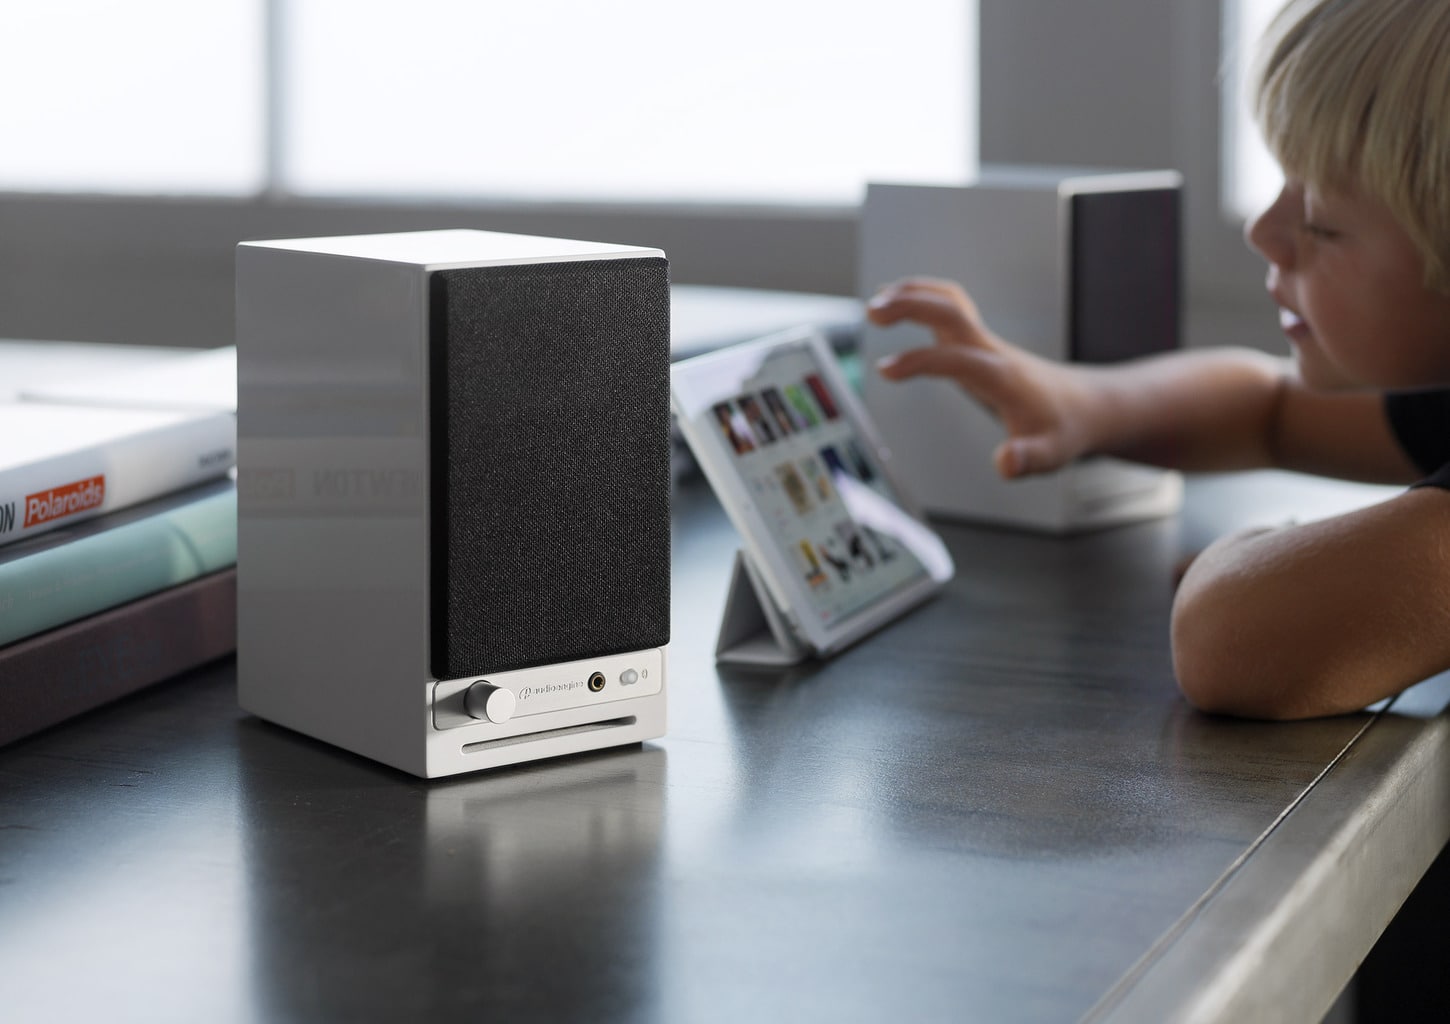
Codecs play a part in how Bluetooth audio is sent and received and some codecs provide slightly better fidelity than others.
In products like our B1 Bluetooth Music Receiver, we utilize the aptX HD codec, which we feel provides you with the highest fidelity decoding possible. Some devices, like most iOS devices, don’t utilize aptX, but even though we use aptX in our products, other great codecs like SBC and AAC will work and sound great. Not to mention, we utilize built-in DACs in our Bluetooth products, which will take your audio and pad the bit-depth to a 24-bit format, giving you added benefits such a lower noise floor.
Even though we use Bluetooth in more of our newer products, we do have other wireless options if you’re looking for any non-Bluetooth solutions. We offer two different wireless audio adapters, the W3 Wireless Audio Adapter the D2 Wireless DAC. The wireless technology used in both of these products is a lot like Wi-Fi, but on a closed protocol built specifically for high-resolution audio. The W3 includes a 16-bit/44.1kHz DAC, which makes it able to send CD-quality uncompressed audio over the air. If you’re looking for high-quality, though, the D2 represents the absolute highest possible performance wireless audio device we could build, able to send 24-bit/96kHz wirelessly.
So is wireless audio quality any good? The short answer is yes!
Using only the best hardware and software, you can rest assured that the wireless gear you’ve been considering will not only add convenience to your listening experience, but will retain the authenticity that you expect from your music.
Why go wireless?
If you haven’t used them before, wireless speakers might sound like a hassle to set up, connect to, and maintain in your home. The truth is, getting your wireless speaker system started doesn’t take much and can easily be done in a matter of minutes.
With all of the mobile technology available at our fingertips, there’s no reason to be tied down to one method of listening to your music; whether it’s your phone, laptop or tablet, your streaming sources are unlimited when you go wireless.
One of the greatest benefits to adopting a wireless speaker system is getting rid all of those unsightly wires running along your floors and behind entertainment centers. This alone gives you plenty of options for placing your wireless speakers where they will work best for your listening experience. Not to mention that without all of the wires and confusing installation instructions, you’re free to connect them to your phone, computer or tablet via Bluetooth and start enjoying them right away.
It’s fairly simple to connect directly to Pandora, Spotify, or any other music streaming source you prefer as long as you follow instructions. Audioengine’s wireless speakers, for example, are designed so that once they’re turned on, you need only activate Bluetooth in your device’s settings menu and select the correct speaker to connect.
If you do run into trouble installing or connecting to your new speakers, our Audioengine support reps are ready to step in and show you the best possible solution for the issue.
[Find out what speakers are best for you. Take the quiz]
Our technology
At Audioengine, we provide only the best products. Currently, we have a few varieties of wireless home speakers, including the B2 wireless speaker, which boasts an easily adapted Bluetooth wireless system for your phone, and the HD6 wireless speaker with versatile power and connectivity features. We also are readily available to answer any of your questions, so you not only get the awesome sounding audio you want, but also the tools to make it fit right into your home.
Customer Inquiry: “I’ve recently upgraded to the Audioengine A2+ Home Music System and am thoroughly impressed by the sound quality. Is there a way to further enhance this setup for a richer audio experience?”
Why a Subwoofer is Important:
The Audioengine A2+ excels in high and mid-range frequency reproduction, providing an expansive soundstage. Its mid-woofers deliver a balanced bass, but for deeper, more resonant bass frequencies, adding a subwoofer will introduce you to an entirely new music experience, with bass reminiscent of your favorite live concert.
Expanding Your System with a Subwoofer Integrating a subwoofer into your Audioengine home music system can dramatically improve your audio landscape:
- Deepened Bass Response: A subwoofer like the Audioengine S8 is dedicated to reproducing the lowest frequency sounds, enhancing the depth and dimension of the audio, especially in tracks with significant low-end elements.
- Enhanced Balance and Clarity: The subwoofer takes on the lower frequencies, allowing your system to focus on delivering clear highs and detailed mids. This separation ensures a balanced sound output and maximizes the performance of each component within its frequency range.
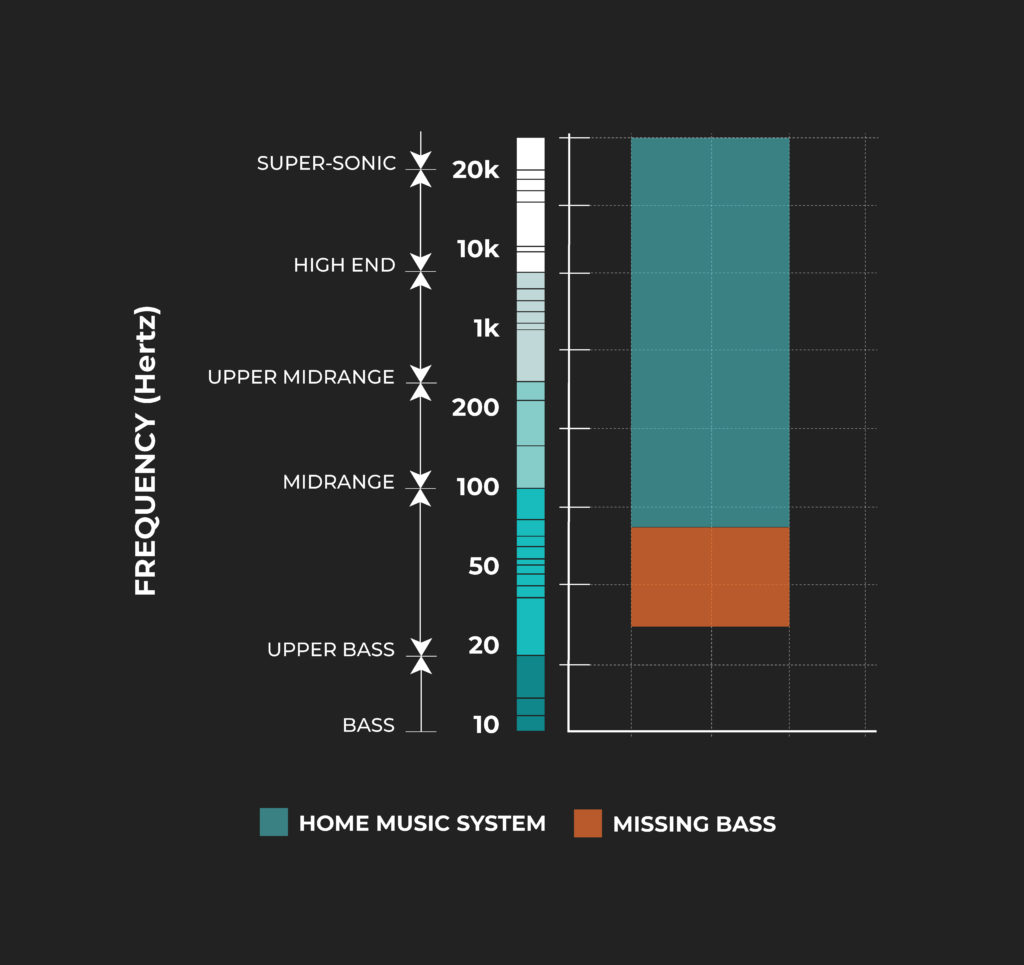
Adding a subwoofer reveals the full spectrum of sound that the artist intended to be a part of your musical experience.
Subwoofer Types: Sealed vs. Ported and Their Placement
- Sealed Subwoofers for Jazz and Acoustic:
- These subwoofers, like the Audioengine S6, offer a tighter and more precise bass, perfect for the nuanced sounds in jazz and acoustic music. Due to their controlled bass response, they are versatile in terms of placement and can be positioned either on the desk or in any compact space within the room.
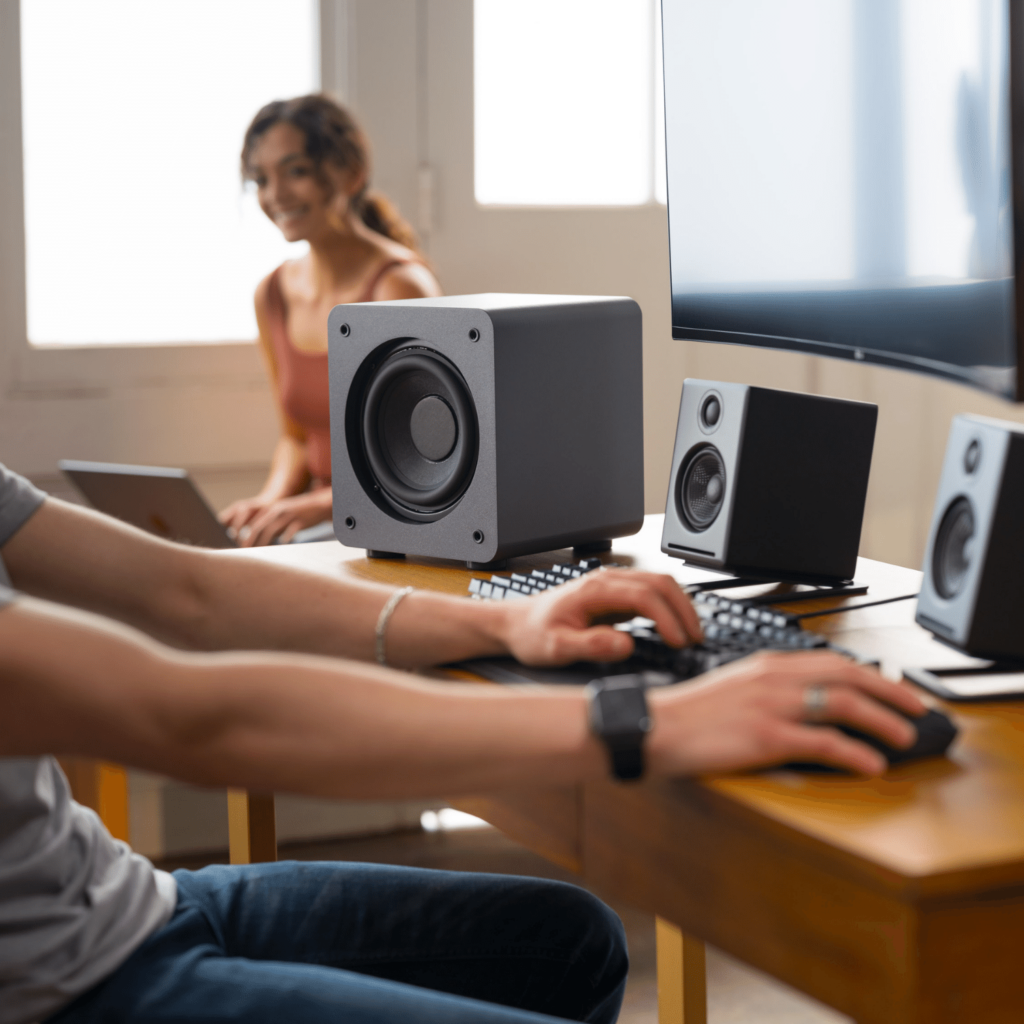
- Front-Firing Ported Subwoofers for Metal and Energetic Genres:
- These subwoofers are designed to handle the depth and intensity of genres like metal. They are ideally placed at listening height for the best experience. An elevated shelf or the desk itself can be great spots, ensuring the sound is directed straight at the listener for maximum impact.

Space Considerations: Choosing the Right Size and Placement
- U and L-Shaped Desks: These desk designs offer unique opportunities for subwoofer placement. With more corner space and legroom, you can consider slightly larger subwoofers that wouldn’t traditionally fit under a standard desk.
- Proper Placement: A front-firing subwoofer should be placed in an elevated position, such as your desktop, while a down-firing subwoofer should be placed on the floor.
- Larger Subwoofers for Spacious Setups: If you have more room, especially with U and L-shaped desks, a larger subwoofer can be placed on the ground under the desk. Their down-firing design is particularly effective in this placement, as it allows the sound to resonate off the floor, filling the room without taking up valuable desk space.

Conclusion:
Selecting the right subwoofer for your desktop setup involves understanding your music preferences, considering your available desk space, and deciding on the appropriate size and type of subwoofer. Whether it’s a compact sealed model for jazz and acoustic melodies or a larger ported subwoofer for the dynamic ranges of metal, the ideal choice will transform your listening experience into an experience rivaled only by live performances.
Experiencing static or buzzing in your home music system?
Whether you’re using the renowned Audioengine A2+ or another high-end audio setup, understanding the root causes of these noises is essential for a pristine listening experience. This guide delves into common sources of disturbances and offers effective strategies to eradicate them.
Why Are My Speakers Buzzing?
1. Static, Buzzing, and Ground Loops
Unwanted sounds in your audio setup, like static, buzzing, or humming, can stem from various sources. These include your computer’s 3.5mm line out, RF interference, or the noise floor inherent in electronic devices. Ground loops are a frequent issue in systems where the audio source and speakers are on different power sources, such as separate power strips.
Solution:
To address ground loops, ensure all components of your audio system are connected to the same power strip or power source. This helps maintain a common ground and prevents ground loops. Using a ground loop isolator can also be effective in eliminating this issue.
2. Static from the 3.5mm Line Out
Static from the 3.5mm line out of a computer is a common issue. This often occurs due to electromagnetic interference (EMI) from other devices or poor quality cables.
Solution:
To reduce static, use high-quality shielded cables. Keeping cables away from power supplies and other electronic devices can also minimize interference. Alternatively, consider using an external digital-to-analog converter (DAC) to bypass the computer’s internal sound card, which is often a source of static.
3. RF Interference
Electronic devices in your home, such as routers, mobile phones, and even microwaves, can cause radio frequency interference (RFI), leading to that annoying buzz.
Solution:
To mitigate RF interference, position your audio setup away from other electronic devices. Using ferrite beads on cables can help suppress high-frequency noise. Additionally, ensuring your audio cables are of high quality and shielded can further reduce susceptibility to RF interference.
4. The Noise Floor
Every electronic device, including your home music system, has a baseline noise level known as the noise floor. When the system is amplified, this noise floor can become noticeable.
Solution:
To minimize the impact of the noise floor, keep your audio system’s volume at a reasonable level and adjust the gain settings appropriately. Ensuring your equipment is well-maintained and free from dust can also help, as dust can affect the performance of electronic components.
How Do I Fix My Speakers?

Eliminating buzzing noises and static involves a combination of savvy technical solutions and simple setup adjustments:
Invest in Quality Cables: High-quality, shielded cables, especially for your 3.5mm line out, can significantly reduce electromagnetic interference.
Strategic Placement of Equipment: Keep your speakers away from potential sources of RF interference, such as a cellphone.
Unified Power Sources: Connecting your audio source and system to the same power strip can help resolve ground loop issues.
Regular Maintenance: Dust and debris can affect connections, leading to static. Keep your connectors and ports clean to maintain a clear signal path.
External DAC for Enhanced Audio: Consider using an external Digital-to-Analog Converter (DAC). Digital to Analog converters work by converting digital audio files back into analog sound, to be heard the way the artist intended. DAC’s such as the Audioengine D1 feature 32-bit audio processing technology and are particularly effective in reducing the noise floor compared to devices with built-in sound cards.
Conclusion
Static, buzzing, and grounding issues can disrupt your music enjoyment, but they don’t have to be a permanent feature of your audio experience. With the right understanding and some adjustments, your home music system will deliver the high-quality sound you expect. Embrace the journey with Audioengine – where we combine state-of-the-art technology with user-friendly solutions to elevate your audio experience.
Connecting Google Home to Bluetooth Speakers
Consumer electronics designers are, and have been, on a perpetual quest to give users the most streamlined experience imaginable.
At this point in time it seems like modern-day designers have exceeded the bounds of what most of us could have ever imagined in the first place. Think about it, there is an app for literally everything; just by downloading a simple program onto your phone or tablet, your life can become easier. Wearable technology, like Apple Watch, and smart speakers, like Google Home, tie all of your electronics together to make technology and user-friendliness a lifestyle rather than a rare luxury. Today we are going to talk a little more about one of the leading products, what it does, and how Audioengine can take it one step further; that product is Google Home.
What Is Google Home?
Offically, this piece of technology is touted as a “Smart Speaker and Home Assistant.”
A smart speaker is one of those sleek futuristic speakers that sits on your friend’s kitchen counter, plays whatever music someone tells it to, and sometimes has a snarky robotic comeback to your sarcastic remarks. There are a number of big brands making smart speakers (some of which we’ll discuss in other articles) and all of them have their pros and cons. One “pro” to the Google Home is the “Home Assistant” part. Google Home has an accompanying downloadable app that allows users to customize how the device interacts with and controls their home; lights, thermostats, coffee makers, and pretty much anything else can be controlled by Google Home and accessories. Once you have all of your desired devices properly connected and configured, turning them on and off is just one voice command away… how much easier can life get?
When it comes to music, smart speakers make calling up the right tune an absolute breeze. Google Home can control apps such as Spotify, YouTube, and iHeartRadio among others, so you can tell it to play just about any song in the world. Google Home will even call up playlists you’ve saved within your music streaming apps, and you can tell the device to increase and decrease volume, pause, skip, and any other command you would typically give a media player. There is just one drawback; while Google Home offers a few different sizes (featuring different speakers), the product’s focus is not audiophile-grade sound quality. For that, we need to bring Audioengine into the mix.
How Can Audioengine Take Google Home Further?
You’re taking a step up in the world of consumer electronics and you’ve decided to purchase Google Home; you care about user-experience and you strive to stay ahead of the pop culture curve. That doesn’t mean you have to sacrifice a quality listening experience. As I always say, what good is having access to every song in the world if you’re just going to play them through an inadequate sound system? That’s like sharpening a hunting knife so you can cut hot butter with it.
Luckily, the Google Home App (iTunes | Google Play) allows users to send audio to external Bluetooth speakers. Whether it’s the humble B2 Wireless Speaker, or a full-fledged pair of active Audioengine speakers such as the A5+ Wireless, Google Home is capable of transmitting your beloved music to your sonic system. Bam!!–we just completed the full circle of user-friendliness and ear-friendliness. It may sound complicated merely by description, but it’s actually extremely easy to configure, just follow the quick steps below:
- Download and open the Google Home App on your phone or tablet.
- Navigate to the “Devices” tab within the app
- Tap “Settings” in the devices submenu
- Scroll down to “Default Music Speaker” and tap “Pair Bluetooth Speaker”
- Select your Audioengine speaker – and you’re done!
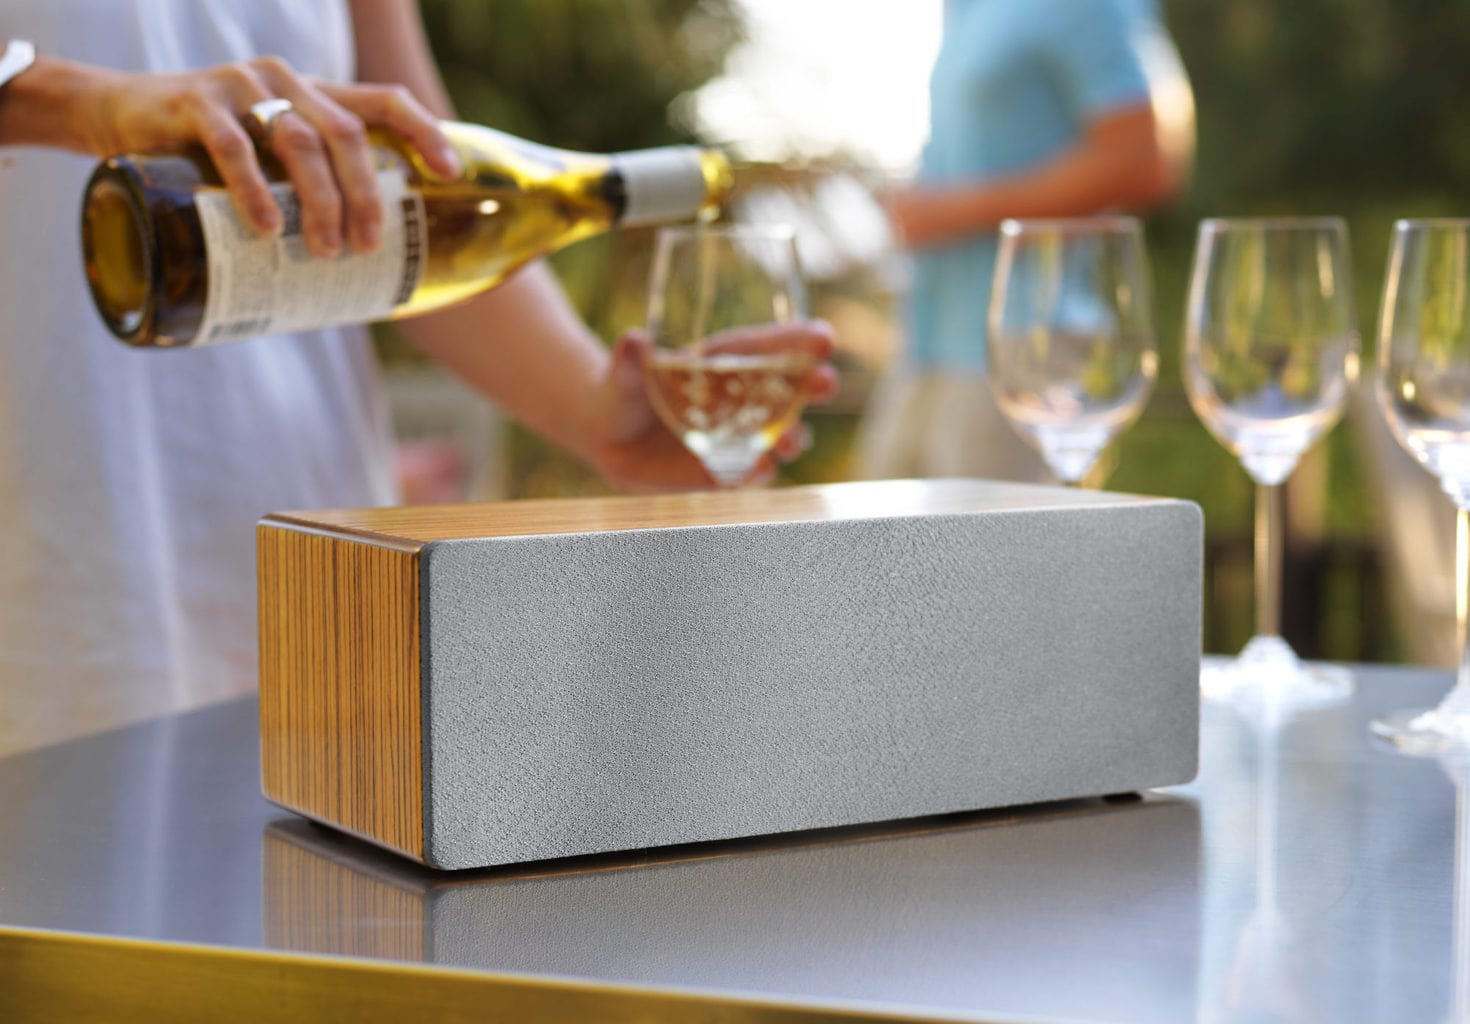
Take control of your music.
Now you’re ready to shout voice commands all over the house and rock out while you make dinner, host a party, or do whatever it is you do. You can even connect multiple sets of Audioengine wireless speakers for multi-room audio, by creating “groups” in the Google Home app (under that same “Devices” tab).
Isn’t it nice that designers have created all this awesome technology for us? Now I’m just spit-balling, here, but — what if one day someone will make some kind of like a smart speaker… except it lives in your brain and reads your mind. Then you can just think about how good your favorite tunes will sound through a pair of Audioengine wireless speakers, and voila!
Can Alexa Connect to Bluetooth Speakers?
Remember how in old science fiction movies a character could just talk out loud to a spaceship and it would do anything they commanded?
The idea of voice control technology has long been embedded in our expectations for the “future”, and even though most of those old science fiction movie-makers couldn’t imagine computers any further-advanced than those already available in 1979, they certainly hit the nail on the head with their forecast of voice control. Nowadays, with the help of products like Amazon Echo (and its voice-controlled personal assistant ‘Alexa’), users can control aspects of their home just by verbalizing simple commands. But even with the huge strides this technology has made in recent years, it’s impossible to get audiophile-quality sound from the speakers in an Amazon Echo product. Audioengine can help with this, but before we dive into how, let’s talk a little more about the Amazon Echo.
Is your Amazon Echo killing your audio quality?
First, while Echo and Alexa do in fact go hand-in-hand, they are not the exact same thing.
Echo is a line of smart speakers manufactured by Amazon, and Alexa is an intelligent personal assistant software used to control Echo. Users can speak aloud to give Alexa, and therefore Echo, verbal commands (always beginning with the wake word, ‘Alexa’) such as, “Alexa, play my favorite song,” or “Alexa, what’s on my calendar this Saturday?” Alexa will respond accordingly, so long as the questions asked or commands given are within Alexa’s realm of capability. With tons of Echo-compatible add-on products on the market, there really isn’t a whole lot that falls outside of Alexa’s wheelhouse.
The most common commands Alexa handles are music-related: whether it’s calling up a Spotify playlist, turning up or down the volume, or finding a specific song you haven’t heard in years but are randomly thinking about and absolutely have to hear right this second!! The accessibility is astounding, no doubt, but its main consequence is that you are forced to listen to all your music on Echo’s built-in speakers instead of your own beastly audio system. This is not to say Amazon has ignored their sound quality altogether, but realistically there’s only so much a single speaker housing of that size can handle. Suffice it to say, there are limitations.
Luckily, Amazon has implemented a crucial feature which expands its functionality to accommodate customers who want to be able to interact with Alexa and still enjoy listening to podcasts, music, and stock tips through exterior systems. That’s right, it’s quick and easy to connect your Echo to Bluetooth speakers:
- Open the Alexa App (Apple link | Google Play Link)
- Tap the “Devices” icon and select the Echo device you want to connect to speakers
- Select “Bluetooth Devices”
- Select “Pair New Device”
- Find your Audioengine Wireless speaker on the list of available Bluetooth devices
Bang, you’re done!
Now you can treat Alexa as if it were any other input device; you can still have whatever other devices you so choose connected to your Audioengine speakers, and since Alexa can control Echo’s volume with a simple, “Alexa turn down volume,” you can leave Audioengine’s volume knob exactly where you like it and adjust volume accordingly with Alexa. If you have our S8 Powered Subwoofer connected wirelessly to your mains, this configuration will still work which means you’ll get full-spectrum high fidelity audio when listening to all your favorite songs, without sacrificing the unparalleled convenience provided by a product like Amazon Echo. This will also work with our standalone B1 Bluetooth Music Receiver in the event you have a set of wired speakers you want to turn into wireless speakers.
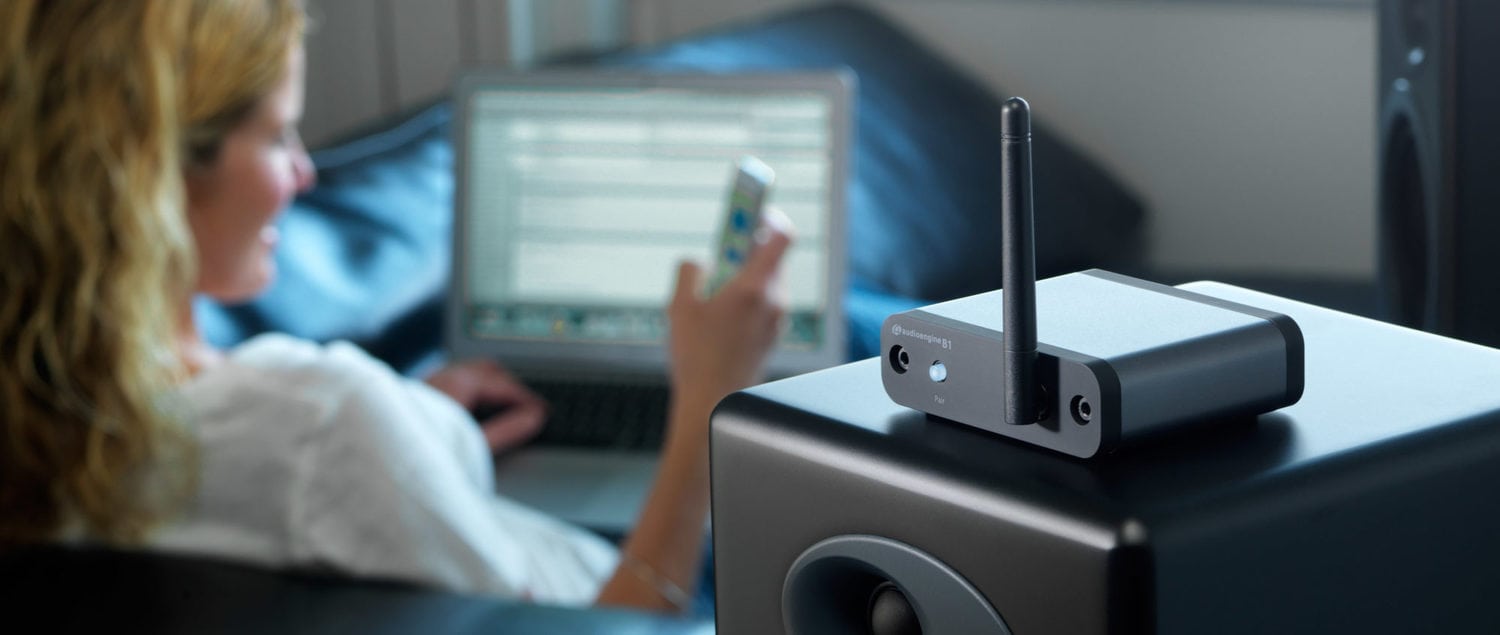
Modern technology is really opening up doors… and windows… and exhaust fans… it’s basically blasting the roof off the whole place.
We are reaching the point where we can do just about anything we want with voice control technology, as long as we have all the right accouterments. Products like Amazon Echo make life so easy it hurts… perhaps it hurts so good that you want to lie down and say, “Alexa, play ‘Hurts So Good’ by John Mellencamp.” Don’t worry – we designed Audioengine Wireless speakers to do the rest.
If the Bluetooth LED is illuminated orange that means you are streaming in aptX HD which is a higher grade of Bluetooth signal.
The best way to attach the plug into the USB adapter is to go in at an angle. The plastic on the plug should have a more rounded side; we would suggest putting that side in first and then push down the other end (you may need to pull the tab out to make it easier to insert). One thing to look out for is the metal prongs on the body- when inserting the rounded end of the head, make sure the top prong is being inserted into the slot of the head; usually, if the first prong goes into the slot, the other prong should go into the other slot with no problems.
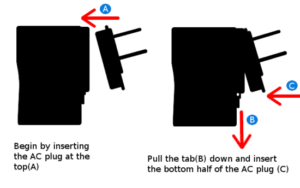
The cable included with our products is standard speaker wire (16 AWG), so you should be able to find something like this most anywhere that carries electronics or audio gear. 16 AWG should be good up to around 25 ft or so. If you’d like to go farther than that we’d recommend 14 AWG.
Using stands like the DS1s and DS2s will angle the speakers upwards, which can be a positive thing depending as well as other variables in your setup. The closer the speakers tweeters are aimed to your ears, the more you will perceive higher frequencies, which are very directional, and using these stands can achieve this. Some customers prefer having the tweeters off axis a bit, as this results in a less pronounced high end moving the focal point lower.
There are a ton of options and it really comes down to personal preference, so we highly recommend trying a few different placements / toe-in / toe-out etc. to see what seems to work out best in your setup.
The following diagrams show the most common configurations for D2 Setup.
Note: For maximum range, ensure that both antennae are upright.
USB from your computer

Step 1 — Connect the D2 Sender to your computer USB port.
For PC, the D2 should be recognized automatically.
For Mac, under System Preferences/Sound, select “Audioengine D2”
Step 2 –- Connect the analog output of your D2 Receiver to any audio input of your active speakers, stereo, etc.
Step 3 — Connect the D2 power adapter to the D2 Receiver, and to an AC power source.
Optical Source

Step 3 –- Connect the analog output of your D2 Receiver to any audio input of your active speakers, stereo, etc.
Step 4 — Connect the D2 power adapter to the D2 Receiver, and to an AC power source.
Pairing
Pairing is the function by which two devices become acquainted. Once a Sender and Receiver(s) are paired, they will remember one another.
Note: D2 Senders and Receivers packaged together are paired out of the box, so if you’re only using one Sender/Receiver set, no further configuration is needed.
To pair an additional Receiver or to re-pair a Sender/Receiver set, press the Pair button on the Receiver (the Pair LED will blink), then press the Pair button on the Sender. Both Sender and Receiver pair lights should now be solid, indicating that they are paired.
For the full setup guide, download the attached PDF:
D2 setup guide_web
D2 Setup Video
Some turntables will need a preamp before being connected and others may have one built-in. With that in mind, it is best to check the turntable manufacturer’s website, the turntable’s user manual, or you can even try your turntable without the preamp first to see how it operates.
You can absolutely still use the A5+ Wireless and it will sound great. AptX is a high-quality Bluetooth audio codec that works really well. In addition to mandatory support for SBC, Bluetooth also includes optional support for many other codecs, like MPEG-1, MPEG-2, MPEG-4, and AAC, all of which have their own advantages, and some of which sound very close to AptX.
There is an auxiliary input on the rear panel so you can directly connect any product with an audio output.
No extra software or drivers are needed. The A5+ Wireless is compatible with any device that supports Bluetooth, and the A2DP profile for streaming stereo audio. This includes most smartphones, tablets, and computers.
The A5+ Wireless uses the same amplifier design and woofers that the A5+ Classic does, so both the A5+ Wireless and the A5+ Classic should sound virtually the same. The biggest difference between the two is the added Bluetooth receiver built into the A5+ Wireless; we’ve added a 24-bit DAC built inside that connects any bluetooth capable device (whether be your phone, tablet, or computer) to the speakers so you can stream high-quality music directly without having to use audio cables. The A5+ Wireless also features a minor cosmetic refresh; the most obvious of which includes centering the tweeters, as opposed to the offset tweeters featured on the A5+ Classic.
Once your A5+ Wireless is paired and connected then any app (iTunes, Amarra, etc.) – or online players such as Youtube – it will automatically play your music through Bluetooth.
If you have a Mac running Snow Leopard or later, you can create a multiple output device to accomplish this. See the link below for how-to instructions on Apple’s site: https://support.apple.com
The A5+ Wireless is not officially supported by any universal remotes. However, you can use a learning remote to copy the signals being sent by the A5+ Wireless’s remote. Check with the manufacturer of your remote to find out if it supports learning IR codes.
All you would need to do is connect the variable output of the A5+ Wireless into the input of your sub using RCA cables.
The A5+ Wireless have an idle mode which is engaged automatic when nothing is playing. The lights will remain on and solid and nothing needs to be done to resume audio playback. The sleep mode on the A5+ is manual and can be toggled on/off by pressing the volume knob in or by clicking the moon button on the A5+’s remote, so it won’t go into sleep mode automatically. Sleep mode will just reduce the power more than idle mode. It is perfectly fine to leave your A5+s powered on when not in use!
Yep, an AC wall outlet near the A5+ Wireless is all you need to power the W3 or D2 wireless Receiver.
The size of each speaker is 10.75″Hx 7″W x 9″D
The light on the rear panel of the A5+ Wireless is the Bluetooth LED indicator. Below are the various Bluetooth LED statuses and their meanings.
- Bluetooth LED is on and solid: The A5+ Wireless has power and currently connected to a Bluetooth-enabled device.
- LED indicator illuminates orange instead of white: This is normal! It means that your source is currently sending the A5+ Wireless an aptX signal.
- Bluetooth LED is on and blinking: The A5+ Wireless has power and the Bluetooth receiver is in pairing mode.
- Bluetooth LED is off and A5+ Wireless is on: Bluetooth is in standby and not in pairing mode. However, the A5+ Wireless is still visible to your device, so simply connect using your device and it will automatically wake up.
Bluetooth has a delay of about 30ms (milliseconds) so you can watch videos and stream audio without any noticeable lag.
No. We designed the USB port on our Audioengine 5+ speakers for power charging only. Don’t worry, though. We’ve also included an audio input next to the USB port to plug your music into.
Type
Powered Bluetooth aptX HD speaker system
Amplifier Type
Class AB
Rated Power Output:
50W RMS per channel (measured in compliance with 16 C.F.R. § 432.3)
Peak Power Output: 75W per channel (AES)
Total Peak Power Output:150W (AES)
Drivers
5″ aramid fiber woofers
0.75″ silk dome tweeters
Inputs
3.5 mm stereo mini-jack, RCA L/R, Bluetooth
Outputs
RCA variable line-out
Input Voltages
115/240 V, 50/60 Hz manually switchable
SNR
>95 dB (typical A-weighted)
THD+N
Less than 0.05% at all power settings
Crosstalk
<50 dB
Frequency Response
50 Hz-22 kHz ±1.5 dB
Frequency Response w/ Bass Reduction Switch selected
N/A
Analog Input Impedance
N/A
Nominal Impedance
N/A
Input Impedance
10K ohms unbalanced
Crossover Frequency
N/A
Protection
Output current limiting, thermal over-temperature, power on/off transient protection, replaceable external main fuse
Power Consumption
Idle: 10 W
Mute: 6 W
Sleep: 4 W
Standby Consumption
N/A
Phase
N/A
Recommended Amplifier Power
N/A
Battery Life
N/A
Battery Charge Time
N/A
Internal D/A Converter
PCM5102
Internal BT Receiver
N/A
Input Bit Depth
24 bit (padded)
Bluetooth Receiver Type
Bluetooth 5.0
Supported Codecs
aptX HD, aptX, AAC, SBC
Supported Bluetooth Profiles
N/A
Wireless Operation Range
Up to 100 ft (30 m) typical
Input Data Rate
Determined by Bluetooth
Wireless Latency
~30 milliseconds (ms)
Dimensions (HWD)
Left (active) – 10.75″ (27 cm) x 7″ (18 cm) x 9″ (23 cm)
Right (passive) – 10.75″ (27 cm) x 7″ (18 cm) x 7.75″ (20 cm)
Weight
Left (active) – 15.4 lb (7 kg)
Right (passive) – 9.6 lb (4.4 kg)
Total Shipping Weight
31 lb (14 kg)
Shipping Box Dimensions (LWH)
22″ (56 cm) x 11.5″ (29 cm) x 15″ (38 cm)
Operating temperature: 32 degrees F to 95 degrees F
Non-operating temperature: -4 degrees F to 113 degrees F
Relative humidity: 5% to 95% non-condensing
0.5″ (13 mm) thick MDF cabinets
5″ (130 mm) aramid fiber woofers with advanced voice coils
0.75″ (20 mm) silk dome tweeters with neodymium magnets
Toroidal power transformer
To minimize unwanted resonances and distortion, Audioengine cabinets have thick high-resin MDF walls with extensive internal bracing. Heavy internal sound-damping material is used to reduce unwanted sound reflections inside the cabinet. All cabinet edges are rounded which look great and reduce high-frequency diffraction effects on the front baffles. The A5+ cabinet contains tuned, rear-port slots.
The D2 is a USB Plug-and-Play audio device. This means that the drivers it uses are developed and provided by the developer of your computer’s operating system. In the case of a Windows PC for example, these drivers are provided by Microsoft, and are a part of Windows.
Although D2 may work just fine when connected to most USB hubs, this is not recommended as the data rate may not be fast enough for higher-resolution music. We therefore suggest you select a high-speed USB bus all by itself and don’t use a USB port on your keyboard, for example.
Yes, however, note that 24/96 HD digital audio pushes the limits of USB 1.1 speeds. Due to this, it’s highly recommended that you connect to a higher speed USB 2.0 port.
In the Foobar control panel, under Preferences->Output, set the buffer length to minimum. A few customers have mentioned that WASAPI mode is more stable when used under WinAmp, so try that as well.
Your D2 will sound great out of the box and will get better over time. However, it’s best to play music for 40 to 50 hours before doing any critical listening.
We use 2-pin non-polarized IEC 320-C7 cables, which is common and can be purchased at most electronics stores.
The D2 is designed to play well with most wireless devices, especially computers and routers. We do, however, recommend that you locate the D2 at least 12″ from other wireless products.
The S8s crossover is a variable low-pass filter. This means it variably adjusts how high the S8 will play. Unless the subwoofer is pretty far away, you can usually leave the phase switch set to 0°. When setting up a new S8, I like to start with the crossover all the way counter clockwise and, with some music I’m familiar with playing, first get the volume “about” right. After that try making very small adjustments clockwise on the crossover, evaluating each small change from where you’ll be listening from most often. Once it starts sounding like you can localize where the sub is coming from, back it off until you can’t again. You may also need to lower the volume a touch after the crossover is dialed in, or perhaps even while you’re dialing it in, depending on the acoustics of the room you’re in, and your own preference on how present you’d like the sub to sound.
Audioengine powered speakers have fixed passive crossovers designed specifically for them; this simply means that they are designed to play the frequency range they produce, so it’s not necessary to alter this when adding a subwoofer. Adding a subwoofer, such as the S8, will pick up where the speakers leave off, extending the low end response.
The S8’s crossover is a variable low-pass filter, and will not adjust the audio for the RCA output connection. This is a full range line level output.
Type
Powered Subwoofer, front ported design
Amplifier Type
Class D
Rated Power Output:/strong>
125W RMS (measured in compliance with 16 C.F.R. § 432.3)
Total Peak Power Output: 250W (AES)
Drivers
8″ long throw down-firing woofer
Inputs
3.5 mm stereo mini-jack, RCA L/R
Outputs
N/A
Input Voltages
100-240 V AC, 50/60 Hz auto-switching
SNR
Greater than 95 dB (typical A-weighted)
THD+N
Less than 0.05% at all power settings
Crosstalk
N/A
Frequency Response
27Hz – 180Hz ±1.5 dB
Frequency Response w/ Bass Reduction Switch selected
N/A
Analog Input Impedance
N/A
Nominal Impedance
N/A
Input Impedance
10K ohms unbalanced
Crossover Frequency
50Hz – 130Hz
Protection
Output current limiting, thermal over-temperature, power on/off transient protection
Power Consumption
N/A
Standby Consumption
<1W
Phase
0 / 180 degrees
Recommended Amplifier Power
N/A
Battery Life
N/A
Battery Charge Time
N/A
Dimensions (HWD)
11.25″ (28.6 cm) x 11.25″ (28.6 cm) x 11.25″ (28.6 cm)
Weight
23.6 lb (10.7 kg)
Total Shipping Weight
30 lb (13.6 kg)
Shipping Box Dimensions (LWH)
16″ (40.6 cm) x 16″ (40.6 cm) x 18″ (45.7 cm)
15.6mm thick MDF cabinet
8″ custom downfiring woofer
Every setup is different but we generally recommend leaving your speaker volume at around 11 or 12 o’clock and then using your music source (phone, tablet, computer, TV, etc.) as the master volume control.
We are firm believers that two quality speakers will always sound better than one or more speakers together in a single cabinet, regardless of the amplifier or sound enhancing technology used. There are some decent one-piece speaker systems that simulate stereo and surround sound from a single source but most fall short as they can’t accurately duplicate a wide sound stage with imaging as complete and rich as Audioengine speakers.
Due to the electronics, cabinet materials and finish, it’s not a good idea to drill into your speakers, but you can use side clamping mounts as an alternative. Mounts that clamp from the front and back may obstruct the bass port.
All you would need to do is connect the variable output of the A5+ Classic into the input of your sub using RCA cables.
Nope. The 3.5mm stereo mini and RCA inputs run on the same analog circuitry and will sound equally awesome.
If you have a Mac running snow leopard or later, you can create a multiple output device to accomplish this. See the link below for how-to instructions on Apple’s site:
https://support.apple.com
If your B2 speaker sounds distorted, is buzzing, or just doesn’t sound quite right, we’d recommend the following troubleshooting steps:
Start with power cycling your B2 by turning it off and then back on. From there:
- Determine if the distortion is due to your source by disconnecting all source devices from the speakers.
- Please make sure all of your connector cables are in working order. Try different cables as well as a different source device.
- Please try using each input available (mini-jack and Bluetooth), one at a time, to see how the speakers react.
- Make sure it is not a power issue by trying a power outlet that is on a different circuit.
If the issue persists, please click on the following link and then click on the dropdown to submit an email to our Support team:
When doing so, please copy and paste the above troubleshooting steps along with the results of each and include this information when contacting us.
If you have recently purchased a B2 and you cannot find the antenna or antenna post on the back of the unit, don’t worry! Starting in 2021, we made some updates to the B2 cabinet. One of those changes was mounting the antenna inside of the speaker cabinet. So if you do not have an antenna nor see a way to attach one, then rest assured knowing that the antenna is mounted to the inside of the cabinet of your B2.
Type
Powered Bluetooth aptX speaker
Amplifier Type
Class D
Rated Power Output:
15W RMS per channel (measured in compliance with 16 C.F.R. § 432.3)
Peak Power Output: 30W per channel (AES)
Total Peak Power Output: 60W (AES)
Drivers
2.75” aramid fiber woofers
0.75“ Silk dome tweeters
Inputs
3.5 mm stereo mini-jack, Bluetooth
Outputs
N/A
Input Voltages
100-240 V 50/60 Hz auto-switching
SNR
>95 dB (typical A-weighted)
THD+N
Less than 0.05% at all power settings
Crosstalk
N/A
Frequency Response
65 Hz-22 kHz ±2.0 dB
Frequency Response w/ Bass Reduction Switch selected
N/A
Analog Input Impedance
10K ohms unbalanced
Nominal Impedance
N/A
Input Impedance
N/A
Crossover Frequency
N/A
Protection
Output current limiting, thermal over-temperature, power on/off transient protection
Power Consumption
Idle: 10W
Standby Consumption
N/A
Phase
N/A
Recommended Amplifier Power
N/A
Battery Life
N/A
Battery Charge Time
N/A
Internal D/A Converter
PCM 5102
Internal BT Receiver
N/A
Input Bit Depth
16 bit
Bluetooth Receiver Type
Bluetooth 5.0
Supported Codecs
aptX, AAC, SBC
Supported Bluetooth Profiles
N/A
Wireless Operation Range
Up to 100 ft (30 m) typical
Input Data Rate
Determined by Bluetooth
Wireless Latency
~30 milliseconds (ms)
Connector Type
N/A
USB Device Class
N/A
Input Bit Depth
N/A
Input Sample Rate
N/A
Headphone Amp Type
N/A
Full-scale Headphone Output Level
N/A
Output Impedance
N/A
Recommended Headphone Impedance Level
N/A
Dimensions (HWD)
4.25”(10.8 cm) x 12.25”(31.1 cm) x 5.50”(14 cm)
Weight
6 lb (2.7 kg)
Total Shipping Weight
10 lb (4.6 kg)
Shipping Box Dimensions (LWH)
16” (40.6 cm) x 7.5” (19.1 cm) x 10.5” (26.7 cm)
0.7″ (18 mm) thick MDF cabinets with real wood veneer
0.75″ (20 mm) silk dome tweeters with neodymium magnets
2.75″ (70 mm) aramid fiber woofers with advanced voice coils
To minimize unwanted resonances and distortion, Audioengine cabinets have thick high-resin MDF walls with extensive internal bracing. Heavy internal sound-damping material is also used to reduce unwanted sound reflections inside the cabinet. The B2 cabinet is a unique design in that it has dual sub-enclosures to prevent cross-interference, while each side contains its own tuned, front-port bass slot.
Table of Contents
- Introduction
- Main Differences Between Bose Music Wave and Audioengine B2
- Key Specifications
- Key Features
- Overall Design
- Playback Capabilities
- Other Noteworthy Features
- Reliability
- Pros and Cons
- Conclusion
Introduction
When choosing a high-quality home music system, both Bose and Audioengine are prominent names in the industry. However, while the Bose Music Wave has been around for decades, the Audioengine B2 Home Music System offers a more modern take on premium audio. This comparison aims to delve into the specifics of each system, highlighting their strengths and weaknesses to help you make an informed decision.
Main Differences Between Bose Music Wave and Audioengine B2
The primary differences between the Bose Music Wave and Audioengine B2 lie in their design philosophy, sound quality, and connectivity features. The Bose Music Wave, released in 1993, is a legacy product with outdated features and a high price tag that does not justify its performance in today’s market. On the other hand, the Audioengine B2 emphasizes superior sound performance, modern connectivity, and handcrafted design.
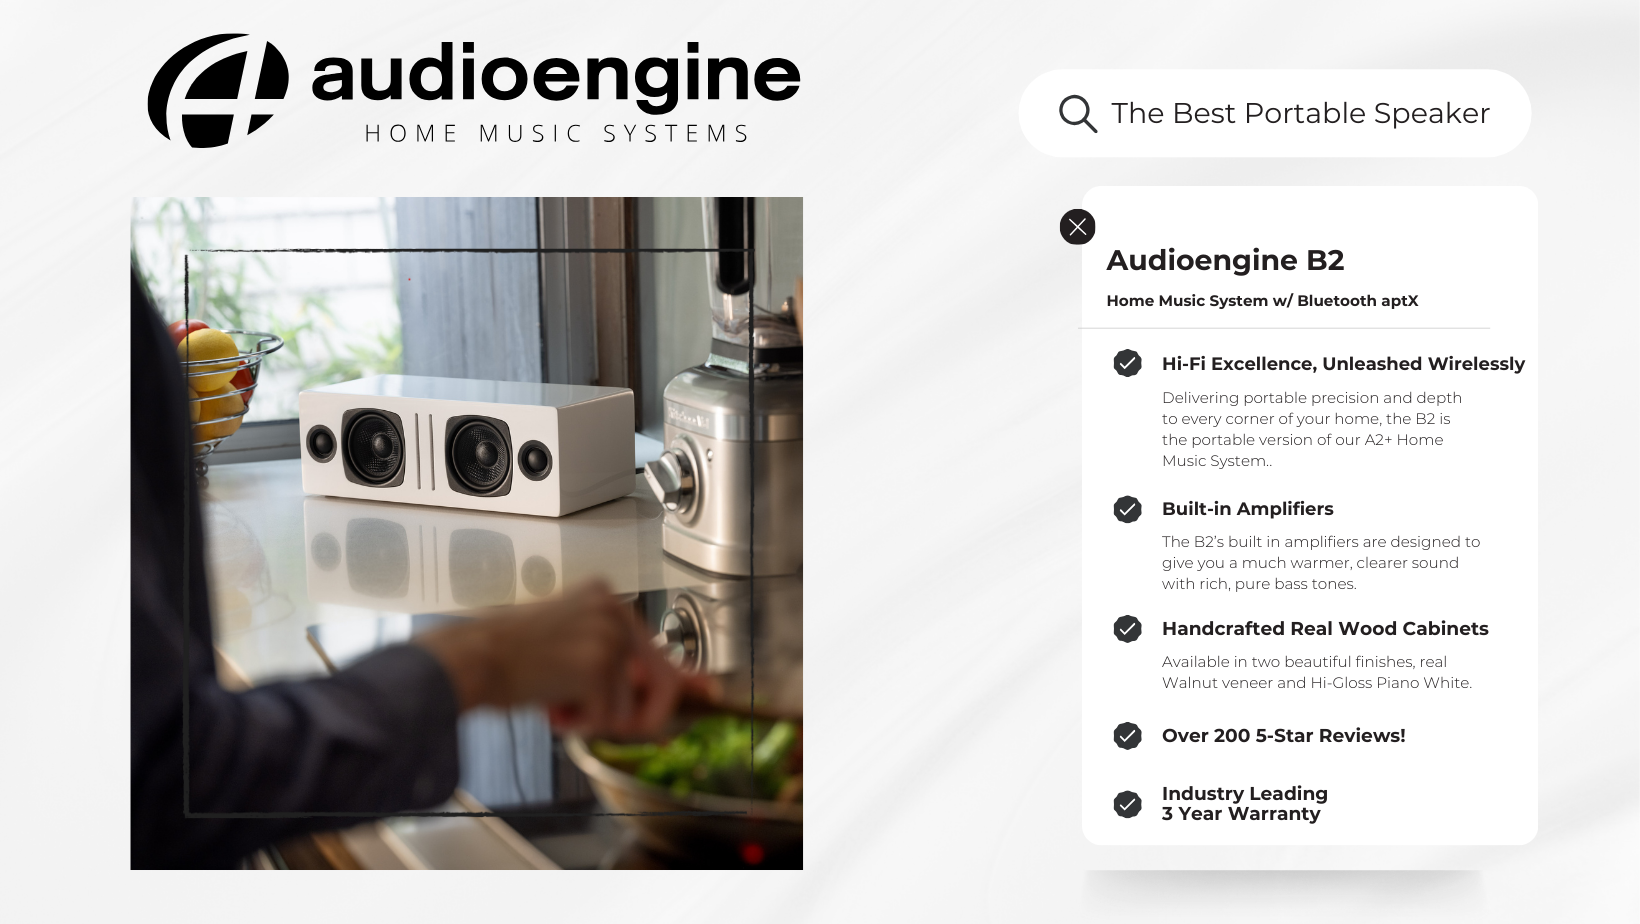
Key Specifications
Bose Music Wave:
- Type: Integrated music system
- Release Year: 1993
- Original Price: $349 (equivalent to $600 in 2024)
- Amplifier: Built-in amplifier
- Drivers: Proprietary Bose speaker technology
- Connectivity: CD player, AM/FM radio, auxiliary input, optional Bluetooth (added later)
- Dimensions: 4.2” H x 14.6” W x 8.6” D
- Weight: 8.7 lbs
Audioengine B2:
- Type: Powered Bluetooth speaker
- Amplifier: 60W peak power total (15W RMS / 30W peak per channel), Class D
- Drivers: 2.75” aramid fiber woofers, 0.75” silk dome tweeters
- Connectivity: Bluetooth aptX, 3.5mm analog input
- Dimensions: 4.25” H x 12.25” W x 5.50” D
- Weight: 10.0 lbs
Key Features

Totorus,” Cat, 2012. https://flickr.com/photos/totorus/8088287827 (accessed July 3, 2024). Licensed under CC BY 2.0.
Bose Music Wave:
- Outdated Design: Combines multiple outdated audio sources in one unit.
- Basic Connectivity: Includes CD player, AM/FM radio, and an auxiliary input. Optional Bluetooth was added much later.
- High Cost: Originally priced at $349, equivalent to $600 today, without offering modern features.
Audioengine B2:
- High-Fidelity Sound: Utilizes premium components for superior audio quality.
- Bluetooth aptX: Provides CD-like audio quality with extended range.
- Handcrafted Cabinets: Made with real wood veneers, available in Walnut and Hi-Gloss White finishes.
- Compact and Portable: Designed for easy placement and portability.
Overall Design
Bose Music Wave: The Bose Music Wave features a dated design that reflects its 1993 release. Its integrated form factor is bulky by today’s standards, making it less suitable for modern home decor. The design focuses on combining multiple outdated audio sources in one unit, which may not appeal to contemporary users.
Audioengine B2: The Audioengine B2 showcases a modern speaker design, with a focus on craftsmanship and premium materials. The hand-crafted wood cabinets not only enhance the acoustic performance but also add a touch of elegance to any room. The compact size and portability make it a versatile option for various spaces.
Playback Capabilities
Bose Music Wave: The Bose Music Wave offers basic playback capabilities, including a CD player and AM/FM radio. These features, while popular in the 90s, are now considered outdated. The optional Bluetooth adapter, added later, lacks the advanced audio quality of modern Bluetooth standards.
Audioengine B2: The Audioengine B2 focuses on delivering high-fidelity sound through its Bluetooth aptX technology and built-in digital to analog converter. This ensures that every playback retains the artist’s original intention with unmatched clarity and detail. The 3.5mm analog input provides additional connectivity options for wired sources.
Other Noteworthy Features
Bose Music Wave:
- Alarm Clock Function: Built-in alarm clock with dual alarms.
- Remote Control: Comes with an easy-to-use remote control.
- Proprietary Waveguide Technology: Enhances sound quality using Bose’s patented technology, though now outdated.
Audioengine B2:
13-Step Painting Process for Hi-Gloss White Finish
Audioengine’s B2 Home Music System in Hi-Gloss White undergoes a detailed 13-step painting process, the same used for a baby grand piano.
This process includes initial sanding to smooth the wood surface, followed by the application of each layer before intermediate sanding ensures a flawless finish.
The surface is polished to achieve a high-gloss, mirror-like finish, like a baby grand piano. Each cabinet undergoes a final thorough inspection, and hand detailing ensures the finish is perfect, resulting in a stunningly elegant and durable Hi-Gloss White cabinet for the B2 Home Music System.
- Magnetic Speaker Grill: Protects the speakers while minimizing distortion.
- Effortless Setup: No network setup, no passwords, just plug and play.
- 3-Year Warranty: Industry-leading warranty and exceptional US-based customer support.
Reliability
Bose Music Wave: Bose’s Music Wave system, while reliable in its time, is now outdated. The brand’s legacy doesn’t compensate for the lack of modern features and the high cost.
Audioengine B2: Audioengine’s B2 Home Music System is highly reliable, with numerous 5-star reviews and a high average rating. The brand’s commitment to quality is evident in the B2’s construction and performance, backed by a comprehensive 3-year warranty.
Pros and Cons
Bose Music Wave: Pros:
- Basic connectivity with CD player and radio
- Trusted brand history
Cons:
- Outdated features and design
- High price point without modern capabilities
- Bulky and less suitable for modern decor
Audioengine B2: Pros:
- Exceptional sound quality with Bluetooth aptX
- Elegant, handcrafted design
- Versatile connectivity options
Cons:
- Lacks integrated audio sources like a CD player and radio
- Slightly heavier and less compact than other modern speakers
Conclusion
Choosing between the Bose Music Wave and Audioengine B2 ultimately depends on your audio needs and preferences. If you value modern sound quality, elegant design, and versatile connectivity, the Audioengine B2 Home Music System is the superior choice. While the Bose Music Wave offers basic connectivity and a legacy brand name, it falls short in terms of modern features and value for money. The Audioengine B2 stands out with its high-fidelity sound, premium materials, and excellent customer support, making it the better option for today’s audio enthusiasts.
- If it’s on and solid, this means the HD6 is powered on, and currently connected to a Bluetooth-enabled device.
- If your source is currently sending the HD6 an aptX signal, the LED indicator on the rear panel will illuminate orange instead of white.
- If it’s on and blinking, this means the HD6 is powered on but not currently connected to a device.
- If it’s off (and HD6 is powered on), this means Bluetooth is in standby and not connected to a device. The HD6, however, is still visible to your device, so simply connect using your device and the HD6 will automatically wake up.
Possibly, it depends on the computer’s operating system, sound capabilities and connection type. If your computer is capable of doing so, our speakers will not prevent this type of use in any way.
For example, if you have a Mac running Snow Leopard or later, you can create a multiple output device to accomplish this. See the link below for how-to instructions on Apple’s site:
The HD6 are capable of providing audio playback for any and all audio that your source device is capable of playing. Your source device would be the device your speakers are currently connected to either via the analog inputs, Bluetooth, or the optical cable. They will play back audio from any streaming service including but not limited to:
- Tidal
- Spotify
- Pandora
- iTunes/Apple Music
- Amazon Music
- YouTube
- Sirius XM
- Qobuz
Bluetooth has a delay of about 30ms (milliseconds) so you can watch videos from Youtube, for example, and stream the audio through your HD6 without any noticeable lag between the video and audio.
The HD6 is not officially supported by any universal remotes. However, you can use a learning remote to copy the signals being sent by the HD6’s remote. Check with the manufacturer of your remote to find out if it supports learning IR codes.
Yes! An AC wall outlet near the HD6 is all you need to power the W3 wireless receiver.
View the short video below to see one of our quality control technicians connect the HD6 left and right channels.
The HD6’s do not come with a dedicated headphone out. If you wanted to use headphones with our HD6 speakers, you’d want to incorporate a headphone amp, like our D1 24-bit DAC/Headphone Amp, into your set up. When using a device like this, the audio would be cut off to your speakers when your headphones are plugged in, allowing you to enjoy the audio coming through the headphones without any interruption from your speakers.
Though the HD6’s are capable of ‘remembering’ up to 6 devices, you can only have 1 source device (phone, laptop, computer, etc) actively paired via Bluetooth with the HD6’s at a time.
The HD6 Bluetooth LED light will blink and be discoverable for 5 minutes once powered on. If in that 5 minute window the speakers are paired to a Bluetooth source, the light will go solid. After the 5 minutes is up, the light will turn off and it will no longer be discoverable and able to pair to new sources, but it will still be on. If the LED is off, a previously connected device can still pair to it at any time from within their device’s Bluetooth menu.
If you want to pair to to a new device, just tap the LED light once more and it will blink and be discoverable for another 5 minutes. If you’re paired to something and want to disconnect from the HD6’s, you can hold the button down the Bluetooth LED for a few seconds before it disconnects.
The Bluetooth 5.0 receiver found in the latest builds of the HD6’s will support the following Bluetooth codecs: SBC, AAC, aptX, and aptX HD.
Once you have set up your HD6 speakers, turn them on using the power switch on the rear panel. The speakers will automatically enter their “pairing mode” when first turned on. The Bluetooth LED on the back of the powered speaker will blink during this time frame.
While the LED is flashing, go into your source device’s Bluetooth menu and then search for nearby Bluetooth devices. Select the HD6’s from the list of nearby devices to pair and connect with the speakers. Once your source device has been paired with the speakers, the LED light on the back should remain solid and on.
At this point, select your favorite tunes and hit play! Keep in mind that you can adjust the volume by using your source device’s volume control along with the volume knob on the front of the speakers. If the volume seems too low, check to make sure the volume is set to an appropriate level with both your source and the speakers.
If you’d like to switch to another Bluetooth source, either press and hold the LED button on the back of the HD6’s until it starts flashing OR go into the Bluetooth menu of your source device and disconnect from there. Once the LED on the HD6’s begins to flash again, you can pair a new Bluetooth source to the speakers.
All digital audio sources will ultimately need to be converted to analog to provide sound through any speaker system. Any optical/Bluetooth input will pass the digital signal on to the HD6’s internal digital-to-analog converter (DAC), while the RCA/3.5mm inputs are already analog and have been converted by the built-in DAC in your source. So it’s a question of which DAC sounds best to you. We would recommend testing each input separately to see which one you prefer!
Type
Powered Bluetooth aptX HD speaker system
Amplifier Type
Class AB
Rated Power Output:
50W RMS per channel (measured in compliance with 16 C.F.R. § 432.3)
Peak Power Output: 75W per channel (AES)
Total Peak Power Output: 150W (AES)
Drivers
5.5″ aramid fiber woofers
1″ silk dome tweeters
Inputs
3.5 mm stereo mini-jack, RCA L/R, digital optical (SPDIF,) Bluetooth aptX
Outputs
RCA variable line-out
Input Voltages
115/240 V, 50/60 Hz manually switchable
SNR
>95 dB (typical A-weighted)
THD+N
Less than 0.05% at all power settings
Crosstalk
<50 dB
Frequency Response
50 Hz-22 kHz ±1.5 dB
Frequency Response w/ Bass Reduction Switch selected
N/A
Analog Input Impedance
48K ohms unbalanced (mini-jack and RCA inputs)
Nominal Impedance
N/A
Input Impedance
N/A
Crossover Frequency
N/A
Protection
Output current limiting, thermal over-temperature, power on/off transient protection, replaceable external main fuse
Power Consumption
Idle: 10 W
Mute: 6 W
Sleep: 4 W
Standby Consumption
N/A
Phase
N/A
Recommended Amplifier Power
N/A
Battery Life
N/A
Battery Charge Time
N/A
Internal D/A Converter
AKM AK4396
Internal BT Receiver
N/A
Input Bit Depth
24 bit (padded)
Bluetooth Receiver Type
Bluetooth 5.0
Supported Codecs
aptX HD, aptX, AAC, SBC
Supported Bluetooth Profiles
N/A
Wireless Operation Range
Up to 100 ft (30 m) typical
Input Data Rate
Determined by Bluetooth
Wireless Latency
~30 milliseconds (ms)
Connector Type
N/A
USB Device Class
N/A
Input Bit Depth
N/A
Input Sample Rate
N/A
Internal D/A converter
AKM AK4396
Input Bit Depth
up to 24 bit native
Sample Rate
up to 192 kHz native
Dimensions (HWD)
Left speaker (active)
Dimensions: 11.75″ (30 cm) x 7.25″ (18.5 cm) x 10″ (25 cm)
Right speaker (passive)
Dimensions: 11.75″ (30 cm) x 7.25″ (18.5 cm) x 10″ (25 cm)
Weight
Left (active) – 17.5 lb (8 kg)
Right (passive) – 12.5 lb (5.5 kg)
Total Shipping Weight
33.5 lb (15 kg)
Shipping Box Dimensions (LWH)
20″ (51 cm) x 15″ (38 cm) x 17″ (43 cm)
Operating temperature: 32 degrees F to 95 degrees F
Non-operating temperature: -4 degrees F to 113 degrees F
Relative humidity: 5% to 95% non-condensing
0.7″ (18 mm) thick MDF cabinets with real wood veneer
1″ (26 mm) silk dome tweeters with neodymium magnets
5.5″ (140 mm) aramid fiber woofers with advanced voice coils
‘-Both analog (3.5mm mini-jack and RCA) inputs are “open” or active, so you can leave 2 audio sources plugged in at the same time.
-The USB (Optical for HD6) and the Bluetooth module share the same DAC (Digital to Analog Converter) If connected to both, the Bluetooth connection will take precedence. If you’re using USB (Optical for HD6) for example, and start using Bluetooth, USB (Optical for HD6) will mute and Bluetooth will take over. If you pause or disconnect from Bluetooth the speakers will automatically switch back to USB (Optical for HD6) after a few seconds.
*Please note, if you have a digital (Bluetooth, USB or Optical) and or multiple analog sources connected and streaming you are able to hear the input sources if they play simultaneously.
Applicable to our A2+, HD3, and HD4 speaker models
All digital audio sources will ultimately need to be converted to analog to provide sound through any speaker system. The USB and Bluetooth inputs will pass the digital signal on to the speaker’s internal digital-to-analog converter (DAC), while the RCA/3.5mm inputs are already analog and have been converted by the built-in DAC in your source. So it’s a question of which DAC sounds best to you. We would recommend testing each input separately to see which one you prefer!
You can do this using powered speakers like our A2+s, HD3s, HD4s, A5+s, and HD6s. For this, you’ll connect the W3 sender to the RCA output on the left speaker, using a 3.5mm stereo-mini to RCA “Y” cable. Then connect the W3 Receiver to the input on your S8. You can either use a 3.5mm stereo-mini to stereo-mini cable for this, or another 3.5mm stereo-mini to RCA “Y” cable; either will work fine. Both W3 units will need to be powered from a USB port. You can use USB AC power adapters, or if the powered speaker you’re using is our A5+ Classic model, you can use the USB port on it’s rear panel for the W3 sender. The same would apply to the S8 subwoofer if you have our current ‘Gen II’ model that has a USB port on the rear panel.

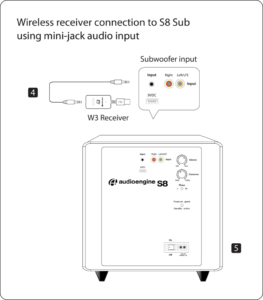
Speaker Setup – How to break in new speakers.
So you just got your brand new Audioengine speakers and you’re ready to pull them out of the box and get them set up so you can start rocking out.
Straight out of the box, your speakers should sound great, but what if your speaker setup could sound better with time?
One thing that you can easily do to make that new speaker setup sound top-notch is a thing called “break-in” and it’s actually really simple.

So why would you want to break the speakers in?
The materials we use for our speakers are quite robust, so right after manufacturing they can be a bit stiff.
One way to help out with this stiffness is to break them in so that these materials, such as the rubber surrounds of the aramid fiber drivers, loosen up. As mentioned earlier, the speakers should sound great from your first listen, but after they move around a bit and loosen up you should notice smoother low end response and sweeter mids/highs.
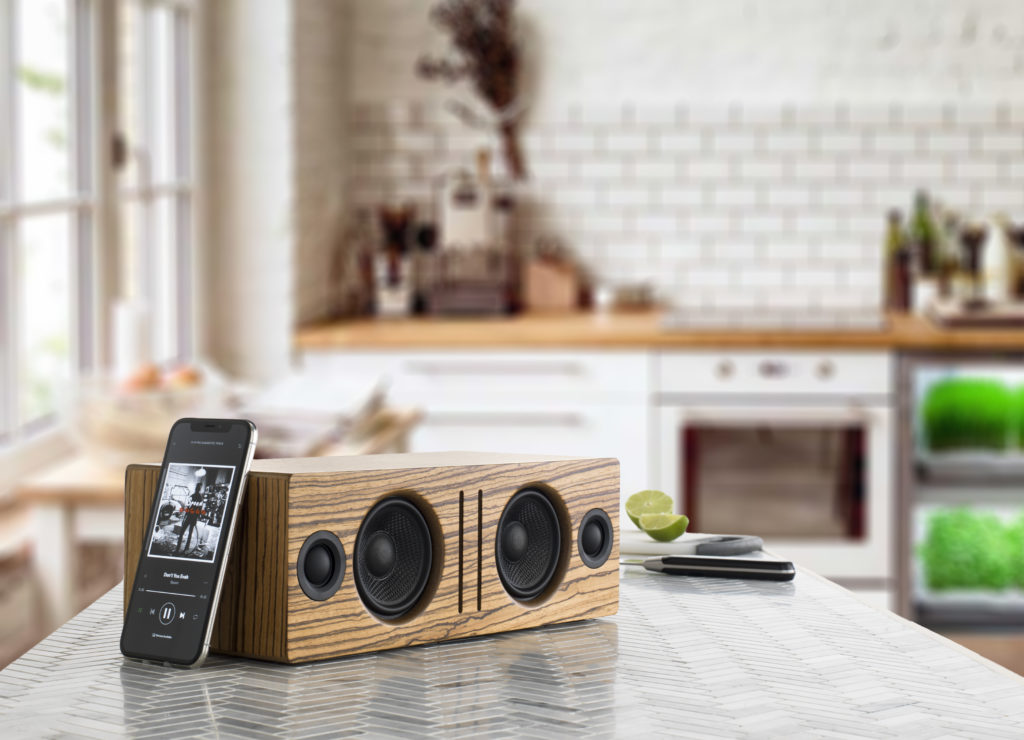
From time to time, we get asked about how to break in new speakers.
The break-in period doesn’t really require anything special other than listening to music and over time your speakers will become more and more broken in.
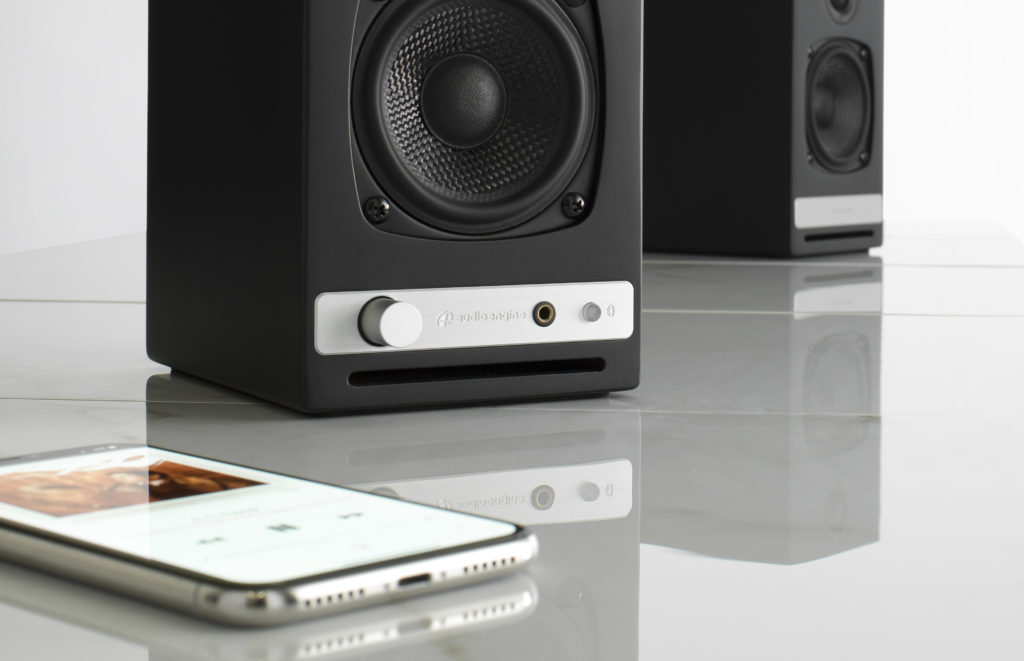
For proper break in, we generally recommend around 40 to 50 hours of at least mid-level playback before doing any critical listening. Some our customers have mentioned that they play tones or white noise while they are away, such as while they’re at work, to help the process along, but we’d recommend just listening to them normally at a medium-level during the break in period.
Breaking in your new speaker setup is a simple and crucial thing to do to make your speakers sound better and open up their potential. Some things do get better with age!
Audioengine – Doesn’t Your Music Deserve It?
6 Simple Wireless Speaker Shopping Tips
So you’ve decided to make the leap from wired to wireless music and might have made the mistake of Googling “Best Wireless Speakers.”

We here at Audioengine know how overwhelming this can be and we extend our deepest sympathies. But it’s time to put your concerns to rest as we’re here to give you some important buying tips… and yes, you may need these tips to make it through this with your sanity intact.
Before we start, let it be known we are not trying to sway you in any particular direction but we only want to make sure you’re aware of a few items that could go overlooked. And the majority of the following advice can be applied to pretty much any purchase you’re making in the audio world.
[Find out what speakers are best for you. Take the quiz]
Price point
As with anything, it is important to start by setting a budget for yourself and finding a product that aligns with this budget.

There are a ton of great wireless products out there, some of them are practically being given away, and others might cost your life savings. No matter your budget, one fact remains: a quality wireless speaker setup doesn’t HAVE to be expensive. Conversely, you often get what you pay for, so it is wise to be wary of a product whose price tag looks more like a shoe size if you catch my drift.
Features
Another important point that will assuredly be different for everyone is the inclusion of features.
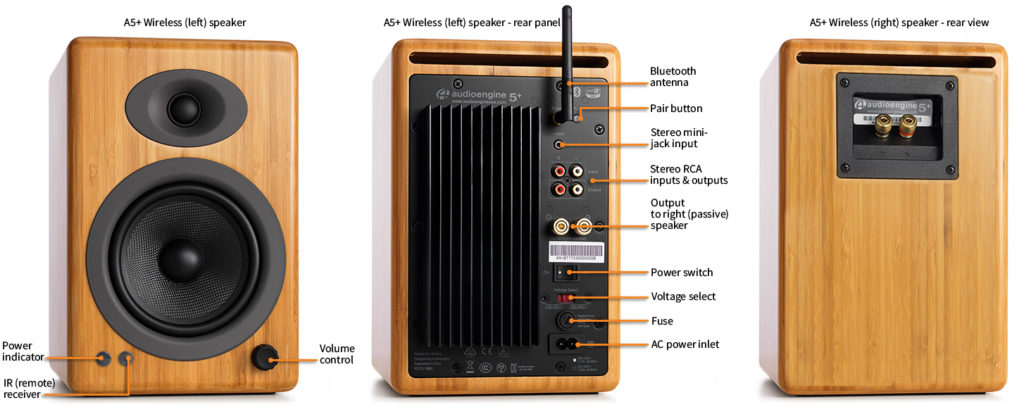
If you’re looking for a simple wireless speaker with no options and no extra inputs, then don’t bother spending hours comparing products that are saturated with bells and whistles. If, on the other hand, you know you want the option to connect an analog device like a stereo or surround sound receiver, for instance, make this determination early and stick with it. There will always be an option to suit your exact needs so don’t feel pressured.
Reviews
Reviews are king in today’s world.
Everything from the usability of a product to the competence of a company’s customer service team can be scrutinized in an online review, and that’s why it’s obviously important to read as many reviews as you can find (and to also read between the lines with some of these). A responsible company addresses negative reactions and does not let any concern go unnoticed. Reviews not only tell us how customers react to a product but how a company reacts to its customers. And the way a company reacts to its customers can tell you whether you’re making a good or bad purchase.
Warranties and trials
This is always a fun one! If you’re having trouble deciding between two or more products because they have the same features and similar reviews, why not go with the one that offers a trial or a better warranty?

The wireless audio market is extremely competitive, and most companies are offering a brief trial period with no penalties or full-coverage or even an extended warranty period. The fact is, a company with a truly great product has nothing to fear and is confident in their product’s ability to satisfy anyone and everyone.
Portability and durability
Where are you going to be using these speakers? Are you going to sling wireless audio from the kitchen to the living room, or are you taking this setup down to the park for a picnic? Do you need the speakers to be battery powered? Waterproof?
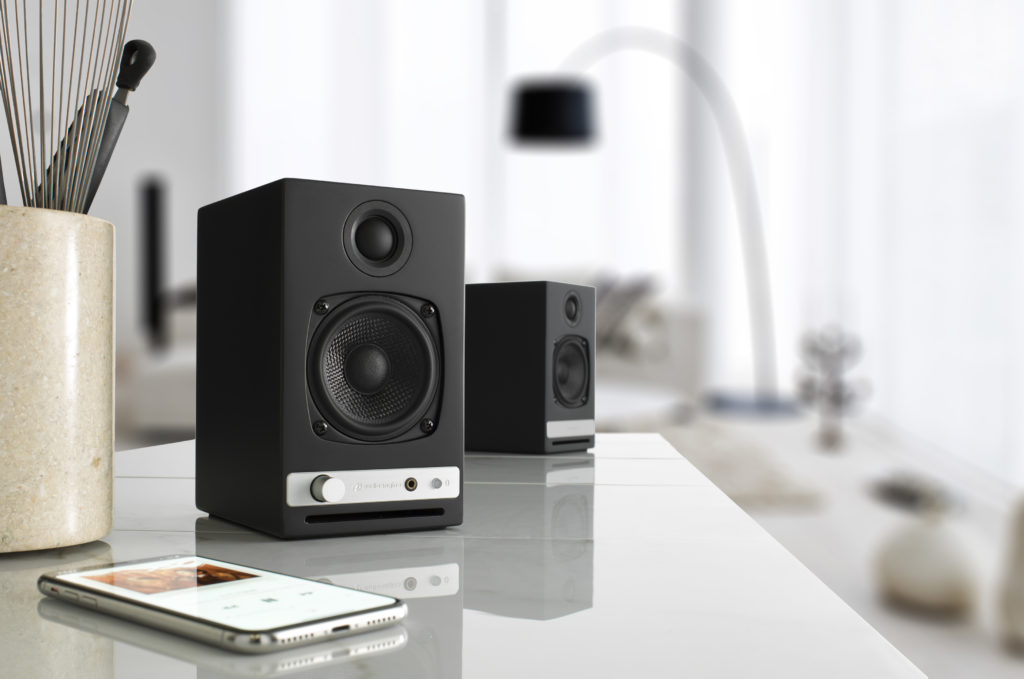
I know, I know, asking way too many questions but you should be asking these questions too! Again, there will always be a product that suits your needs for portability — and often times, if the speakers are easily portable, they will also be durable to some extent. The caveat is that certain other aspects of the speakers will inevitably suffer. Sound quality, aux inputs, wireless range, etc.; these are all things that have the potential to “get the boot” the more portable or waterproof your speakers need to be.
Sound quality and wireless range
Obviously we want our wireless speakers to sound great and to not drop out or lose signal EVER.
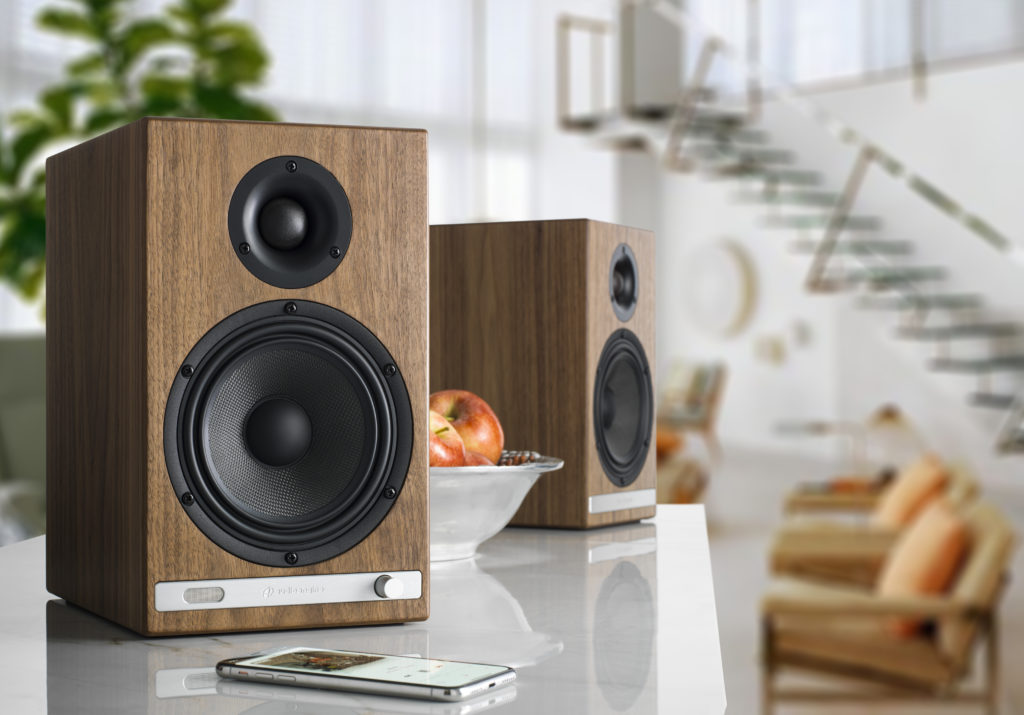
The sound quality of the actual speaker itself is something you may need to derive from customer reviews, unless you have the option to actually hear the speaker before making a purchase. Apart from that, it’s best to read up on the company, what materials they are using, and what the speakers can be compared to, etc.
But when it comes to the sound quality of the actual WIRELESS itself, you’ll need to look out for a few things. Wi-fi or Bluetooth and other fun terms all define different ways a speaker can receive wireless audio information and process it. Each of these has its own pros and cons, and some will be more or less suitable to your particular setup. Wi-fi is good if you want to transmit audio to multiple speakers at once but Bluetooth has a much easier setup and the ease-of-use is a HUGE advantage. But for the best sound quality AND ease-of-use, you will want to look for Bluetooth products that use the aptX or aptX HD “codecs”. These will give you the best audio quality possible, and with Audioengine, the longest range as well. If you wish to get into more technical details about this type of wireless audio, please read our article on Bluetooth aptX HD technology.
In summary, there are a myriad of products on the market and all have their pros and cons. To get started, make a list of things you want and need out of your music system. Determine what is necessary, nice-to-have, and what you don’t need. Then when you make the detrimental error of Googling, “Best Wireless Speakers,” you might make it through to the other side with your sanity intact.
Still struggling with choosing the right speaker? Take our quiz and make it easy!
The D1 is essentially a very high-end external sound card. Its components and implementation of those components make it more capable than what might be built into a computer, not to mention the benefit of moving those sensitive components outside and away from the potentially noisy interior of your computer. All of this means the signal your speakers receive will be clearer, with a lower noise-floor, and with a more pronounced dynamic range over your internal sound card.
The D1 includes a headphone amplifier based on the ES9601C SABRE low noise opamp. This headphone amp is able to provide low-impedance, high-fidelity audio to a wide range of headphones. We’ve found the sweet spot for the D1 is headphones that measure between 20 and 300ohms. The resistance of a pair of headphones can tell you a little bit about how much power they need, though other variables do have an impact as well. We have heard from customers with headphones measuring as much as 600ohms who say they’re happy with the output of the D1.
All Optical audio is considered a “fixed” output, meaning volume will not attenuate from the TV remote. If you have an HD5/HD6 you can use the Audioengine remote for this. Fo
The Gen 1 24-bit D1 requires a USB 2.0 cable to work properly. If your computer has USB-C inputs, use a 2.0 USB cable with a type C-to-A USB adapter.
The D3 is essentially a very high end external sound card. Its components and implementation make it more capable than what might be built in to a computer, not to mention the benefit of moving those sensitive components external to the potentially noisy interior of your computer. All of this means the signal your speakers receive will be clearer, with a lower noise-floor, and with a more pronounced dynamic range over your internal sound card.
Although D3 may work just fine when connected to most USB hubs, this is not recommended as the data rate may not be fast enough for higher-resolution music. We therefore suggest you select a high-speed USB bus all by itself and don’t use a USB port on your keyboard, for example.
Your D3 will sound great out of the box and will get better over time. We do generally recommend playing music for 40 to 50 hours before doing any critical listening, though.
Try removing all other USB devices temporarily, and try each USB port on your computer one at a time to see which one works best in your setup. USB audio needs quite a bit of bandwidth, so for best results ensure your D3 is on a “High-Speed” bus and not a “Full-Speed” bus.
The short answer is yes! You can use TIDAL on any compatible source device (PC, Mac, iPhone Android, etc.). The B1 is compatible with most all of these devices as well since they almost universally also include Bluetooth.
The overall range you can expect will vary depending on the device you use with the B1. We tested using mostly a variety of smartphones though, and found 100 FT to be a realistic expectation, and that’s through one wall.
It depends on the device it is connected to. Most Android devices and computers can rename the device, but only for that specific connection. The B1 will still show as Audioengine B1 to a different device. You may also be able to change the name when using Apple products, but it will depend on the operating system.
You could use a B1 to stream Bluetooth audio in your car if you use USB power from either a cigarette lighter USB power adapter or USB port, and your car audio has an aux 3.5mm input. You can then pick up a RCA to 3.5mm adapter for the connection and the B1 will be ready to pair to your device/play through the car stereo. Let us know if you have any other questions.
For starters, try pressing the Bluetooth LED on the front of the B1 to confirm it’s not on. If the device that was paired with the B1 last is out of range or has been turned off, the light on the front of the B1 will turn off and remain off until the LED button is pressed.
From there, to assure it’s not simply an issue with one of the accessories, swap out the USB cable and the USB AC adapter to see if that fixes things. If you have a micro USB cable laying around from an older cell phone model, you would be fine using that. And most current cell phone USB power adapters would work just fine with the B1.
If you have no success with either of the above, try plugging the B1 into a different power outlet to see how the unit reacts. If there is still no indication of the unit powering on, please contact our Support Team for further assistance.
Bluetooth receiver type
Bluetooth 5.3
Supported Bluetooth codecs
aptX HD, aptX, AAC, SBC
Supported Bluetooth profiles
A2DP, AVRCP
Inputs
Bluetooth
Outputs
Stereo analog RCA
Digital optical (SPDIF)
Required power
5V, 200mA
Wireless operation range
Up to 100ft (30m) typical
Full-scale output
2.0V RMS
Output impedance
57 Ohms
D/A converter
Wolfson WM8740
Power filtering
3-stage redundant regulation
SNR
SNR (DC to 20 kHz)
100dB
THD+N
(1 kHz FS 96 kS/s) <0.02%
Frequency response
10Hz – 20kHz (+/-0.5dB)
Crosstalk
>-86dB
Input bit depth
24-bit (upsampled)
Input data rate
Determined by Bluetooth
Latency
~30 milliseconds (ms)
Product dimensions
3.5 x 4 x 1
Shipping weight
1.0lbs (0.5kg)
Shipping box dimensions
11 x 7 x 3
Environmental Requirements
Operating temperature: 32° to 105°F (0°C to 40°C)
Storage temperature: -4°0 to 115°F (-20°C to 46°C)
Relative humidity: 5% to 95% non-condensing
Included accessories
RCA audio cable (3ft/1m)
Power adapter with detachable cable
Microfiber bag
Setup guide
Technical Features
Supports all Bluetooth-enabled devices
High-fidelity Bluetooth with aptX transmission and extended range
Stream high-resolution 24-bit digital audio from the Audioengine B1 to any music system.
Includes built-in Wolfson WM8740 DAC for superior 24-bit upsampled playback
Aluminum case with audiophile-grade connectors
Analog and optical outputs
2.0Vrms maximum output level
Experience stunning audio quality with aptX HD coding, built-in 24-bit upsampling DAC, and extended wireless range.
DAC Characteristics
The B1 Bluetooth Receiver utilizes the Wolfson WM8740 DAC, widely known for its low noise and high fidelity. B1 is essentially an upsampling 24-bit Bluetooth DAC and will pad all bit depths internally to 24-bits, thus achieving a higher signal-to-noise ratio. Due to the WM8740’s high signal-to-noise specs, the fact that the digital signal is converted (upsampled) to 24-bits and the added benefit of triple redundancy power source conversion and filtering, the B1 presents impressive low noise and low distortion characteristics with a noticeable improvement over other Bluetooth devices.
Extended Range
Most Bluetooth implementations have very limited range, usually within just one room. But with careful signal management circuitry and antenna tuning, we offer a superior solution that will reach more than one room with no degradation in audio quality.
High quality Bluetooth audio
The B1 features aptX HD coding which is an advanced Bluetooth audio codec that provides much higher-quality sound than previous versions. The B1 is backwards-compatible with all previous Bluetooth implementations as well, so you can wirelessly stream music from any device and still enjoy outstanding sound.
Optical Output
B1 also functions as a wireless audio bridge from your device to your favorite DAC or preamp. Use the internal DAC with RCA analog outputs or connect the optical output into another DAC.
Adding Bluetooth to Your Stereo Receiver or Amplifier: A Practical Guide with the Audioengine B1
In the current landscape of digital music, the convenience and versatility of Bluetooth connectivity have become increasingly essential for music enthusiasts. Those with traditional stereo receivers or amplifiers often find themselves at a crossroads, seeking to bridge the gap between their cherished, high-quality equipment and the modern world of wireless audio streaming.
This scenario raises the question: How to add Bluetooth to a stereo receiver or amplifier without compromising on sound quality? Enter the Audioengine B1 Bluetooth Receiver, a product that has risen to become one of our best sellers, thanks to its significant improvement in audio quality over competing solutions.
Why Consider Bluetooth for Your Audio System?
The shift towards wireless audio streaming is driven by several factors:
- Convenience of Wireless Technology: Eliminating the need for physical cables, Bluetooth allows for a clutter-free and flexible listening experience. The ability to control music from a distance is not just about comfort; it’s about integrating your audio system into a wireless world seamlessly.
- Access to a Wide Range of Devices: Bluetooth enables your stereo system to connect with a variety of modern devices, including smartphones, tablets, and laptops. This compatibility opens up a world of possibilities, from streaming services and digital libraries to podcasts and online radio.
- Ease of Use: The ability to control your music wirelessly means you can change tracks, adjust volume, and switch between devices effortlessly, all from the device in your hand.
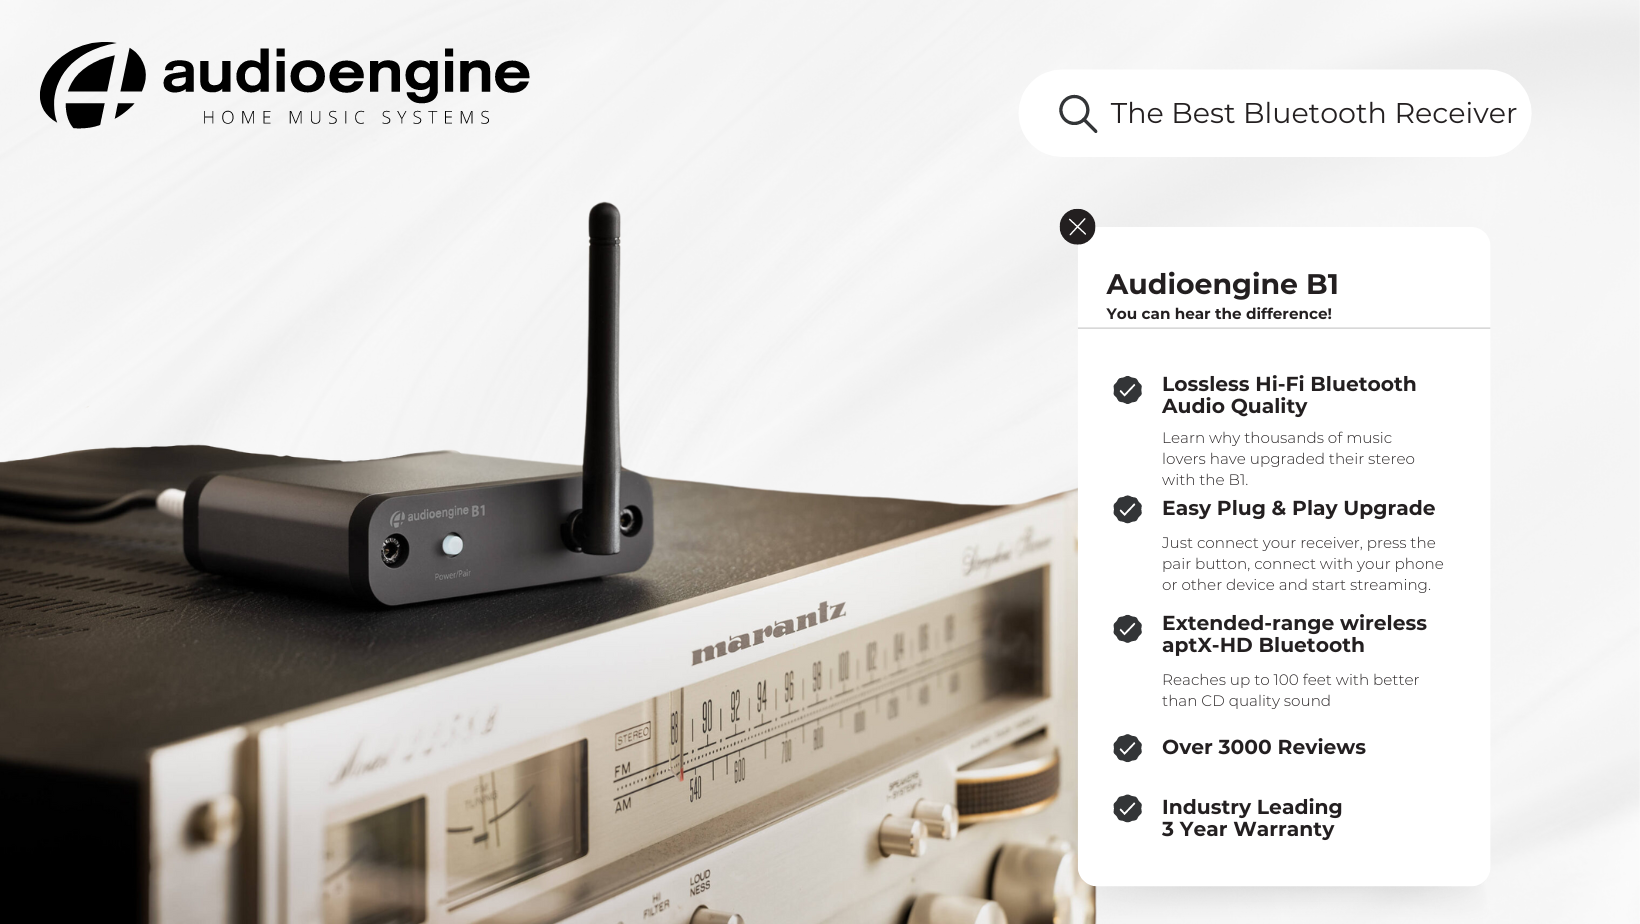
The Audioengine B1: Enhancing Traditional Systems with Modern Technology
The B1 Bluetooth receiver allows you to cast music and other audio from your device and send it out to any music system, without losing any sound quality along the way—even to those extended ranges. It works great with those vintage systems that have been waiting in the wings.
The Audioengine B1 Bluetooth Receiver has earned its place as a top seller by addressing the common pitfalls of wireless audio. Here’s how:
- Better than CD Sound Quality: The B1 stands out from its competitors by delivering an audio experience that’s both clear and rich. It leverages advanced technology to ensure that the sound transmitted over Bluetooth is faithful to the original recording. The B1 delivers high-quality, extended-range, CD-like quality sound anywhere in your home.
- Simple and Universal Compatibility: Designed for hassle-free integration, the B1 connects easily with any stereo receiver or amplifier, making the setup process straightforward for all users.
- Reliability: The B1 is known for its stable and consistent Hi-Fidelity Bluetooth connection, ensuring uninterrupted music playback.
Implementing the B1 in Your Audio Setup
- Making the Connection: Link the B1 to your stereo system using the provided cables, connecting it to an available input on your receiver or amplifier.
- Powering the Device: Plug the B1 into a power source, readying it for use.
- Bluetooth Pairing: Activate Bluetooth on your device and select the B1 to establish a connection.
- Begin Streaming: Your stereo system is now equipped to wirelessly receive audio from a range of Bluetooth-enabled devices.
Advantages of the Audioengine B1
While the B1’s primary goal is to introduce Bluetooth functionality to traditional systems, its benefits extend further:
- Preservation of Audio Quality: One of the key strengths of the B1 is its ability to maintain the integrity and richness of your music, a feature that has been a significant factor in its popularity.
- Compact and Unobtrusive Design: The B1’s sleek and minimalistic design ensures it fits seamlessly into any audio setup without becoming an eyesore or occupying unnecessary space.
- Versatility in Use: The B1 is not limited to streaming music; it enhances the audio experience for movies, gaming, and other multimedia applications.
Just a few MORE reasons why you’ll love the B1 Bluetooth Music Receiver:
- Easy setup, connects in seconds
- No network setup, no passwords, no hassle
- Extended-range wireless aptX-HD Bluetooth, reaches further with CD-like quality sound
- Connects to any music system
- Analog and optical outputs
- Bluetooth aptX LED indicator
- CD-like quality audio with aptX-HD Bluetooth
Conclusion
The addition of Bluetooth to your stereo receiver or amplifier represents more than just a technological upgrade; it’s a step towards bringing your audio experience in line with the evolving digital world. The Audioengine B1 Bluetooth Receiver offers an ideal solution, balancing the need for wireless convenience with the uncompromised audio quality. Its success as one of our top sellers is a testament to its ability to meet the demands of discerning audiophiles looking to modernize their audio systems.
Our A2+’s are an all-in-one system with no extra components needed except your phone or computer. Simply place the speakers where you want them and connect the power supply. Hook up the included speaker wire from the powered left speaker to the right passive speaker. Then connect your music source with the supplied cables – or go wireless with any Bluetooth enabled source device, like a computer, smartphone, or tablet.
Here is a quick video that can be used as a reference:
(Please note – there is no audio associated with the video.)
This sometimes happens when the speakers and turntable share the same surface. The vibrations from the speakers playing feedback into the turntables stylus, causing unwanted noise. The best way to mitigate this would be to place the speakers on a different surface. If that’s not an option, we’d recommend trying out some isolation stands. For larger speakers like A5+ and HD6, the ones made by Isoacoustics work well.
On the A2+ Wireless/HD3 models with an external power supply brick, first test it by plugging into wall power and observing the LED light on the brick to see if its solid, blinking, out. If it’s blinking or out, the power supply is likely faulty.
If the light is solid, proceed to plugging into the speaker and observe the power supply brick LED once more. If it’s blinking or out, there is likely an issue with the internal amp. Contact support if either has an issue.
Yes! As long as your speakers have an analog output (either RCA outputs or a 3.5mm stereo mini output), you can absolutely connect the S6 to your powered speakers. With the exception of the B2, all of our powered speakers will have the outputs needed to connect the S6, this includes the original A2 and A5 models.
You can simply use RCA cables to connect the S6 to the A2+, HD3, HD4, A5+, A5+Wireless, and HD6 speaker models.
For the A1 and A1-MR speakers, you can use one side of your stereo RCA cables. Just use the left/white RCA cable, and leave the red RCA disconnected to prevent an accidental ground loop.
** Please note: a 3.5mm/stereo mini cable will not work with the ‘Subwoofer’ output on the back of your A1/A1-MR speakers. **
Kanto YU2 vs Audioengine A2+: Table of Contents
- Introduction
- Main Differences Between Kanto YU2 and Audioengine A2+
- Key Specifications
- Overall Design
- Playback Capabilities
- Kanto YU2 Overview
- Audioengine A2+ Exclusive Advantages
- Customer Service and Warranty
- Pros and Cons
- Conclusion
Introduction
In the competitive world of desktop audio systems, the difference between an average and exceptional experience is marked by details that go beyond mere volume. The Audioengine A2+ and Kanto YU2 both strive to dominate this niche, but the A2+ stands out significantly in both performance and design.

Main Differences Between Audioengine A2+ and Kanto YU2
- The Audioengine A2+ excels with its Class AB amplifier, known for superior sound quality, over the Kanto YU2’s Class D amplifier.
- The YU2 does not support Bluetooth. The A2+ supports Bluetooth with Qualcomm’s advanced aptX codec offering clearer, more versatile connectivity than the wired capabilities of the YU2.
- With discrete analog crossovers, the A2+ ensures a more refined audio separation compared to the YU2’s digital approach.
- Front-ported speakers, like the Audioengine A2+, offer greater flexibility in placement and better bass response in confined spaces compared to rear-ported designs, like the Kanto YU2, which require more room to avoid bass buildup and distortion.
Key Specifications
Audioengine A2+:
- Amplifier Type: Class AB Analog
- Power Output: 60W Peak Power Total (30W Peak per Channel)
- Inputs: 3.5mm Stereo Mini-Jack, RCA, USB, Bluetooth aptX
Kanto YU2:
- Amplifier Type: Class D
- Power Output: 100W Peak Power (50 Watts Total RMS)
- Inputs: 3.5mm Mini-Jack AUX, USB, NO RCA INPUT
Overall Design
Audioengine A2+ not only prioritizes acoustic quality but also highlights detailed attention to design. Each speaker is hand-crafted from real wood and hand-painted using the same 13-step process as a baby grand piano. This not only enhances the aesthetic of any setup but also improves audio performance by reducing unwanted resonances, providing a warmer and more natural sound compared to materials like plastic or metal. This level of craftsmanship is not seen in the Kanto YU2, which opts for a more simplistic approach, lacking the A2+’s hand-painted and handcrafted real wood finish.
Playback Capabilities
The A2+ leverages its powerful Class AB amplifier to deliver an expansive and detailed sound, making it ideal for diverse audio settings from quiet background music to party-level sound without distortion. In contrast, the Kanto YU2, although capable within smaller spaces, struggles to maintain clarity at higher volumes due to its Class D amplifier configuration, highlighting the A2+ as the more versatile and superior-sounding option.
Kanto YU2 Overview
The Kanto YU2, while a competent competitor in the budget speaker market, is designed with basic functionality in mind. It offers a basic digital audio connection via USB and a minimal physical footprint, making it suitable for desktop environments where space is at a premium. However, it lacks the robust feature set and acoustic fidelity that define the A2+, positioning it as a more entry-level option.
Audioengine A2+ Exclusive Advantages
Beyond delivering exceptional sound quality, the A2+ excels with user-friendly features such as extended-range wireless Bluetooth aptX and multiple input options, ensuring seamless connectivity across devices. This simplicity extends to the speaker’s operation, where inputs are always ready to accept signals without the need to toggle between sources manually, making the A2+ both powerful and incredibly convenient for daily use.
Customer Service and Warranty
Audioengine is dedicated to exceptional customer service and reliability, offering a comprehensive 3-year warranty on all products, which far surpasses the industry standard. This commitment is highlighted by the unique 30-day audition period, allowing customers to experience the quality of the A2+ in their own space. Moreover, Audioengine prides itself on US-based customer phone support where clients can speak directly to knowledgeable staff who work collaboratively to resolve any issues. This contrasts with Kanto’s offering, which includes only a 2-year warranty, reflecting a lesser commitment to customer assurance and product longevity.
Pros and Cons
Audioengine A2+:
Pros: Exceptional sound quality due to class AB amplifier and integrated DAC; handcrafted, hand-painted real wood design; versatile connectivity; superior customer support.
Cons: Fewer color options and slightly taller design.
Kanto YU2:
Pros: Suitable for limited-space setups and seven color options
Cons: Compromised sound quality at higher volumes, less detailed design, and compressed customer service.
Conclusion
Comparing the Audioengine A2+ and Kanto YU2 reveals a clear disparity in quality and value. The A2+ not only outperforms the YU2 in terms of sound and design but also in its comprehensive feature set and customer-centric offerings. For those seeking a superior desktop audio experience, the A2+ proves an unbeatable choice. Cementing A2+’s position as the preferred system for both audiophiles and casual users seeking premium sound on their desktop.
You can absolutely still use the A2+ Wireless and it will sound great. AptX is a high-quality Bluetooth audio codec that works really well. In addition aptX, and the default Bluetooth codec SBC, The A2+ Wireless support other high quality audio codecs, like AAC for use on Apple iPhone and iPads, as well as Android devices that do not include aptX.
The A2+ Wireless work excellent via Bluetooth, but they can also be used wired, with more traditional source devices like Turntables, CD players, or anything else with a standard analog audio connection like RCAs or 3.5mm stereo-mini. They also include a USB port for use with a Windows or Mac computer, as well as many Smartphones and Tablets with the right USB adapter cable.
In most cases, Yes! The overall range you can expect will vary depending on the device you use with the A2+ Wireless, as well as things like the type of construction used in walls you’ll be transmitting through. In our testing, most mobile devices like smartphones and tablets will have the best range, some of which can exceed 100 ft in good conditions, even through one wall. Laptops and desktop computers in our testing generally had less overall range with an average of around 70 ft in similar good conditions through a single wall.
No extra software or drivers are needed. The A2+ Wireless is compatible with any device that supports Bluetooth, and the A2DP profile for streaming stereo audio. This includes most smartphones, tablets, and computers. For computers that don’t include BLuetooth support out of the box, you can simply add a USB Bluetooth adapter.
The same is also true for the USB connection on the A2+, which uses plug-and-play drivers provided by your computer’s OS. The A2+ USB input is compatible out of the box with Windows and Mac computers, iPhones and iPads when using Apple’s lightning USB 3 adapter along with a fast wall charger, and should work with most Android Smartphones and Tablets as well.
No. The Bluetooth and USB inputs both share the internal DAC for processing, so you can only listen to one at a time, with Bluetooth taking priority. If you’re using USB for example, and start using Bluetooth, the USB signal will cut and Bluetooth will take over. Depending on your source, if you pause or disconnect from Bluetooth the speakers may automatically switch back to USB after a few seconds.
Our woofers are made of aramid fiber and the tweeter domes are silk. Both of these materials are very robust and can handle quite a bit of abuse. For our A-series speakers we decided against grill covers as they do tend to color the sound a bit. However, without speaker grills they are more cat and kid-friendly! If you do prefer speakers with grills, you can check out our HD3 speakers here:
https://dev-v2.audioengine.com/shop/wirelessspeakers/hd3-wireless-speakers/
Absolutely! You will need to pick up Apple’s Lightning to USB 3 Camera Adapter, which allows a USB connection to the iPad (and, as of iOS7, the iPhone). Then just hook up as you would from a computer. You can even charge your iPhone or iPad while you use it this way!
Yes, you can. The A2+ Wireless speakers use a switching power supply so it will automatically convert to the different voltage. The power cable is also detachable which makes it convenient to replace the AC plug with a different type if you don’t want to use an adapter plug.
Not necessarily. Audioengine speakers and amplifiers are very efficient. Also, we designed them together as a system; so, we therefore get more volume output than stereo receivers or amplifiers that might have higher wattage or power numbers. Due to this tuning, we achieve big sound outputs with a fraction of the power required by other systems.
Each speaker is 6″ (15.2 cm) x 4″ (10.2 cm) x 5.25″ (13.3 cm)
If you are experiencing issues with your speakers when connected via USB on a Windows 10+ operating system, it might be due to the DCH (Declarative, Componentized, Hardware Support Apps) drivers. While DCH drivers offer many benefits, they can sometimes cause compatibility issues with USB audio devices, resulting in problems such as delays when sound starts, poor audio quality, or the speakers not being recognized properly.
Solution: To resolve these issues, we recommend switching from DCH drivers to non-DCH (standard) drivers. Here’s a step-by-step guide to help you do that:
- Uninstall the Current DCH Drivers:
- Open the Device Manager on your PC.
- Locate your audio device under “Sound, video, and game controllers.”
- Right-click on the device and select “Uninstall device.”
- Ensure you check the option to delete the driver software for this device to completely remove the DCH drivers.
- Download the Non-DCH Drivers:
- Visit the support website of your motherboard or computer manufacturer.
- Navigate to the driver download section and find the non-DCH Realtek (or appropriate) audio drivers for your system.
- Install the Non-DCH Drivers:
- Download and run the installer for the non-DCH drivers.
- Follow the on-screen instructions to complete the installation process.
- Restart Your PC:
- After installing the non-DCH drivers, restart your computer to apply the changes.
By switching to non-DCH drivers, the compatibility issues with your USB speakers should be resolved, allowing you to enjoy optimal audio performance.
Additional Tips
- Check for Firmware Updates: Ensure your speakers have the latest firmware installed. Visit the manufacturer’s website for firmware updates that may improve compatibility and performance.
- USB Ports: Try connecting your speakers to a different USB port to see if the issue persists.
- Contact Support: If you continue to experience issues, please contact our customer support team. Provide details about your operating system, motherboard model, and the specific problems you are encountering.
We hope this helps you resolve any issues and enhances your experience with our speakers. If you have further questions or need assistance, don’t hesitate to reach out to our support team.
If you’re looking to enhance the bass on your A2+ Home Music System, there are a few steps you can take to achieve the sound you’re looking for:
- Speaker Positioning:
The placement of your speakers can have a significant effect on bass performance. Try placing the speakers closer to a wall, which can naturally amplify the bass. Additionally, ensure that the surface they’re on is stable, as vibrations can impact sound quality. - Use of Equalizer Software:
Windows 11 has built-in sound enhancements, but for more detailed control over the bass and other sound frequencies, we recommend using third-party equalizer software. One highly recommended option is a DSP correction software specifically designed for A2+ Home Music System. You can find more details about this software and how to use it in this article: Enhancing Audioengine A2+.
This software allows for precise adjustments of the bass and other sound settings to give you a more customized listening experience.
If you need any further assistance or have additional questions, feel free to contact our support team!
This issue occurs because some computers fail to “wake up” the USB port after a period of inactivity. While our A2+BT uses UPnP drivers for maximum compatibility, the USB connection is identified as an external DAC by most systems. Recent operating system updates for Mac and Windows have made this issue more frequent.
1. What solutions can I try to resolve this issue?
The solution often requires trial and error based on your specific computer setup. Many customers have found helpful tips and solutions in the following resources:
- For Mac users: Apple Community Thread
- For Windows users: StarTech USB Issues FAQ
2. Is there a difference in audio quality when using USB/Bluetooth versus analog connections?
Yes, there is a difference. Here’s what you need to know:
- USB/Bluetooth Connection: This uses the digital-to-analog converter (DAC) built into the A2+BT speakers, which is 16-bit.
- Analog Connection (RCA or 3.5mm inputs): This uses the DAC in your computer or device. Since most modern computers support 24-bit or even 32-bit audio, you’ll achieve better sound quality when using an analog connection.
3. How do I know which connection type is best for me?
- If you prioritize convenience or wireless functionality, USB or Bluetooth is a great choice.
- If you’re looking for the highest audio fidelity, consider using analog connections like RCA or a 3.5mm mini-jack.
If you need further assistance, feel free to reach out to our support team. We’re here to help!
- If it’s on and solid, this means the A2+ Wireless is powered on, and currently connected to a Bluetooth-enabled device.
- If it’s on and blinking, this means the A2+ Wireless is powered on but not currently connected to a device.
- If it’s off (and A2+ Wireless is powered on), this means Bluetooth is in standby and not connected to a device. The A2+ Wireless, however, is still visible to your device, so simply connect using your device and it will automatically wake up.
Yes! If your tablet or smartphone has a USB output and supports USB audio (refer to the manufacturers’ documentation), then it will work with A2+ Wireless’s USB input. You’ll most likely also need an OTG adapter cable to connect from your tablet to the USB input on the A2+ Wireless. These are generally available from the manufacturer of your tablet/smartphone, local electronic stores, or even online retailers.
The headphone outputs on many computers will sound great with the A2+ Wireless. Some do have poor audio quality though, so if this is the case for your computer, try connecting from the USB port to your with A2+ Wireless, or connect wirelessly via Bluetooth.
While the DAC in the A2+ Wireless is better than what is built into most computers, adding a 32-bit DAC, such as our D1, D1P or DAC3, would still be a benefit to audio quality.
Type
Powered Bluetooth aptX speaker system
Amplifier Type
Class AB
Rated Power Output:
15W RMS per channel at 4 ohms (measured in compliance with 16 C.F.R. § 432.3)
Peak Power Output: 30W per channel at 4 ohms (AES)
Total Peak Power Output: 60W (AES)
Drivers
2.75” aramid fiber woofers
0.75“ Silk dome tweeters
Inputs
3.5 mm stereo mini-jack, RCA L/R, USB, Bluetooth
Outputs
RCA variable line-out
Input Voltages
100-240 V 50/60 Hz auto-switching
SNR
>95 dB (typical A-weighted)
THD+N
Less than 0.05% at all power settings
Crosstalk
<50 dB
Frequency Response
65 Hz-22 kHz ±2.0 dB
Frequency Response w/ Bass Reduction Switch selected
N/A
Analog Input Impedance
N/A
Nominal Impedance
N/A
Input Impedance
10K ohms unbalanced
Crossover Frequency
N/A
Protection
Output current limiting, thermal over-temperature, power on/off transient protection
Power Consumption
Idle: 10W
Standby Consumption
N/A
Phase
N/A
Recommended Amplifier Power
N/A
Battery Life
N/A
Battery Charge Time
N/A
Internal BT Receiver
Qualcomm QCC 3031/3034
Input Bit Depth
16 bit
Bluetooth Receiver Type
Bluetooth 5.3
Supported Codecs
aptX, AAC, SBC
Supported Bluetooth Profiles
N/A
Wireless Operation Range
Up to 100 ft (30 m) typical
Input Data Rate
Determined by Bluetooth
Wireless Latency
~30 milliseconds (ms)
USB Specifications
Connector Type
Micro-USB
USB Device Class
type 1.1 and above
Input Bit Depth
up to 16 bit native
Input Sample Rate
up to 48 kHz native.
Internal D/A Converter
Dimensions (HWD)
Each speaker – 6″ (15.2 cm) x 4″ (10.2 cm) x 5.25″ (13.3 cm)
Weight
Left (active) – 3.6 lb (1.6 kg)
Right (passive) – 3.2 lb (1.4 kg)
Total Shipping Weight
10 lb (4.6 kg)
Shipping Box Dimensions (LWH)
15” (38.1 cm) x 7” (17.8 cm) x 10.5” (26.7 cm)
Operating temperature: 32 degrees F to 95 degrees F
Non-operating temperature: -4 degrees F to 113 degrees F
Relative humidity: 5% to 95% non-condensing
0.7″ (18 mm) thick MDF cabinets
0.75″ (20 mm) silk dome tweeters with neodymium magnets
2.75″ (70 mm) aramid fiber woofers with advanced voice coils
To minimize unwanted resonances and distortion, Audioengine cabinets have thick high-resin MDF walls with extensive internal bracing. Heavy internal sound-damping material is used to reduce unwanted sound reflections inside the cabinet. All cabinet edges are rounded which look great and reduce high-frequency diffraction effects on the front baffles. The A2+ cabinet contains tuned, front-port slots.
The A2+ cabinets are available in several handsome, high-gloss finishes, including black, white and red paint, offering a modern compliment to any small space or desktop.
Audioengine designs and manufactures our own tweeters, woofers, and other critical components. In other words, these are not “box built” speakers with off-the-shelf parts but custom-designed to our specifications. What we do not fabricate directly in our factory we have made to our designs (parts such as transformers, magnets, and wiring harnesses, for example). The cabinets, drivers, bass port designs, amplifiers, and crossovers are all painstakingly tuned together for each Audioengine model. This, in turn, makes for a much more efficient system that requires much less power than passive speakers and a separate integrated amplifier or similar A/V components.
Studio monitor speakers are used by producers and engineers in recording and production studios. They are designed with a theoretical flat frequency response which allows the engineer to create a final mix in such a way that the recorded music will sound good on most other speakers. Although Audioengine speakers are not designed to be up-close “nearfield” studio monitors, we do carry over much of the same higher-end technology, components, and design philosophy for all Audioengine speaker systems.
The speaker cabinets, drivers, innovative bass port designs, amplifiers, and passive crossovers are all critically tuned together for each Audioengine model. This, in turn, makes for a much more efficient system that requires less power than passive speakers and a separate integrated amplifier or similar A/V components. We build all this goodness into the left speaker cabinet to make it super-easy to connect your smartphone, tablet, computer, TV, network player or any other audio product.
The Bluetooth built into the A2+ Wireless speakers features aptX coding which is an advanced Bluetooth audio codec with very impressive sound. And even if your phone or tablet does not have aptX, the A2+ Wireless Bluetooth solution is backwards-compatible with SBC and AAC codecs, so you can wirelessly stream music from any Bluetooth-enabled device and still enjoy all your music. High-fidelity Bluetooth aptX that really works and sounds great.
Extended-range wireless. Most Bluetooth implementations have very limited range, typically within just one room. But with careful signal management circuitry and antenna tuning, we offer a superior solution that has up to 3 times the range of standard Bluetooth for multi-room use, with no degradation in audio quality.
16 bit DAC
The A2+ Bluetooth receiver utilizes the PCM 2704C DAC, known for extremely-low quantization noise in the audio band, with a built-in analog low-pass filter that removes the high-frequency components of the noise-shaping signal.
The amplifiers in powered Audioengine speakers are located in the left speaker and are a conservatively-rated class A/B analog monoblock design. This is a more traditional speaker/amplifier configuration which provides excellent quality audio and greater flexibility. All circuit boards for the power and preamp sections are vertically mounted for maximum mechanical shock protection.
Audioengine uses audiophile-quality, ferrofluid-cooled silk dome tweeters with neodymium magnets. Silk tweeters hold up well under high power and the edge-driven design gives very smooth response. The woofers are aramid fiber woven glass composite with rubber surrounds. Aramid fiber is obviously very strong, which means the woofer retains its shape when being driven at high levels.
Both drivers are directly video shielded and allow the user to place the speakers within a few inches of a video monitor. This shielding also offers protection for hard-drive digital music players.
Type
Powered Bluetooth aptX speaker system
Amplifier Type
Class AB
Rated Power Output:
15W RMS per channel at 4 ohms (measured in compliance with 16 C.F.R. § 432.3)
Peak Power Output: 30W per channel at 4 ohms (AES)
Total Peak Power Output: 60W (AES)
Drivers
2.75” aramid fiber woofers
0.75“ Silk dome tweeters
Inputs
3.5 mm stereo mini-jack, RCA L/R, USB, Bluetooth
Outputs
RCA variable line-out
Input Voltages
100-240 V 50/60 Hz auto-switching
SNR
>95 dB (typical A-weighted)
THD+N
Less than 0.05% at all power settings
Crosstalk
<50 dB
Frequency Response
65 Hz-22 kHz ±2.0 dB
Frequency Response w/ Bass Reduction Switch selected
N/A
Analog Input Impedance
N/A
Nominal Impedance
N/A
Input Impedance
10K ohms unbalanced
Crossover Frequency
N/A
Protection
Output current limiting, thermal over-temperature, power on/off transient protection
Power Consumption
Idle: 10W
Standby Consumption
N/A
Phase
N/A
Recommended Amplifier Power
N/A
Battery Life
N/A
Battery Charge Time
N/A
Internal BT Receiver
Qualcomm QCC 3031/3034
Input Bit Depth
16 bit
Bluetooth Receiver Type
Bluetooth 5.3
Supported Codecs
aptX, AAC, SBC
Supported Bluetooth Profiles
N/A
Wireless Operation Range
Up to 100 ft (30 m) typical
Input Data Rate
Determined by Bluetooth
Wireless Latency
~30 milliseconds (ms)
Connector Type
Micro-USB
USB Device Class
type 1.1 and above
Input Bit Depth
up to 16 bit native
Input Sample Rate
up to 48 kHz native.
Internal D/A Converter
Dimensions (HWD)
Each speaker – 6″ (15.2 cm) x 4″ (10.2 cm) x 5.25″ (13.3 cm)
Weight
Left (active) – 3.6 lb (1.6 kg)
Right (passive) – 3.2 lb (1.4 kg)
Total Shipping Weight
10 lb (4.6 kg)
Shipping Box Dimensions (LWH)
15” (38.1 cm) x 7” (17.8 cm) x 10.5” (26.7 cm)
Operating temperature: 32 degrees F to 95 degrees F
Non-operating temperature: -4 degrees F to 113 degrees F
Relative humidity: 5% to 95% non-condensing
0.7″ (18 mm) thick MDF cabinets
0.75″ (20 mm) silk dome tweeters with neodymium magnets
2.75″ (70 mm) aramid fiber woofers with advanced voice coils
How to Connect a Turntable to Audioengine Speakers
Even though records can be seen by some as an archaic music format, the truth is vinyl is still alive and well with many young people collecting vinyl records that were either handed down from their parents or found in a bin of used records at their local record or thrift store.
Obviously, every budding record collector needs a turntable and luckily they are extremely easy to set up. Here’s how to connect a turntable to Audioengine speakers.
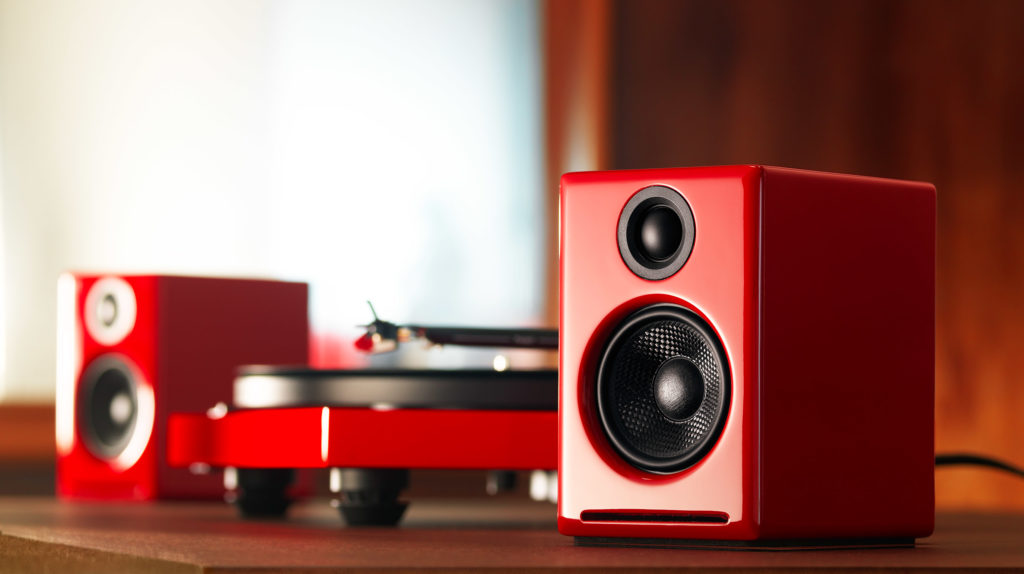
Turntables with Built-In Preamp
How you connect your turntable to your Audioengine speakers mostly depends on the kind of turntable you have. Many modern turntables, such as the Audio Technica AT-LP120 and Music Hall USB-1, have a built-in preamp so they can be connected directly with your Audioengine powered speakers.
These turntables are pretty reasonably priced and are ready to go right out of the box, making it the perfect turntable for those who are starting to break into the world of vinyl collecting. These types of turntables typically include a switch on the back for “line” or “phono”. In order to use this kind of turntable, just connect the output of your turntable to the Audioengine powered speakers, make sure it’s set to “line”, and you’re ready to throw on your records.
Turntables Without a Built-In Preamp
There are some turntables that do not feature a built-in preamp. Some modern and most, if not all, vintage turntables will typically not have the built-in preamp, meaning you’ll need to add an extra piece of gear to use with Audioengine speakers.
With turntables that do not have a preamp, you would need to add an external phono preamp in order to bring the instrument level signal of the turntable up to line level. To use an external phono preamp, you will just need to connect the output of your turntable into the input of the preamp and then connect the output of the preamp into the analog input of your Audioengine speakers; typically if the turntable features a grounding wire, you would connect that to the grounding post on the phono preamp itself.
Bluetooth-Ready Turntables
Since wireless connections are becoming more and more popular, it’s also possible to use Bluetooth-ready turntables with your Audioengine wireless speakers or our Bluetooth receiver and setting it up should be simple.
First, you would also need to make sure your Audioengine Bluetooth device is in pair mode (LED light flashing), and near the turntable. Next, you would need to use the pairing button to send the turntable into pairing mode. Depending on the turntable, you will need to either press and release the turntable’s pair button or press and hold it; for example, on the Audio Technica AT-LP60-BT you would need to hold the turntable’s pairing button for about two seconds until the light flashes different colors. Once the turntable is in pairing mode, it will search and connect to the nearest available Bluetooth device. Once the turntable if paired and connected to your Audioengine Bluetooth device, the pair light on the receiver should turn solid.
Turntables are a great way to connect to your music collection and can be super easy to setup, making those night-in listening sessions hassle-free and sounding great.
Where to find vinyl and Audioengine Speakers
A number of great record stores carry Audioengine products. If you’re looking for a place to pick up some killer vinyl AND audition turntables and speakers all in one stop, check the list below for a store near you:
Analog Record Shop – Tustin, CA
Badfish Records – Corpus Christi, TX
Black Wax Records – Lafayette, IN
Boo Boo Records – San Luis Obispo, CA
Chief Records – Ft. Worth, TX
Comeback Vinyl – Alpharetta, GA
Cosmic Vinyl – Los Angeles, CA
End Of An Ear – Austin, TX
Heights Vinyl – Houston, TX
Hi-Phy Records – Albuquerque, NM
In The Moment Records – Brattleboro, VT
Jet Age Records – Newport, AL
Josey Records – Dallas, TX
M-Theory Music – San Diego, CA
Metavinyl – Santa Cruz, CA
Moldy Toes LLC – San Clemente, CA
Port Of Sound Records – Costa Mesa, CA
Rough Trade – Brooklyn, NY
Salzer’s Records – Ventura, CA
Scotti’s Record Shop – Summit, NJ
Seasick Records – Birmingham, AL
Space City Audio – Spring, TX
Spinning Jenny’s House Of Music – Shamrock, TX
Spinster Records – Dallas, TX
Stereo Unlimited – San Diego, CA
The Audio Nerd – Rocklin, CA
The End Of All Music – Oxford, MS
The Record Exchange – Boise, ID
Turntable Lab – New York, NY
Twist And Shout Records – Denver, CO
Vinyl Index – Somerville, MA
Waterloo Records & Video – Austin, TX
Wuxtry Records – Athens, GA
The Bluetooth icon button controls the speaker’s pair mode and also acts as an indicator. When the button is flashing, the speaker is currently in pair mode and open to connect to a device. If the button is solid, it means a device is currently connected to the speaker. In order to disconnect a device from the speaker, you can press and hold the button until you hear the notification that the speaker is in pair mode.
On the top of the 512, there are three lights that tell you how much charge the 512’s battery has. When the 512 needs to be charged (only 1 of the lights will be lit), there is a rapid succession of 5 electronic beeps or bongs that will interrupt the music before resuming it to let you know that the battery is low. It will repeat this sound periodically until it is plugged in to charge.
The 512 is not designed to function as a pair, however, depending on what source you use this may be possible! We have tested pairing some Android phones with 2 of the 512s by selecting “dual audio” in the Bluetooth settings on the phone. Some phones/sources will allow you to connect to multiple Bluetooth devices at once by doing this.
The LED in the power button will remain lit when the 512 is charging, but this does not mean it is powered on. If the light is on but there is no playback, press and hold the power button and you will hear it power on, then you’ll see the Bluetooth LED turn blue to indicate it is ready to connect.
The battery won’t necessarily drain faster, but the 512 will not go into it’s “idle” mode while the mini jack is plugged in. This means the connection will stay active even if nothing is playing, so the battery is better preserved when using Bluetooth.
When this happens, what we see most often is either the 512 is not getting an adequate charge or the power button has gotten stuck . To ensure efficient charging, make sure you use a 1000mA charger or higher to charge your 512.
If the power button is stuck in a depressed position, try tinkering with the power button to see if you can get it to pop back out and into place. If you can, then be sure to charge the device afterwards. While the button is stuck it will drain the battery of the 512.
At 20% battery life the 512 notifies you with a chime and reduces the volume level to preserve battery life. When the battery is charged above 20%, it will no longer auto-reduce volume to save power.
There is a cardboard insert located in the 512 box containing the manual and the micro-USB charging cable.
The 512 uses a lithium-ion battery.
We recommend using a1000mA charger or higher with Micro USB connection to charge your 512.
Nope! The 512 features an analog input so you can connect your audio source to the speaker using a standard mini-stereo cable.
Yes, you can control the volume from the audio source itself as well as the volume buttons on the top of 512.
While battery life will depend somewhat on the volume you’re using the 512 at, typical battery life of the 512 is up to 12 hours.
The 512 was designed to be a stand-alone Bluetooth speaker and also has a mini-stereo input; because of this, it doesn’t have any outputs to connect to a powered subwoofer, such as the S8.
No, but for good reason! This is something we struggled with when developing the 512. Our engineers choose materials based on what will provide a high quality sound, and using water-resistant materials would have a negative effect on that. It was a tough decision to make, but if we have to compromise on something, sound quality is not going to be it!
Yes! The charger plugs into a micro USB charging port, leaving the aux input or Bluetooth open for use at the same time!
Using the supplied W3 sender and receiver, follow the diagram below:
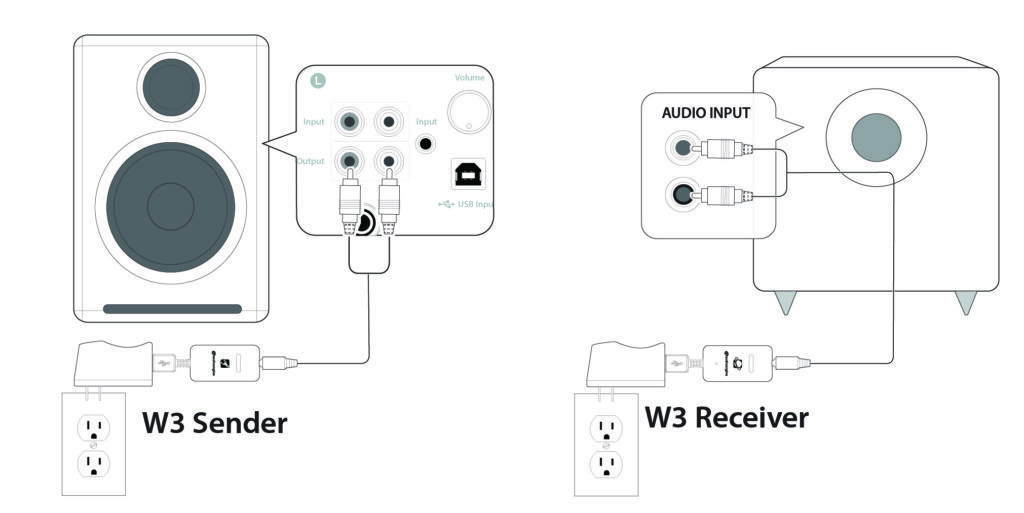
Most Audioengine powered speakers have variable RCA outputs for use with a subwoofer like the S8. This means that the output of the speakers and the RCA output will go up and down together. So once you dial in the volume of your S8, you should be able to adjust the volume from the speakers, or your source device. Either way the subwoofer and speakers should stay in balance as the volume is raised and lowered.
Type
Powered Subwoofer w/ wireless audio receiver, rear ported design
Amplifier Type
Class D
Rated Power Output: 125W RMS (measured in compliance with 16 C.F.R. § 432.3)
Total Peak Power Output: 250W (AES)
Drivers
8″ long throw down-firing woofer
Inputs
3.5 mm stereo mini-jack, RCA L/R
Outputs
N/A
Input Voltages
100-240V AC, 50/60Hz auto-switching
SNR
Greater than than95 dB (typical A-weighted)
THD+N
Less than 0.05% at all power settings
Crosstalk
N/A
Frequency Response
27Hz – 180Hz ±1.5 dB
Frequency Response w/ Bass Reduction Switch selected
N/A
Analog Input Impedance
N/A
Nominal Impedance
N/A
Input Impedance
10K ohms unbalanced
Crossover Frequency
50Hz – 130Hz
Protection
Output current limiting, thermal over-temperature, power on/off transient protection
Power Consumption
N/A
Standby Consumption
<1W
Phase
0 / 180 degrees
Recommended Amplifier Power
N/A
Battery Life
N/A
Battery Charge Time
N/A
Dimensions (HWD)
11.25″ (28.6 cm) x 11.25″ (28.6 cm) x 11.25″ (28.6 cm)
Weight
23.6 lb (10.7 kg)
Total Shipping Weight
30 lb (13.6 kg)
Shipping Box Dimensions (LWH)
16″ (40.6 cm) x 16″ (40.6 cm) x 18″ (45.7 cm)
15.6mm thick MDF cabinet
8″ custom downfiring woofer
This is actually normal behavior. It’s is a tradeoff of using an analog potentiometer for the N22. Analog potentiometers are tactile, and don’t require a microprocessor like a digital encoder would, but they sometimes do have some volume imbalance at lower levels. An easy solution for this is to raise the volume of your N22, and lower the volume at your source device.
Type
Compact Integrated Stereo Amplifier
Rated Power Output: Speaker 2x52W @ 4Ohms; HP: 2.8 Vrms; RCA : 1.5Vrms. (measured in compliance with 16 C.F.R. § 432.3)
Peak Power Output: 104W per channel at 4 ohms (AES)
Amplifier type
Class D TDA 7492 amplifier
Input voltages
100-240AC/50Hz
Inputs
RCA, 1/8″ (3.5mm) mini-jack, USB-C, and Bluetooth aptX
Outputs
RCA, Speaker, HP, and Line-out
Speaker outputs
5-way binding posts
SNR
90dB @ input 1Khz 100mV
THD+N
0.055% @ input 1Khz 100mV
Crosstalk
-52dB
Frequency response
20Hz-20kHz
Input impedance
100Ohm
Input sensitivity
Bluetooth: 0dBfs; MiniJack: 1Vrms; RCA: 1.3Vrms
Protection
Output current limiting, thermal over-temperature, power on/off transient protection
Headphone amplifier
OPA1602
Dimensions
7″(H) x 2.75″(W) x 5.5″(D)
Weight
3.55 lbs (1.6kg)
Shipping weight
5.0 lbs (4.6kg)
Shipping box dims
11.5″(H) x 7.5″(W) x 9.5″(D)
Finish
Satin Black
Upstanding design
The vertical design of the N22 with its integrated stand allows the 52 watt/per channel stereo class D TDA 7492 amplifier to run cool through passive convection without a fan or massive heatsink. The N22 fits easily on your desk and doesn’t take up much space.
Discrete headphone amplifier
For headphone enthusiasts the N22 includes a high-performance, low-noise discrete amplifier which works well with all types of headphones and earphones.
Variable line out
The N22 includes a variable preamp output so you can connect a subwoofer, external amplifier, or Audioengine wireless adapter and control the volume of the line-out from the front panel.
Simple operation
Both audio inputs on the N22 are active so two audio sources may be connected to the amplifier at the same time without the need for an input switch. A standby idle mode is also included to conserve power when you’re not playing music.
Wireless rear speakers
Use the N22 amp, Audioengine P4 passive speakers, and our W3 wireless adapter for a low-cost but great-sounding wireless rear channel setup for your home theater.
M6 x 40mm, 6mm diameter pan head
The S8 is 11.25″H x 11.25″W x 11.25″D
Yes! All of our speakers and subwoofers are directly video shielded. They also allow the user to place the speakers or subwoofer within a few inches of a video monitor. In addition, this shielding offers protection for hard-drive digital music players.
The following troubleshooting tips can help diagnose and correct most concerns with the A2 speakers. We have attempted to make this list as comprehensive as possible, so some of these may not apply to your issue, but please go through each tip.
Please check to see if the green LED on your power supply brick lights up when AC power is applied and that all of the pins are straight and connected properly. Also, check to see that any wall outlets or surge protectors are switched to the “On” position and are in working order. If you haven’t already, power cycle your speakers by disconnecting them from AC power, and plugging them back in.
If the light comes on:
1) Please make sure all of your connections are complete and all of your connector cables are in working order (you will want to swap out some interconnects to test for this).
2) Try using at least one additional source to see if the problem follows.
3) Make sure your speaker wire is connected according to proper polarity (Red to Gold, Black to Silver) on both ends.
4) Please try using the mini plug (Input B) as well as the RCA jacks (Input A) to see how the speakers react. Switch the RCA jacks (red and white) to see if the issue remains in the same channel.
5) If you are using any wireless devices, preamps, or external DACs in line with these speakers, please remove the wireless device from the application (temporarily) and connect the source directly to the speakers.
6 If you are using a computer in line with the speakers, please make sure the volume is up on your media players, internet radio, master control, device volume, etc. and your balance control in centered.
7) If your input source has its own EQ, please make sure the low end is at a moderate level, as having too much bass in your signal can cause the speakers to break up.
8) Try your speakers in a different location to see if something is causing interference in the current location. Something as simple as a router, cordless / mobile phone, halogen lamps, etc. near the speakers may be causing the issue in your setup.
The following troubleshooting tips can help diagnose and correct most concerns with the A5 speakers. We have attempted to make this list as comprehensive as possible, so some of these may not apply to your issue, but please go through each tip.
1) Please make sure all of your connections are complete and all of your connector cables are in working order, test two or three different audio cables (you will need to swap out some of your cables to test for this).
2) Make sure your speaker wire is connected according to proper polarity (Red to Gold, Black to Silver) on both ends.
3) Make sure you try using the top panel input as well as the back panel input.
4) Try using as many different input sources as possible to see what happens. Also raise the volume on the A5 to at least 10:00 to see if that helps with this issue.
5) If you are using these speakers in line with a computer, please make sure ALL volume controls for the computer (including media players, etc.) are turned up and the computer’s balance control is centered.
6) If you are using any wireless devices, preamps, computer soundcards, external DACs, or other products in line with these speakers remove the devices from your setup (temporarily) and only connect the audio source directly to the speakers.
7) Check to see that any wall outlets or surge protectors are switched to the “On” position and are in working order.
8) Try your speakers in a different location to see if something is causing interference in the current location. Something as simple as a router, cordless / mobile phone, halogen lamps, etc. near the speakers may be causing the issue in your setup.
Affirm is a financing alternative to credit cards and other credit-payment products. Affirm offers instant financing for online purchases to be paid in fixed monthly installments over 3, 6, or 12 months.
- Buy and receive your purchase right away, and pay for it over several months. This payment option allows you to split the price of your purchase into fixed payment amounts that fit your monthly budget.
- If Affirm approves your loan, you’ll see your loan terms before you make your purchase. See exactly how much you owe each month, the number of payments you must make, and the total amount of interest you’ll pay over the course of the loan. There are no hidden fees.
- The application process is secure and real-time. Affirm asks you for a few pieces of information. After you provide this information, Affirm notifies you of the loan amount that you’re approved for, the interest rate, and the number of months that you have to pay off your loan — all within seconds.
- You don’t need a credit card to make a purchase. Affirm lends to the merchant directly on your behalf.
- You may be eligible for Affirm financing even if you don’t have an extensive credit history. Affirm bases its loan decision not only on your credit score, but also on several other data points about you.
- Affirm reminds you by email and SMS before your upcoming payment is due. Enable Autopay to schedule automatic monthly payments on your loan.
To sign up for Affirm, you must:
- Be 18 years or older (19 years or older in Alabama or if you’re a ward of the state in Nebraska).
- Not be a resident of Iowa (IA) or West Virginia (WV).
- Provide a valid U.S. or APO/FPO/DPO home address.
- Provide a valid U.S. mobile or VoIP number and agree to receive SMS text messages. The phone account must be registered in your name.
- Provide your full name, email address, date of birth, and the last 4 digits of your social security number to help us verify your identity.
Affirm loan-application process steps:
- At checkout, choose Pay with Affirm.
- Affirm prompts you to enter a few pieces of information: Name, email, mobile phone number, date of birth, and the last four digits of your social security number. This information must be consistent and your own.
- To ensure that you’re the person making the purchase, Affirm sends a text message to your cell phone with a unique authorization code.
- Enter the authorization code into the application form. Within a few seconds, Affirm notifies you of the loan amount you’re approved for, the interest rate, and the number of months you have to pay off your loan. You have the option to pay off your loan over three, six, or twelve months. Affirm states the amount of your fixed, monthly payments and the total amount of interest you’ll pay over the course of the loan.
- To accept Affirm’s financing offer, click Confirm Loan and you’re done.
After your purchase, you’ll receive monthly email and SMS reminders about your upcoming payments. You can also set up autopay to avoid missing a payment. Your first monthly payment is due 30 days from the date that we (the merchant) processes your order.
- Affirm asks for a few pieces of personal information: Name, email address, mobile phone number, date of birth, and the last four digits of your social security number.
- Affirm verifies your identity with this information and makes an instant loan decision.
- Affirm bases its loan decision not only on your credit score, but also on several other data points. This means that you may be able to obtain financing from Affirm even if don’t have an extensive credit history.
Although Affirm performs a credit check when you apply for a loan, this won’t impact your credit score. However, if you’re approved and decide to buy with Affirm, your loan and payments may affect your credit score. Paying on time can help you build a positive credit history.
Audioengine has no information regarding a customer’s financing denial. Affirm strives to offer all credit-worthy applicants financing with Affirm, but isn’t able to offer credit in every case. Affirm will send you an email with more details about its decision. Unfortunately Affirm’s decision is final.
If Affirm has difficulty confirming your identity, you may need to provide more information. Affirm uses modern technology to confirm your identity, including verifying your address or full SSN, or requesting a photo of your ID. Affirm takes these steps in some cases to counter fraud and provide the most accurate credit decision they can.
Affirm may sometimes need more information about your finances and your ability to repay in order to make a credit decision. Your income gives Affirm additional insight into your ability to repay.
Affirm may sometimes need more information about your finances and your ability to repay in order to make a credit decision. If you are prompted to link your checking account and would like to proceed, please provide the login information for your online bank account. Affirm does not store your online login credentials—they are transmitted securely to your bank.
If Affirm asks you to link your checking account, Affirm won’t be able to offer you credit if:
- Your bank is not listed
- You choose not to link your checking account
- You don’t use online banking
- The username and / or password you provide is incorrect
- You’re unable to successfully connect your checking account
Although Affirm is continually adding support for additional banks, they aren’t able to connect to every bank at the present time. We apologize for the inconvenience. If you’re unable to connect your bank, you’ll need to complete your purchase with another payment method.
Affirm isn’t always able to offer credit for the full amount you request. In these cases, Affirm asks you to make a down payment with a debit card for the remainder of your purchase. The down payment amount can’t be changed and must be made upon confirming your loan and before the loan offer expires.
Yes! Affirm works hard to be completely transparent. You’ll see the amount of interest you’ll owe on the terms page and again on the loan confirmation page. If you pay off your loan early, you’ll receive a rebate for any interest that hasn’t yet accrued.
Affirm is available only to shoppers residing in the United States. Affirm hopes to expand its services to customers outside the U.S. in the future.
The annual percentage rate (APR) on an Affirm loan ranges from 10% to 30%. Affirm discloses any required fees upfront before you make a purchase, so you know exactly what you will pay for your financing. Affirm does not charge any hidden fees, including annual fees.
When Affirm determines your annual percentage rate (APR), it evaluates a number of factors, including your credit score and other data about you. If you finance future purchases with Affirm, you may be eligible for a lower APR depending on your financial situation at the time of purchase.
This APR calculator will give you an idea of how much interest you actually pay: https://www.affirm.com/apr-calculator/
When you consider Affirm financing, carefully evaluate the loan terms that Affirm offers you and determine whether the monthly payments fit your budget.
Affirm calculates the annual percentage rate (APR) of a loan using simple interest, which equals the rate multiplied by the loan amount and by the number of months the loan is outstanding.
This model differs from compound interest, in which the interest expense is calculated on the loan amount and the accumulated interest on the loan from previous periods. Think about compound interest as “interest on interest,” which can increase the loan amount. Credit cards, for example, use compound interest to calculate the interest expense on outstanding credit card debt.
Before each payment is due, Affirm sends you an email or SMS reminder with the installment amount that is coming due and the due date. You have the option to sign up for autopay, so you don’t risk missing a payment.
Follow these steps to make a payment:
- Go to www.affirm.com/account.
- Enter your mobile phone number. Affirm sends a personalized security PIN to your phone.
- Enter this security PIN into the form on the next page and click Sign in.
- After you sign in, a list of your loans appears, with payments that are coming due. Click the loan payment you would like to make.
- Make a payment using a debit card or ACH bank transfer.
A refund posts to your Affirm account if we process your refund request. In the event that we issue you store credit instead of a refund, you are still responsible for paying off your Affirm loan.
If you have already made loan payments or a down payment, Affirm issues a refund credit to the bank account or debit card that you used to make the payments.
Affirm does not refund any paid interest.
A refund credit appears in your account within three to ten business days, depending on your bank’s processing time.
You cannot edit your order after you have confirmed your loan. If you want to add items to your purchase, apply for another loan with Affirm or use a different payment method.
Refunds can be processed up to 365 days from the date your order is placed.
Yes, you pay with Affirm on our website using your prequalified credit amount for up to 7 days. Prequalifications expire after one week. So, for example, if you prequalify for $4,000 and spend $750 on a purchase, you can still spend $3,250 on our site for a week.
Yes, if you apply for financing on the Audioengine site, the prequalification amount is tied specifically to audioenginedev.wpengine.com. If you wish to pay with Affirm at other merchants, you can apply for credit on any other site that uses Affirm, or you can apply for a loan directly on the Affirm website to receive a virtual credit card. See here for details.
- B-Fi uses your home Wi-Fi network for multiroom music streaming and stereo pairing, while B1 uses Bluetooth.
- B-Fi allows you to name and rename devices, while B1 does not due to limitations of Bluetooth.
- B-Fi requires the Audioengine Control app for initial setup while no product app is required for B1.
Both are capable of high-resolution and high-definition audio and provide the highest quality sound for wireless streaming.
Yes, while streaming via Airplay.
The Audioengine Control app supports a maximum of 12 rooms, however for most homes we recommend 8.
After setup you can stream your music anywhere there is a reliable wireless internet signal.
Yes. If your hotspot is listed as a choice in Wi-Fi networks, you can use it as an access point.
The B-Fi supports lossless playback of CD quality audio, with zero compression. While you can play higher than CD quality audio to the B-Fi through DLNA, UPnP, or high res streaming apps like TIDAL and Qobuz, all audio is transmitted at 16-bit 44.1kHz.
Yes. You can play music from your library, a mobile device storage device, and portable hard disks and NAS.
Yes, anybody connected to the same network.
Any Audioengine powered speaker systems that have line-level (RCA or 3.5mm) input connection or digital optical input will work with B-Fi.
The B-Fi is a 2.4GHz device but most networks are dual-band, so select 2.4GHz during B-Fi setup.
Any audio source can be used for multiroom playback through your B-Fi(s) when using AirPlay, or when streaming audio via DLNA / UPnP, or using the streaming services integrated into the Audioengine Control App. The B-Fi(s) need only first be configured into groups using the Audioengine Control App.
You could use these two systems separately, with their respective apps, and separately through Airplay. Sonos speakers are not able to be integrated into a B-Fi system, though. The Audioengine Connect App is only able to recognize B-FI connected audio systems, and the Sonos App will not recognize B-Fi wireless music streamers. So there wouldn’t be a way to group them together.
We considered Airplay 2, and will continue to keep an eye on it for future products or updates. At present though, the B-Fi includes support for only Airplay.
While Airplay 2 allows grouping of Airplay 2 devices in the Apple Home app, to allow streaming audio to multiple rooms at once, we’ve already built out advanced multi-room grouping features through the Audioengine Connect App. And in our implementation, these features extend not only to Airplay on iOS and MacOS, but can even be used for non-Apple devices which don’t support Airplay or Airplay 2.
One of the great benefits to the B-Fi is that you’re no longer stuck using one product app. Any music player will work for iOS and MacOS via Airplay, as well as DLNA or UPnP streaming options for Android and Windows.
Try playing music directly on your phone, tablet or from your local library using the same network to check your internet connection.
If your internet connection is OK:
- Check the connections between B-Fi and your stereo system.
- Use the Audioengine Control app to test signal strength.
- Restart your source music device and power cycle your B-Fi and stereo.
Yes. You must be connected to your network for your music to play.
Yes.
Press and hold the status button on the front panel until the LED begins flashing (about 4 seconds), and you hear a voice prompt letting you know that the B-Fi has entered setup mode. If you don’t hear the voice prompt, double check your audio systems volume, and that the B-Fi is connected to an active input.
Open the Audioengine Control app on your smartphone or tablet, and follow the instructions to complete setup. If you have other B-Fi units that are already configured, you will need to press the + in the top right corner of the screen to continue setup.
If you have grouped the speakers for a multi-room setup in the Audioengine app, only the B-Fi that you grouped the speakers into will show as the available destination. If you wish to send to your other speakers independently, ungroup the B-Fi in the app by pressing and holding on the speaker in the grouping and dragging down and away from the group.
Qobuz works great with the B-Fi for lossless CD quality streaming! Once you get your B-Fi setup on your network using the Audioengine app, you will be able to send your Qobuz music to the B-Fi through the Qobuz app on your MacBook Pro, the Qobuz app on your devices, or directly through the Audioengine Control app! Qobuz and other lossless capable streaming services are played back at CD quality, with no compression.
Windows 10 supports sharing the media on your computer via DLNA. To set this up, you’ll need to:
- Click start and search for “media streaming options”.
- Turn on media streaming.
- Name your media library whatever you’d like after turning it on.
- From the Audioengine Control app on your Smartphone or tablet, go to My Music-> Home Music Share, and look for your media library name.
From here you can play audio stored on your computer to any B-Fi(s) on your network. Just keep in mind that your computer will need to be powered on.
Gapless playback works great when streaming to the B-Fi as long as the music app you are using supports gapless playback as well, such as Spotify. You would not need to adjust anything with the B-Fi or within the Audioengine B-Fi app.
The B-Fi doesn’t include any MQA specific hardware, but you can still enjoy the benefits of MQA through software decoding with services like TIDAL, where you’ll have access to up to 16-bit 44.1kHz high resolution audio.
Both Audioengine Bluetooth and WiFi-based solutions are capable of delivering very high quality audio! Bluetooth is an extremely convenient way to quickly pair to a speaker for easy wireless playback. WiFi solutions are great for multi-room setups with custom groupings with different music or simultaneous playback to all which can be easily controlled with the B-Fi app.
The B-Fi doesn’t include a YouTube Music integration into the Audioengine Control App, but YouTube Music will work via Airplay on an Apple Device. So you’d be able to stream YouTube Music to the B-Fi from your iPhone, iPad, or Mac computer, no problem.
For music streamed through Audioengine Control App, or from streaming applications built into the Audioengine Control App, the B-Fi streams music directly over your WiFi network. The stream will continue whether your device is taken out of range or turned off altogether.
Airplay, generally speaking makes a connection between your source device and the B-Fi, through your network. If your device goes out of range of the network, or the application on your source that is playing audio is closed, playback will stop.
Sending audio to multiple B-Fi units at once will not impact the audio quality.
The B-Fi uses the ES9023 DAC. As the B-Fi uses your home wi-fi network, it is lossless and no compression is needed.
Once you have each B-Fi set up on your Wi-Fi network:
Open the Audioengine control app. Swipe from right to left in the app to the “Device” screen where your B-Fis are listed. Determine which group of B-Fis you want to be your primary, then touch the “+” in the upper right corner. A list of any additional A1-MRs you want to add will appear and you can tap the empty circle to add a check to the bubble, then tap “Done” You can add multiple B-Fis into that primary B-Fi for whole-home playback.
You’ll need to make sure you have gone through the initial set up process for the B-Fi before moving onto the below steps.
For iPhone users:
1. On the iPhone, swipe to open Control Center. (the swipe direction is dependent upon the iPhone model you are using)
2. In the music control area, tap the AirPlay button.
3. A list of AirPlay capable devices seen by your iPhone will be shown. Tap the B-Fi to connect to it.
4. Once connected, you can use your iPhone to send audio to your B-Fi without the need to open the Audioengine Control App.
For Mac users:
Option 1:
- Make sure that your Mac and B-Fi are on the same Wi-Fi network.
- Go to Apple menu > System Preferences > Sound.
- Under Output, you should see a list of any devices you are able to AirPlay to, and the B-Fi should be an option. If you named the B-Fi during setup, it may appear under that name.
Option 2:
- Hold down the Option key on your keyboard, then click on the speaker icon in your menu bar. You will then see a list of audio output devices that are on your local network – select the B-Fi.
- Once you change the audio output to an AirPlay device, all audio coming from your Mac will go through the B-Fi, and not the internal speakers on your Mac.
- To change the audio output back to your Mac’s internal speakers, you can either Option-click on the speaker icon again and select internal speakers, or go back into System Preferences and change it there.
Apple changed the way the iPhone and iPad connect to Wi-Fi networks starting in the iOS 14 and iPadOS 14 updates. This can cause issues when setting up the B-Fi on your network. To resolve this issue you would simply need to disable Private Wi-Fi MAC Addresses on your iPhone. The “Private Address” option is controlled separately for each Wi-Fi network. We don’t recommend disabling it for a network unless you need to do so (or are troubleshooting a problem.)
To find this option, head to Settings > Wi-Fi on your iPhone or iPad. Locate the Wi-Fi network you want to change this option for—it’ll be at the top of the screen if you’re currently connected to it. Tap the “i” icon at the right side of the Wi-Fi network name.

Disable the “Private Address” option by tapping the switch to its right.
The “Wi-Fi Address” option here shows you the private MAC address being used on that specific network, just in case you need it—to configure something on a router, for example.

You’ll be prompted to rejoin the network if you’re already connected. Tap “Rejoin” and your iPhone or iPad will rejoin with a static MAC address necessary for the B-Fi to communicate with your device.

You should now be able to go back into the B-Fi Control App to complete the set up process.
The short answer is ‘yes’. However, you will need to use an app that gives you the ability to use Airplay while in Windows. Though there are a few options out there, we’ve found TuneBlade to be one of the more affordable and easy-to-use applications available. TuneBlade is a simple tray utility that lets you stream system-wide audio to the B-Fi from your windows device. There’s a one-time fee of $9.99 to purchase the app, but they have a trial version you can try out for free.
To start, make sure your B-Fi is setup on the same network as your Windows device (PC/laptop). Once TuneBlade is installed, start the program. TuneBlade will automatically locate your B-Fi and any other Airplay-ready devices connected to your network.
Start playing the audio you wish to stream to your B-Fi(s). While the audio is playing, hit the ‘play’ button next to the corresponding B-Fi in the TuneBlade app. All audio coming from your computer will now be passed on to the B-Fi. While using TuneBlade, you can send the audio to multiple B-Fi’s at once and the audio will automatically sync between B-Fi’s without the need to group them in the Control App.
Things to keep in mind when using TuneBlade:
- If you have speakers directly connected to your computer, then turn them down (using the volume controls on the actual speaker) as there will be a slight buffering delay between the audio from your computer speakers and the speakers connected to your B-Fi(s).
- TuneBlade streams system-wide audio, so Windows notifications will be passed through when they occur.
- TuneBlade is a work-around we found offering Windows users the same streaming capabilities via Airplay that Apple users have.
Wi-Fi Input
802.11 b/g/n (2 GHz)
Audio output
Analog, optical
Output level
2V RMS
Sample rates
32 – 44.1kHz
Bit depths
16 bit
Interfaces
AirPlay, DLNA, UPnP
Processor
AP8064 ARM
DAC
ES9023
Signal-to-noise-ratio
-105dB
Distortion
THD+N, 0.01%
Power
Micro USB
Power requirements
5V, 300ma
Product dimensions
3.5 x 3 x 1
Product weight
5 oz.
Shipping weight
1.0lbs (0.5kg)
Shipping box dimensions
11 x 7 x 3
Environmental Requirements
Operating temperature: 32° to 105°F (0°C to 40°C)
Storage temperature: -4°0 to 115°F (-20°C to 46°C)
Relative humidity: 5% to 95% non-condensing
Included accessories
RCA audio cable (3ft/1m)
Power adapter with detachable cable
Microfiber bag
Setup guide
Yes. In addition to aptX, and the default Bluetooth codec SBC, the A1 supports other high-quality audio codecs, like AAC, for devices that do not support aptX.
Yes. The A1 will work with both the Audioengine W3 Audio Adapter and the B-Fi Mulitroom Music Streamer.
No. The A1 offers wired or wireless playback for extended range streaming via aptX Bluetooth. It can additionally connect to your turntable, computer or TV with a standard AUX cable (3.5mm, 1/8″, mini TRS, etc.).
The A1 offers high-definition aptX Bluetooth with an extended range of up to 100 ft.
No. The A1 is a premium powered, plug and play stereo system that will easily connect to any Bluetooth enabled phone, tablet or computer in seconds. After a quick setup with the included power cord and speaker wire, immediately start streaming music from your favorite music services (TIDAL, Spotify, Pandora, Amazon Music and more) or directly from your music library.
The speakers are 6″H x 4″W x 5.25″D each
-
- If it’s on and solid, this means the A1 is powered on, and currently connected to a Bluetooth-enabled device.
- If it’s on and blinking, this means the A1 is powered on but not currently connected to a device.
- If it’s off (and A1 is powered on), this means Bluetooth is in standby and not connected to a device. The A1, however, is still visible to your device, so simply connect using your device and it will automatically wake up.
Type
Powered Bluetooth aptX speaker system
Amplifier Type
Class D
Rated Power Output: 15W RMS per channel (measured in compliance with 16 C.F.R. § 432.3)
Peak Power Output: 30W per channel (AES)
Total Peak Power Output: 60W (AES)
Drivers
2.75” aramid fiber woofers
0.75“ Silk dome tweeters
Inputs
3.5 mm stereo mini-jack, Bluetooth
Outputs
LFE Variable line-out for subwoofer
Input Voltages
100-240 V 50/60 Hz auto-switching
SNR
Greater than 95 dB (typical A-weighted)
THD+N
Less than 0.05% at all power settings
Crosstalk
Less than 50 dB
Frequency Response
65 Hz-22 kHz ±2.0 dB
Frequency Response w/ Bass Reduction Switch selected
N/A
Analog Input Impedance
N/A
Nominal Impedance
N/A
Input Impedance
10K ohms unbalanced
Crossover Frequency
N/A
Protection
Output current limiting, thermal over-temperature, power on/off transient protection
Power Consumption
Idle: 10W
Standby Consumption
N/A
Phase
N/A
Recommended Amplifier Power
N/A
Battery Life
N/A
Battery Charge Time
N/A
Internal D/A Converter
N/A
Internal BT Receiver
CSR8670
Input Bit Depth
16 bit
Bluetooth Receiver Type
Bluetooth 5.0
Supported Codecs
aptx, AAC, SBC
Supported Bluetooth Profiles
N/A
Wireless Operation Range
Up to 100 ft (30 m) typical
Input Data Rate
Determined by Bluetooth
Wireless Latency
~30 milliseconds (ms)
Connector Type
N/A
USB Device Class
N/A
Input Bit Depth
N/A
Input Sample Rate
N/A
Dimensions (HWD)
Each speaker – 6″ (15.2 cm) x 4″ (10.2 cm) x 5.25″ (13.3 cm)
Weight
Left (active) – 3.1 lb (1.4 kg)
Right (passive) – 2.4 lb (1.1 kg)
Total Shipping Weight
7.6 lb (3.5 kg)
Shipping Box Dimensions (LWH)
15″ x (38.1 cm) 7.25″ (18.4 cm) x 11″ (27.9 cm)
0.7″ (18 mm) thick MDF cabinets
0.75″ (20 mm) silk dome tweeters with neodymium magnets
2.75″ (70 mm) aramid fiber woofers with advanced voice coils
The HD4 speakers do include detachable magnetic grills. The grills have thin rubber pads to prevent marks or damage to the finish or the cabinet, so your HD4s will keep looking great even if you like to remove / replace them frequently!
Yes, you can. The HD4 speakers use a switching power supply so it will automatically convert to the different voltage. The power cable is also detachable which makes it convenient to replace the AC plug with a different type if you don’t want to use an adapter plug.
Sure, for HD4 you will need an inverter that can supply about 50-60 watts.
While the HD4 has a fantastic 24-bit DAC, you can always run your own external DAC to the speakers by connecting to the analog inputs.
Some turntables will need a preamp before being connected and others may have one built-in. Check the turntable manufacturer’s website or user manual.
Yes! All Audioengine powered speakers have multiple audio inputs. Both analog inputs (3.5mm and RCA) are active, so you can connect multiple audio sources at the same time.
The digital inputs are slightly different, though. Both the Bluetooth and USB inputs share an internal DAC. In this case, the Bluetooth input will take precedence over the USB connection. This means that the Bluetooth input will mute the USB input’s audio playback. Simply disconnect your Bluetooth device from the HD4 speakers to resume playback from your USB source device.
You should be able to use multiple sources with the HD4s just fine. The analog inputs on the HD4 are always active. They will play at the same time as the Bluetooth or USB input. Bluetooth and USB share the DAC though, so you can only listen to one at a time, and Bluetooth takes priority. If you’re using USB for example, and start using Bluetooth, USB will mute and Bluetooth will take over. If you pause or disconnect from Bluetooth the speakers will automatically switch back to USB after a few seconds.
The size of the speakers are 9″H x 5.5″w x 6.5″D each
The light on the front panel of the HD4 Wireless is the Bluetooth LED indicator. Below are the various Bluetooth LED statuses and their meanings.
- Bluetooth LED is on and solid: The HD4 Wireless has power and currently connected to a Bluetooth-enabled device.
- LED indicator illuminates orange instead of white: This is normal! It means that your source is currently sending the HD4 Wireless an aptX signal.
- Bluetooth LED is on and blinking: The HD4 Wireless has power and the Bluetooth receiver is in pairing mode.
- Bluetooth LED is off and HD4 Wireless is on: Bluetooth is in standby and not in pairing mode. However, the HD4 Wireless is still visible to your device, so simply connect using your device and it will automatically wake up.
You would connect the variable output of the HD4 into the input of your sub using RCA cables.
Technically, yes. But thankfully, it won’t really be noticeable! Bluetooth only has a delay of about 30ms (milliseconds). So for example, you can watch videos from apps like YouTube and stream the audio through your HD4 without any noticeable lag.
The HD4’s USB interface can only accept up to a 16-bit audio signal. However, the built in DAC of the HD4’s will pad the bit depth to 24-bit during playback, helping to lower the noise floor and provide a better dynamic range.
If looking for a desktop stand, our DS2 desktop stands are sized to fit the HD4’s almost perfectly. You can also use the Sanus Steel Series Speaker Stands, however the HD4’s do not have threaded inserts in the bottom of the speaker.
Lastly, here is a list of stands our customers have recommended for wall mounts:
Vogels VLB200 Speaker Wall Mount
Sanus WMS2 Speaker Wall Mount
BTECH BT-77 Side Clamping Wall Mount
We tend to recommend clamping mounts as they allow for a quicker and easier setup.
You can absolutely use your headphones with the HD4 speakers. The HD4’s have a built in headphone amp and a 3.5mm headphone jack located on the front of the powered speaker. When headphones are connected, the audio coming from the HD4 speakers will be cut out so as to not interfere with the audio coming from the headphones. We recommend using headphones with impedance levels between 10 ohms to 10,000 ohms.
The HD4 is equipped with a power-saving circuit that turns off the final stage of the speaker’s amplifier when no input signal is detected, so you can absolutely leave them on when not in use. This activates right after you stop playing music, and is instantaneous (as soon as the input signal stops and it disengages automatically once an input in reintroduced), so there shouldn’t be a noticeable delay when resuming audio. It’s also fine to power off your speakers when not in use if you prefer.
Type
Powered Bluetooth aptX HD speaker system
Amplifier Type
Class AB
Rated Power Output: 30W RMS per channel (measured in compliance with 16 C.F.R. § 432.3)
Peak Power Output: 60W per channel (AES)
Total Peak Power Output: 120W (AES)
Drivers
4″ aramid fiber woofers
0.75″ silk dome tweeters
Inputs
3.5 mm stereo mini-jack, USB, RCA L/R, Bluetooth
Outputs
RCA variable line-out, 3.5 mm mini-jack headphone out
Input Voltages
110-240 V 50/60 Hz auto-switching
SNR
Greater than 95 dB (typical A-weighted)
THD+N
Less than 0.05% at all power settings
Crosstalk
Less than 50 dB
Frequency Response
60 Hz-22 kHz ±1.5 dB
Frequency Response w/ Bass Reduction Switch selected
N/A
Analog Input Impedence
N/A
Nominal Impedence
N/A
Input Impedence
5K ohms unbalanced
Crossover Frequency
N/A
Protection
Output current limiting, thermal over-temperature, power on/off transient protection
Power Consumption
Idle: 10W
Standby Consumption
N/A
Phase
N/A
Recommended Amplifier Power
N/A
Battery Life
N/A
Battery Charge Time
N/A
Internal D/A Converter
PCM 5102
Internal BT Receiver
N/A
Input Bit Depth
24 bit (padded)
Bluetooth Receiver Type
Bluetooth 5.0
Supported Codecs
aptX HD, aptX, AAC, SBC
Supported Bluetooth Profiles
N/A
Wireless Operation Range
Up to 100 ft (30 m) typical
Input Data Rate
Determined by Bluetooth
Wireless Latency
~30 milliseconds (ms)
Connector Type
Micro-USB
USB Device Class
USB 1.1 or above
Input Bit Depth
24 bit (padded)
Input Sample Rate
44.1 kHz/48 kHz
Headphone Amp Type
OPA2134
Full-scale Headphone Output Level
2.0 V RMS
Output Impedence
2 ohms
Recommended Headphone Impedence Level
10 ohms to 10K ohms
Dimensions (HWD)
Each speaker – 9″(23 cm) x 5.5″ (14 cm) x 6.5″ (16.5 cm)
Weight
Left (active) – 7 lb (3.2 kg)
Right (passive) – 5.2 lb (2.4 kg)
Total Shipping Weight
16 lb (7.3 kg)
Shipping Box Dimensions (LWH)
20″ (51 cm) x 13″ (33 cm) x 15.5″ (39 cm)
0.7″ (18 mm) thick MDF cabinets with real wood veneer
0.75″ (20 mm) silk dome tweeters with neodymium magnets
4″ (101 mm) aramid fiber woofers with advanced voice coils
To minimize unwanted resonances and distortion, Audioengine cabinets have thick high-resin MDF walls with extensive internal bracing. Heavy internal sound-damping material is used to reduce unwanted sound reflections inside the cabinet. All cabinet edges are rounded which look great and reduce high-frequency diffraction effects on the front baffles. The HD4 cabinet contains tuned, front-port slots.
You’ll need to make sure you have gone through the initial set up process for the A1-MR before moving onto the below steps.
For iPhone users:
- On the iPhone, swipe to open the Control Center. (the swipe direction is dependent upon the iPhone model you are using)
- In the music control area, tap the AirPlay button.
- A list of AirPlay capable devices seen by your iPhone will be shown. Tap the A1-MR to connect to it.
- Once connected, you can use your iPhone to send audio to your A1-MR without the need to open the Audioengine Control App.
For Mac users:
Option 1:
- Make sure that your Mac and A1-MR are on the same Wi-Fi network.
- Go to Apple menu > System Preferences > Sound.
- Under Output, you should see a list of any devices you are able to AirPlay to, and the A1-MR should be an option. If you named the A1-MR during setup, it may appear under that name.
Option 2:
- Hold down the Option key on your keyboard, then click on the speaker icon in your menu bar. You will then see a list of audio output devices that are on your local network – select the A1-MR.
- Once you change the audio output to an AirPlay device, all audio coming from your Mac will go through the A1-MR, and not the internal speakers on your Mac.
- To change the audio output back to your Mac’s internal speakers, you can either Option-click on the speaker icon again and select internal speakers, or go back into System Preferences and change it there.
Once you have set up all of your A1-MRs on your Wi-Fi network:
Open the Audioengine control app. Swipe from right to left in the app to the “Device” screen where your A1-MRs are listed. Determine which group of A1-MRs you want to be your primary, then touch the “+” in the upper right corner. A list of any additional A1-MRs you want to add will appear and you can tap the empty circle to add a check to the bubble, then tap “Done” You can add multiple A1-MRs into that primary A1-MR for whole-home playback.
The A1-MR uses the ES9023 DAC. As the A1-MR uses your home wi-fi network, it is lossless and no compression is needed.
Sending audio to multiple A1-MR units at once will not impact the audio quality.
Any audio source can be used for multiroom playback through your A1-MR(s) when using AirPlay, or when streaming audio via DLNA / UPnP, or using the streaming services integrated into the Audioengine Control App. The A1-MR(s) need only first be configured into groups using the Audioengine Control App.
Windows 10 supports sharing the media on your computer via DLNA. To set this up, you’ll need to:
- Click start and search for “media streaming options”.
- Turn on media streaming.
- Name your media library whatever you’d like after turning it on.
- From the Audioengine Control app on your Smartphone or tablet, go to My Music-> Home Music Share, and look for your media library name.
From here you can play audio stored on your computer to any A1-MR(s) on your network. Just keep in mind that your computer will need to be powered on.
For music streamed through Audioengine Control App, or from streaming applications built into the Audioengine Control App, the A1-MR streams music directly over your Wi-Fi network. The stream will continue whether your device is taken out of range or turned off altogether.
Airplay, generally speaking, makes a connection between your source device and the A1-MR, through your network. If your device goes out of range of the network, or the application on your source that is playing audio is closed, playback will stop.
Both Audioengine Bluetooth and Wi-Fi-based solutions are capable of delivering very high quality audio! Bluetooth is an extremely convenient way to quickly pair to a speaker for easy wireless playback. Wi-Fi solutions are great for multi-room setups with custom groupings with different music or simultaneous playback to all which can be easily controlled with the A1-MR app.
The A1-MR doesn’t include a YouTube Music integration into the Audioengine Control App, but YouTube Music will work via Airplay on an Apple Device. So you’d be able to stream YouTube Music to the A1-MR from your iPhone, iPad, or Mac computer, no problem.
Qobuz works great with the A1-MR for lossless CD quality streaming! Once you get your A1-MR setup on your network using the Audioengine app, you will be able to send your Qobuz music to the A1-MR through the Qobuz app on your MacBook Pro, the Qobuz app on your devices, or directly through the Audioengine Control app! Qobuz and other lossless capable streaming services are played back at CD quality, with no compression.
The A1-MR doesn’t include any MQA specific hardware, but you can still enjoy the benefits of MQA through software decoding with services like TIDAL, where you’ll have access to up to 16-bit 44.1kHz high resolution audio.
Does the A1-MR support gapless playback?
Gapless playback works great when streaming to the A1-MR as long as the music app you are using supports gapless playback as well, such as Spotify. You would not need to adjust anything with the A1-MR or within the Audioengine A1-MR app.
One of the great benefits to the A1-MR is that you’re no longer stuck using one product app. Any music player will work for iOS and MacOS via Airplay, as well as DLNA or UPnP streaming options for Android and Windows.
Try playing music directly on your phone, tablet or from your local library using the same network to check your internet connection.
If your internet connection is OK:
- Check the connections between A1-MR and your stereo system.
- Use the Audioengine Control app to test signal strength.
- Restart your source music device and power cycle your A1-MR and stereo.
Yes. You must be connected to your network for your music to play.
Press and hold the status button on the front panel until the LED begins flashing (about 4 seconds), and you hear a voice prompt letting you know that the A1-MR has entered setup mode. If you don’t hear the voice prompt, double check your audio systems volume, and that the A1-MR is connected to an active input.
Open the Audioengine Control app on your smartphone or tablet, and follow the instructions to complete setup. If you have other A1-MR units that are already configured, you will need to press the + in the top right corner of the screen to continue setup.
If you have grouped the speakers for a multi-room setup in the Audioengine app, only the A1-MR that you grouped the speakers into will show as the available destination. If you wish to send to your other speakers independently, ungroup the A1-MRs in the app by pressing and holding on the speaker in the grouping and dragging down and away from the group.
Yes.
We considered Airplay 2, and will continue to keep an eye on it for future products or updates. At present though, the A1-MR includes support for only Airplay.
While Airplay 2 allows grouping of Airplay 2 devices in the Apple Home app, to allow streaming audio to multiple rooms at once, we’ve already built out advanced multi-room grouping features through the Audioengine Connect App. And in our implementation, these features extend not only to Airplay on iOS and MacOS, but can even be used for non-Apple devices which don’t support Airplay or Airplay 2.
The short answer is ‘yes’. However, you will need to use an app that gives you the ability to use Airplay while in Windows. Though there are a few options out there, we’ve found TuneBlade to be one of the more affordable and easy-to-use applications available. TuneBlade is a simple tray utility that lets you stream system-wide audio to the Al-MR from your Windows device. There’s a one-time fee of $9.99 to purchase the app, but they have a trial version you can try out for free.
To start, make sure your A1-MR is setup on the same network as your Windows device (PC/laptop). Once TuneBlade is installed, start the program. TuneBlade will automatically locate your A1-MR and any other Airplay-ready devices connected to your network.
Start playing the audio you wish to stream to your A1-MR(s). While the audio is playing, hit the ‘play’ button next to the corresponding A1-MR in the TuneBlade app. All audio coming from your computer will now be passed on to the B-Fi. While using TuneBlade, you can send the audio to multiple A1-MR’s at once and the audio will automatically sync between A1-MR’s without the need to group them in the Control App.
Things to keep in mind when using TuneBlade:
- If you have speakers directly connected to your computer, then turn them down (using the volume controls on the actual speaker) as there will be a slight buffering delay between the audio from your computer speakers and the speakers connected to your A1-MR(s).
- TuneBlade streams system-wide audio, so Windows notifications will be passed through when they occur.
- TuneBlade is a work-around we found offering Windows users the same streaming capabilities via Airplay that Apple users have.
Type
Powered Wi-Fi speaker system
Amplifier Type
Class D
Rated Power Output: 15W RMS per channel (measured in compliance with 16 C.F.R. § 432.3)
Peak Power Output: 30W per channel (AES)
Total Peak Power Output: 60W (AES)
Drivers
2.75” aramid fiber woofers
0.75“ Silk dome tweeters
Inputs
3.5 mm stereo mini-jack, Wi-Fi
Outputs
LFE Variable line-out for subwoofer
Input Voltages
100-240 V 50/60 Hz auto-switching
SNR
Greater than 95 dB (typical A-weighted)
THD+N
Less than 0.05% at all power settings
Crosstalk
Less than 50 dB
Frequency Response
65 Hz-22 kHz ±2.0 dB
Frequency Response w/ Bass Reduction Switch selected
N/A
Analog Input Impedance
N/A
Nominal Impedance
N/A
Input Impedance
10K ohms unbalanced
Crossover Frequency
N/A
Protection
Output current limiting, thermal over-temperature, power on/off transient protection
Power Consumption
Idle: 10W
Standby Consumption
N/A
Phase
N/A
Recommended Amplifier Power
N/A
Battery Life
N/A
Battery Charge Time
N/A
Dimensions (HWD)
Each speaker – 6″ (15.2 cm) x 4″ (10.2 cm) x 5.25″ (13.3 cm)
Weight
Left (active) – 3.1 lb (1.4 kg)
Right (passive) – 2.4 lb (1.1 kg)
Total Shipping Weight
7.6 lb (3.5 kg)
Shipping Box Dimensions (LWH)
15″ x (38.1 cm) 7.25″ (18.4 cm) x 11″ (27.9 cm)
0.7″ (18 mm) thick MDF cabinets
0.75″ (20 mm) silk dome tweeters with neodymium magnets
2.75″ (70 mm) aramid fiber woofers with advanced voice coils
Yes! You would just need an amp, like our N22, to supply power to the P4 speakers and connect to the S6.
The S6’s crossover is a variable low-pass filter. This means it variably adjusts how high the S6 will play. Unless the subwoofer is pretty far away, you can usually leave the phase switch set to 0°. When setting up a new S6, I like to start with the crossover all the way counter clockwise and, with some music I’m familiar with playing, first get the volume “about” right. After that try making very small adjustments clockwise on the crossover, evaluating each small change from where you’ll be listening from most often. Once it starts sounding like you can localize where the sub is coming from, back it off until you can’t again. You may also need to lower the volume a touch after the crossover is dialed in, or perhaps even while you’re dialing it in, depending on the acoustics of the room you’re in, and your own preference on how present you’d like the sub to sound.
Audioengine powered speakers have fixed passive crossovers designed specifically for them; this simply means that they are designed to play the frequency range they produce, so it’s not necessary to alter this when adding a subwoofer. Adding a subwoofer, such as the S6, will pick up where the speakers leave off, extending the low end response.
The S6’s crossover is a variable low-pass filter, and will not adjust the audio for the RCA output connection. This is a full range line level output.
Yes! You’d just need a wireless adapter like our W3 Wireless Adapter.
Most Audioengine powered speakers have variable RCA outputs for use with a subwoofer like the S6 (the exceptions being the B2 and the 512). This means that the output of the speakers and the RCA output will go up and down together. So once you dial in the volume of your S6, you should be able to adjust the volume from the speakers, or your source device. Either way the subwoofer and speakers should stay in balance as the volume is raised and lowered.
The S6 is dimensions are 10″H x 8.7″W x 10″D
Applicable to our HD3 and HD4 speakers
Turn on the speakers using the power switch located on the rear panel. The speakers will automatically go into Bluetooth “pair mode” and the Pair button on the front panel should start flashing.
- On your source device (phone, tablet, laptop, etc), turn on Bluetooth and go to Bluetooth preferences.
- Select “Audioengine HD3 (or HD4)” to pair and connect. The Pair indicator on the front panel should be solid. Play your music and adjust the volume levels on the speakers and your device.
To add additional devices put the speakers back into pair mode by disconnecting them from your device or by pressing and holding the Pair button on the front panel until the pair indicator starts flashing.
Our speakers can wirelessly connect to only one device at a time, however it will remember up to six different devices.
Applicable to our A2+, HD3, HD4, A5+, A5+Wireless, and HD6 speakers.
Start with power cycling your speakers by turning them off and then back on. From there:
- Determine if the distortion is due to your source by disconnecting all source devices from the speakers.
- Please make sure all of your connector cables are in working order. Try different cables as well as a different source device.
- Please try using each input available (mini-jack, RCA, USB, as well as Bluetooth), one at a time, to see how the speakers react. If the distortion is unique to one speaker, when testing via RCA switch the RCA jacks (red to white and white to red) to see if the issue remains in the same channel.
- Make sure it is not a power issue by trying a power outlet that is on a different circuit.
If the issue persists, please click on the following link and then click on the dropdown to submit an email to our Support team:
When doing so, please copy and paste the above troubleshooting steps along with the results of each and include this information when contacting us.
Audioengine’s A2+ Wireless Desktop Speakers have clinched the title of Best Desktop Speaker of 2024, as declared by New York Magazine. This recognition shines a spotlight on the A2+’s superior sound quality, wrapped in the sleek, new matte blue finish.
In an era where desktop speakers often compromise on quality for design, Audioengine stands out by merging both without sacrifice. The A2+ is not just another speaker—it’s a statement of high-fidelity audio meeting bold, innovative design.
Jennifer Conrad from New York Magazine remarked on the A2+’s impressive capabilities, noting,
“The speakers easily filled my office with music at a low volume and could be turned up loud enough to fill most of my apartment.”
This is what Audioengine aims for: robust, clear sound that can command any room, regardless of volume levels.
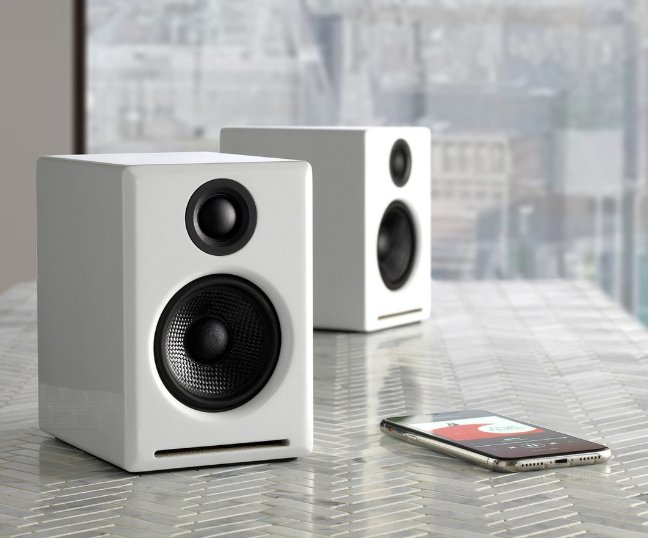
Since its inception in 2005, Audioengine has been at the forefront of creating home music systems that redefine the listening experience.
The A2+ Wireless Desktop Speakers embody this mission, offering Bluetooth connectivity and an intuitive setup that appeals to audiophiles and casual listeners alike, and that is what makes them the best desktop speakers of 2024. The addition of the matte blue model to the A2+ lineup showcases Audioengine’s commitment to providing options that cater to the individual style of our users.
This accolade from New York Magazine is a testament to Audioengine’s legacy of innovation and quality in the audio industry. It celebrates not just the superior sound of the A2+, but also the company’s ongoing commitment to enhancing the way music is experienced in personal and professional spaces.
For those in pursuit of desktop speakers that refuse to compromise on sound or style, the Audioengine A2+ Wireless Desktop Speakers, especially in the new matte blue variant, offer an unrivaled audio experience that stands out in 2024’s competitive landscape.
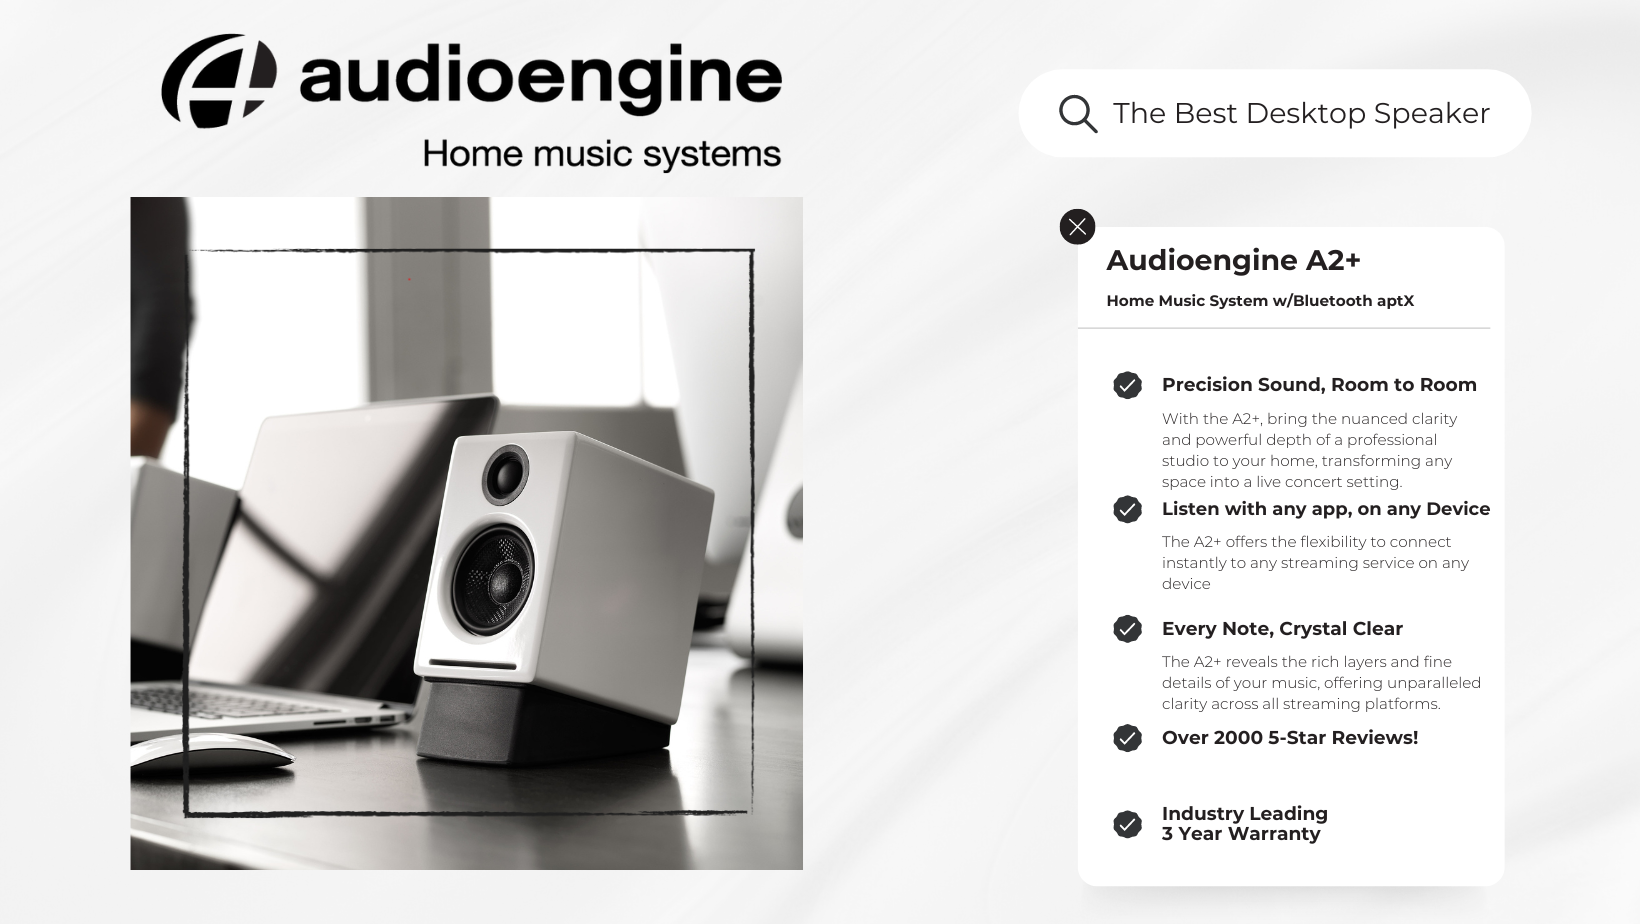
Table of Contents
- Introduction
- Main Differences Between Audioengine A2+ and Edifier R1280DBs
- Key Specifications
- Overall Design
- Playback Capabilities
- Other Noteworthy Features
- Audioengine A2+ Exclusive Advantages
- Edifier R1280DBs Overview
- Pros and Cons
- Audioengine A2+
- Edifier R1280DBs
- Conclusion
Introduction
In the realm of powered desktop speakers, the distinction between a good and an exceptional audio experience can be vast. The Audioengine A2+ and Edifier R1280DBs both offer quality sound and features, but a closer look reveals why the A2+ is the superior choice for audiophiles and casual listeners alike.
Main Differences Between Edifier R1280DBs and Audioengine A2+
The Audioengine A2+ sets itself apart through its premium build quality, superior sound performance, and versatile connectivity options. Emphasizing a richer audio experience and modern aesthetics. While the Edifier R1280DBs aim for affordability and functionality, they do not offer the same level of premium materials or sound quality.
Key Specifications
- Audioengine A2+:
- Amplifier Type: Class AB
- Power Output: 60-Watt Peak Power Total
- Connectivity: Bluetooth aptX, USB, Analog Inputs
- Edifier R1280DBs:
- Built-in Amplifier Power: Up to 42 Watts
- Connectivity: Bluetooth 5.0, RCA Inputs
Overall Design
The Audioengine A2+ showcases its superior design with real-wood cabinets that are both hand-crafted and hand-painted, available in Satin Black, High Gloss White, High Gloss Red, and Matte Blue. This attention to detail sets them apart from the Edifier R1280DBs, which, despite having real wood cabinets, do not offer the same level of craftsmanship, lacking the hand-crafted and painted qualities that pushes the A2+ to a higher standard of design excellence.
Playback Capabilities
The Audioengine A2+ stands out with its 60 watts of power, supported by a Class AB amplifier and Bluetooth aptX, for a superior sound experience. In contrast, the Edifier R1280DBs, although featuring Bluetooth 5.0, are limited to a 42-watt output, which does not allow for the same level of volume or audio clarity, emphasizing the A2+’s enhanced sound capabilities.
Other Noteworthy Features
Audioengine enhances customer confidence with US-based customer phone support, a 30-day audition period, and a 3-year warranty, highlighting its commitment to product excellence. Conversely, Edifier offers essential support with a 30-day return policy and a 2-year warranty.
Audioengine A2+ Exclusive Advantages
- Superior Sound Quality: With its built-in DAC and AB Amplifier, the A2+ allows you to hear your favorite songs the way the artist intended.
- Premium Design: The hand-crafted and hand-painted wood cabinets not only provide superior acoustics but also add a touch of elegance to your space.
- Versatile Connectivity: The A2+ supports a wide range of devices through Bluetooth aptX, USB, and analog inputs, ensuring compatibility with any setup.
- Exceptional Customer Support: Audioengine’s commitment to customer satisfaction is evident in their responsive US-based customer phone support and comprehensive 3-year warranty.
Edifier R1280DBs Overview
While the Edifier R1280DBs are a solid choice for those on a budget, offering Bluetooth connectivity and a practical design, they lack the A2+’s premium finish, signature Audioengine sound quality, and industry leading customer support.
Pros and Cons
Audioengine A2+
- Pros: Exceptional sound quality; elegant, hand-crafted design; versatile connectivity; superior customer support.
- Cons: Higher price but justified by the superior sound quality and craftsmanship.
Edifier R1280DBs
- Pros: Affordable, good for basic needs, and includes remote control.
- Cons: Sound and build quality cannot match the A2+; limited support.
Conclusion
While both the Audioengine A2+ and Edifier R1280DB offer quality sound and features, a closer look revealed that the Audioengine A2+ is the superior choice for both audiophiles and casual listeners. Through the hand-crafted and hand-painted cabinets and superior sound quality, the A2+ proves to be the best choice.
In order to stream Spotify to the Audioengine B-FI or A1-MR, Spotify requires a paid Premium account. This unlocks the Spotify-Connect feature within the app to send the audio to your Audioengine B-FI/A1-MR.
A single device using a personal (1 user only) Spotify Premium account cannot play multiple songs simultaneously. However, this would be possible with a family plan and more than 1 device (B-Fi or A1-MR) though.
To get things up and running only takes 3 simple steps. You would just need to first connect the included USB-C cable from your device’s USB port to the DAC3; then you’ll need to connect the mini-jack output of your DAC3 to headphones, or any audio input of your powered speakers, stereo system, etc.
Next, if using a Mac, you will need to go to System Preferences/Sound, and select “Audioengine DAC3”; if you’re using a PC, no setting changes are needed as the computer will automatically find the USB driver. Finally, you’ll just need to adjust the volume on your device and DAC3 to medium and you’re ready to play music from iTunes or your favorite media player and that’s it! Setup really is that easy!
The DAC3 will work with Android or any device that can operate as a USB-C host, can provide enough power via USB, and includes generic drivers for standard USB audio playback. A device with Android 5.0 or later should have both USB host mode and native plug-and-play functionality for USB audio, so you could connect the two together using the included USB-C cable.
The DAC3 is essentially a very high-end external sound card. Its components and implementation of those components make it more capable than what might be built into a computer, not to mention the benefit of moving those sensitive components outside and away from the potentially noisy interior of your computer. All of this means the signal your speakers or wired headphones receive will be clearer, with a lower noise-floor, and with a more pronounced dynamic range over your internal sound card.
The DAC3 includes a headphone amplifier based on the ES9281A PRO Ultra DAC delivers 32-bit precision, high dynamic range and ultra low distortion. This headphone amp is able to provide low-impedance, high-fidelity audio to a wide range of wired headphones.
Yes! All you would need to do is connect your iOS device to the DAC3 using the included Lightning to USB-C cable.
DAC3 can easily drive wired headphones with impedances of 12 ohms or higher.
Yes! DAC3 offers broad support for standard hi-res audio formats including MQA, PCM and DSD.
The DAC3 uses the ES9281A PRO DAC chipset
If you do not have headphones connected to the DAC3, the LED light will turn off after cycling through ‘Blue/Green/Red’. This is an intended feature to help save device power when headphones are unplugged.
- Verify that one of the included cables is completely plugged into the DAC3 and your source device.
- Also verify that a 3.5mm mini-jack is firmly plugged in.
- Try disconnecting and reconnecting both the USB and 3.5mm cable.
- You will see an LED light confirming the DAC3 is getting power and is connected to an output.
- Check the volume level on your source.
- If connected to a computer, verify that the DAC3 is recognized and the active output device.
- Try restarting your computer.
If none of the above helps resolve your issue, please contact our Support Team for additional assistance.
Please check that the volume control on your phone/tablet/computer is up and at a good level; 75% should be a good level. Also try adjusting the volume on the DAC3 as well.
Check the cables between DAC3 and your headphones or sound system. Also check your audio player and OS audio controls to ensure that the audio balance is centered as well.
Verify that the sample rate selection in your computer’s OS is set correctly. Your OS’s output settings will determine the color of the LED on the DAC3 — not the specific file being played.
Verify that the audio cable from the D3 is plugged in and in working order.
The DAC3 only needs 200mA USB power to work, which most all modern source devices are capable of.
DAC type
USB
Input
USB audio
D/A converter
ESS ES9281A PRO
USB transfer mode
Asynchronous dual clock
USB device class
Type 1.1 or above
Input bit depth
32 bit
Input sample rate
44.1kHz-96kHz native playback
188.2kHz & 192kHz re-sampled to 96kHz
Output
Analog 3.5mm mini-jack stereo
Full-scale output level
2.0V RMS
Output impedance
2 ohms
Recommended headphone impedance range
12 ohms to 10K ohms
Headphone amplifier
LME49726
Frequency response
10Hz-25KHz (+/- 0.5dB)
SNR
>116dB
THD+N
(1kHz FS 96kS/s) <0.002%
Crosstalk
-110dB
Power requirement
USB 5V DC, 200mA
USB power filtering
2-stage redundant regulation
Product dimensions
1.9” (48mm) ×0.6” (15mm) ×0.375″ (10MM)
Shipping weight
1.0lbs (0.5kg)
Environmental
Operating Temperature: 32 to 95 degrees F
Non-operating Temp: -4 to 113 degrees F
Relative Humidity: 5% to 95% non-condensing
Included accessories
Lightning to USB-C and USB-C cables
Setup guide
DAC3 Internal Converter
The heart of the DAC3 is the ES9281A PRO DAC, which is well-regarded for its low noise and high fidelity. Due to the high signal-to-noise specs of the ES9281A PRO and the added benefit of double redundancy power source conversion and filtering, the DAC3 presents impressive low noise and low distortion characteristics. The DAC3 can process digital audio at any bit depth up to 32 bits and any sample rate up to 192kHz. DAC3 pads (upsampled) all bit depths internally to 32-bits, thus achieving a higher signal-to-noise ratio.
DAC3 Headphone Amplifier
The DAC3 contains a high-performance headphone amplifier based on the LME49726 low-noise opamp. This amp is able to provide low-impedance, high-fidelity audio and a 2-volt output which easily drives a wide range of headphones, satisfying even the most demanding headphone enthusiasts. The DAC3’s relay-controlled stereo output can also be connected to any system with an analog audio input, such as Audioengine powered speakers.
DAC3 Power
The DAC3 is powered directly from the USB bus and power is passed through two stages of regulation to ensure no USB bus power variations affect the audio quality. This low-noise, low-ripple power supply is located on a separate circuit board for extra isolation and thermal management.
DAC3 Volume Control
Volume for headphones and line-out is controlled directly from the DAC3 side panel. Smoothly adjust volume levels at fine increments without any undesirable noise or channel imbalance at lower volumes.
Audio formats and bitrates are shown by the color of the indicator light on the D1P
White PCM 32-48kHz
Green PCM 88.2-192kHz, DSD64, Optical
Blue PCM 352.8-384kHz, DSD128
Purple MQA Rendering
*When connected to a Mac or PC, the indicator light reflects what your system sound audio output quality is set to, not the bitrate of the specific track you’re playing.
The D1P works with iOS, Android, MacOS, and Windows devices, supporting any device with a USB or digital audio output, including phones, laptops, and computers.
Absolutely, the D1P is engineered to power audiophile-grade headphones effortlessly. Its robust yet portable 32-bit headphone amplifier ensures superior sound quality from even the most demanding headphones.
It is powered by your devices through a USB-C connection, with no need for an additional/external power source. This ensures convenient and versatile use across all your digital devices on-the-go, or from your home.
The D1P accepts both USB-C and S/PDIF optical input from any device with a TOSLINK digital optical, for your digital audio sources.
By bypassing your computer’s internal DAC or sound card, the D1P with its advanced DAC technology and custom audiophile-grade connectors delivers a more expansive and detailed soundstage, enhancing your listening experience across platforms like iTunes, TIDAL, Spotify, and Pandora.
The D1P supports MQA, FLAC, PCM, and DSD formats, ensuring it can handle a wide range of high-quality audio files for your listening pleasure.
Yes, the D1P has built-in MQA hardware to complete the final unfold of an MQA audio file, offering a crystal clear listening experience.
The D1P processes PCM digital audio up to 32 bits and a maximum sample rate of 384kHz. It also supports DSD playback up to DSD128, allowing for high-resolution audio playback.
The Toslink digital optical input allows the D1P to accept PCM stereo streams from any optical source, like TVs, computers, and media servers, providing flexible and high-quality audio connectivity.
Key components include a Savitech SA9312 USB, an ESS ES9219C DAC for superior audio decoding, and a Cirrus Logic CS8416 for optical input, ensuring premium performance and sound quality.
Ensure the toggle switch is set to the headphone output and not the line out. This common step is overlooked and is crucial for directing audio correctly.
The D1P gives priority to the optical input over USB when dual connected.
The D1P supports a wide range of headphones, from 10-600 Ohms, accommodating nearly all audiophile-grade headphones.
No external power is required. The D1P has a minimal power draw and can be powered directly by your mobile device or computer, ensuring efficient operation without significant power consumption. If you do not have a computer close by and are using the optical, any 5v DC USB power supply will work.
DAC Chip:
SA9312+ES9219C
Input bit depth:
Up to 32 bits
Input sample rate (USB):
PCM Max. 32bit 384KHz, Max 24bit 192KHz
DSD Support:
DSD 64, 128 (DOP), DSD 256 (Native)
MQA Rerender:
8X
USB device class:
UAC 2.0
Inputs:
USB Type-C
S/PDIF Optical (Max 24bit 192KHz)
Toggle Switch for input selection
Outputs:
Standard 3.5mm headphone port for headphones and headsets
RCA
SPDIF
Full-scale output level:
Max. 2.05Vrms @ 10K default
Output impedance:
<0.5R @ Headphone, 47R @ RCA
Recommended headphone impedance range:
10 Ohms ~ 600 Ohms
Frequency Response:
20Hz-40KHz +/-0.1dB
Signal-to-Noise Ratio (SNR):
121dB (10K)
Power Requirement:
USB 5V DC
Consumption:
~102mA (normal), ~121mA (with pink noise at 50% volume, 32bit 384Khz)
Indicators:
- White: power/connected
- Green: PCM 88.2-192kHz / DSD64
- Blue: PCM 352.8-384kHz / DSD128
- Purple: MQA
- Green: Optical
Product dimensions
3.0″ (7.62 cm) x 2.5″ (6.35 cm) x 1″ (2.5 cm)
Shipping weight
13.7 oz (0.39kg)
Environmental
Operating Temperature: 32 to 95 degrees F
Non-operating Temp: -4 to 113 degrees F
Relative Humidity: 5% to 95% non-condensing
Included Accessories:
- USB-C cable
- Lighning Cable
- Setup guide
- Microfiber bag
Table of Contents:
- Introduction
- Main Differences Between Audioengine D1P and AudioQuest DragonFly Cobalt
- Key Specifications
- Key Features
- Overall Design
- Playback Capabilities
- Other Noteworthy Features
- Reliability
- Pros and Cons
Introduction
In the world of high-quality audio playback, digital-to-analog converters (DACs) play a crucial role in transforming digital audio signals into a format that can be appreciated by audiophiles and casual listeners alike. Audioengine’s D1P and AudioQuest’s DragonFly Cobalt are two standout DACs that offer unique features and capabilities. This analysis will delve into a detailed comparison of these two devices, highlighting their strengths and differences.
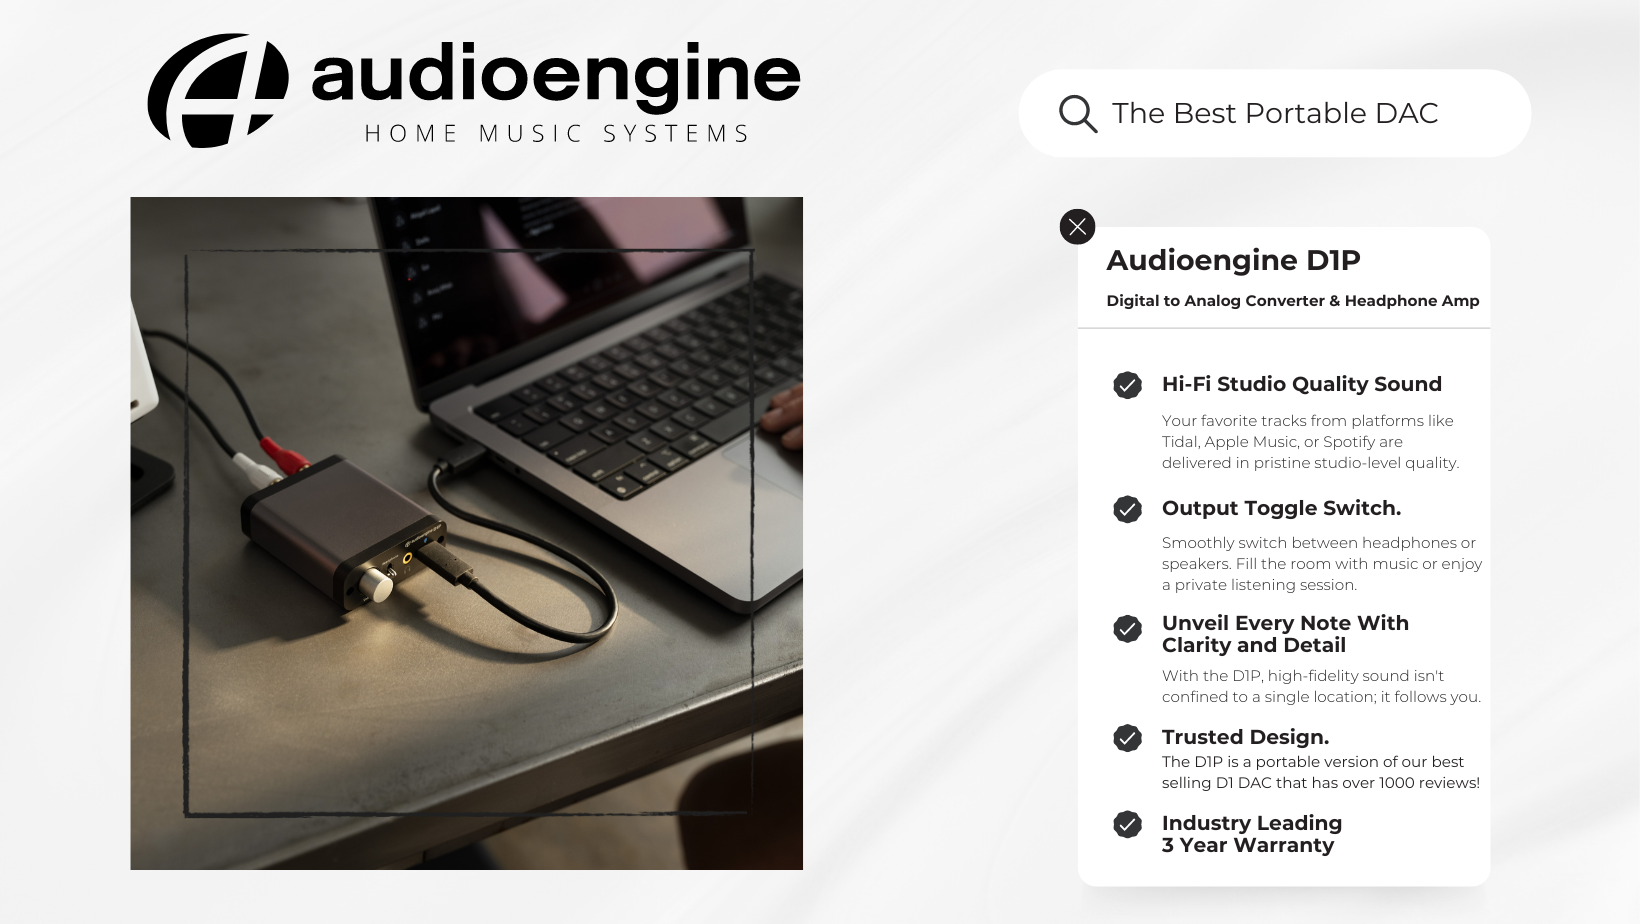
Audioengine D1P and AudioQuest DragonFly Cobalt
The Audioengine D1P builds on the legacy of its predecessor, the D1, offering a lightweight and compact form factor with enhanced audio performance thanks to its ESS Sabre DAC chip. It is designed for versatility with a convenient toggle switch to easily swap between your headphones and speakers.
Conversely, the DragonFly Cobalt by AudioQuest focuses on portability and compatibility, featuring a high-performance ESS Sabre digital-to-analog conversion chip and a variety of connectivity options for mobile and desktop devices.
Key Specifications
Audioengine D1P Digital to Analog Converter:
- ESS Sabre ES9219C 32-bit/384kHz DAC chip
- Supported sample rates: PCM up to 32-bit/384kHz, DSD up to 11.2 MHz
- Connectivity: USB-C, Optical, 3.5mm output, RCA output
- No battery required; powered by USB
- Dimensions: 3″W x 1″H x 2-1/2″D; Weight: 0.85 lbs.
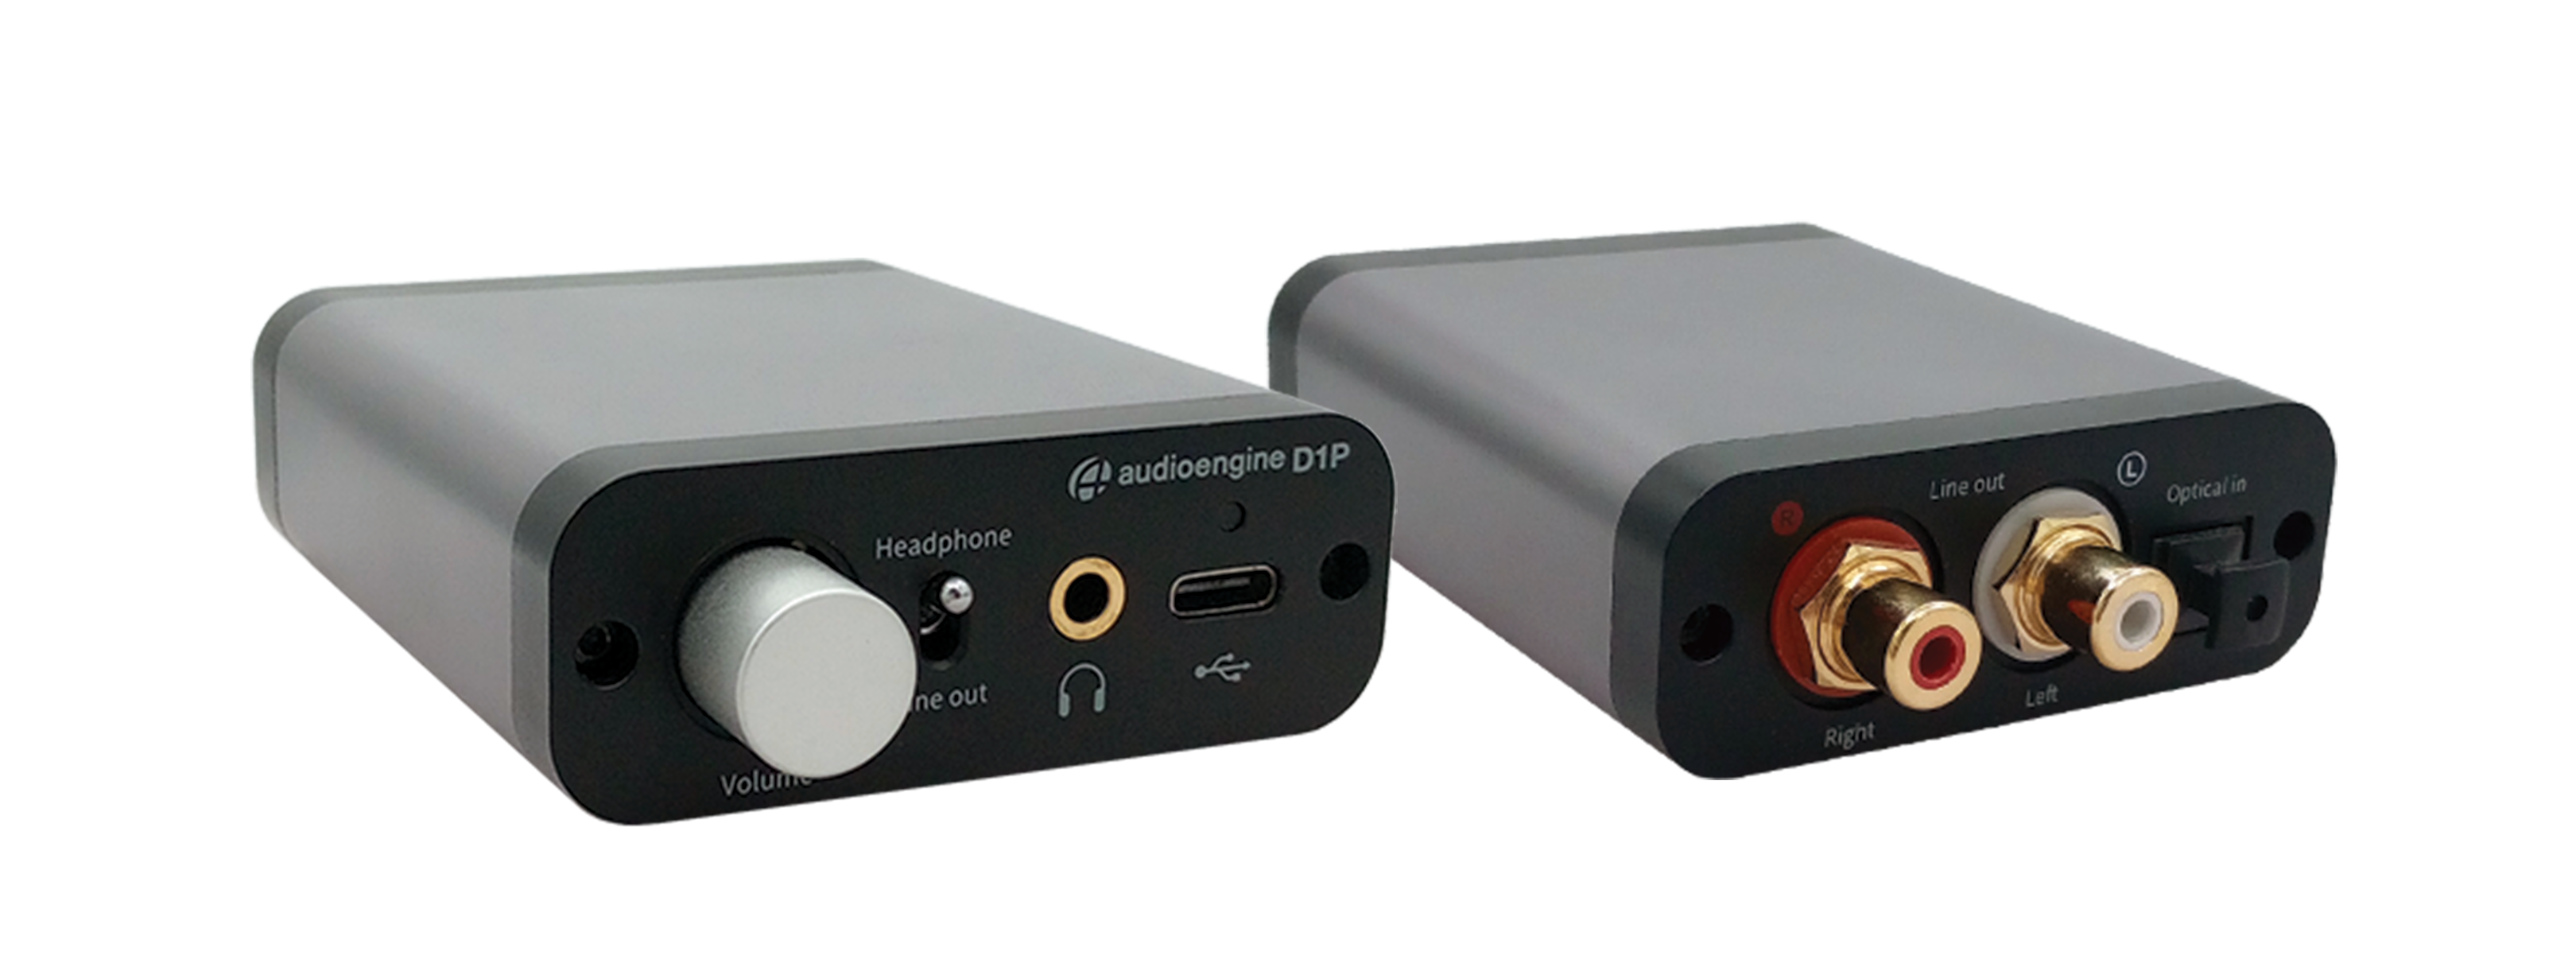
AudioQuest DragonFly Cobalt:
- 32-bit ESS Sabre ES9038Q2M DAC chip
- Supported sample rates: PCM up to 96kHz
- Connectivity: USB, 3.5mm output
- Powered by USB connection
- Dimensions: 3/4″W x 1/2″H x 2-1/4″D
Key Features
- Audioengine D1P: Offers a wide range of audio format support, including AAC, FLAC, and MQA, with a variety of connectivity options for flexibility in setup. It also includes an onboard volume knob and a sampling rate indicator.
- AudioQuest DragonFly Cobalt: Known for its compatibility with a wide array of devices, including Windows and Mac computers, iPhones, iPads, and some Android devices. It offers a compact and durable design, with a simple plug-and-play operation.
Overall Design
The D1P continues Audioengine’s tradition of high-quality, aesthetically pleasing designs with its compact and lightweight form factor. It is designed to be the perfect audio companion for both office and home environments.
The DragonFly Cobalt features a durable metal construction with a blue hardshell finish, emphasizing portability and durability for on-the-go use.
Playback Capabilities
Both DACs excel in their playback capabilities, with the D1P leveraging the power of the ESS Sabre DAC chip for detailed and nuanced sound across all types of headphones. The DragonFly Cobalt, with its ESS Sabre digital-to-analog conversion chip and high-performance headphone amplifier, offers dynamic and nuanced sound quality.
Other Noteworthy Features
- Audioengine D1P: Supports hi-fi quality audio rendering, including MQA and FLAC, a USB-C and Lightning adapter for universal phone connectivity, optical digital input for TV and home theater connections, and an industry-leading 3-year warranty.
- AudioQuest DragonFly Cobalt: Offers increased processing speed and efficiency, rendering for MQA audio files, and comes with a variety of adapters for connectivity with different devices.
Reliability
- Audioengine D1P: Known for its durability and backed by a 3-year warranty, offering peace of mind for consumers.
- AudioQuest DragonFly Cobalt: Comes with a 1-year warranty and is praised for its build quality and reliable performance.
Pros and Cons
Audioengine D1P:
- Pros: Supports a wide range of audio formats with bitrates up to 32bit, inclduing MQA, FLAC and AAC, versatile connectivity, durable proven design based on the Audioengine D1, 3-year warranty.
AudioQuest DragonFly Cobalt:
- Pros: Compact and portable, compatible with many devices, easy plug-and-play operation.
- Cons: Limited to 96kHz PCM, requires additional adapters for some connections.
Why Digital Audio Quality Matters
Understanding the essence of high-quality components in a DAC reveals why Audioengine’s D1P excels. It’s not just about hearing music; it’s about experiencing it in its fullest, with every note and nuance captured exactly as created in the studio. Visit our blog about digital and analog audio to learn more.
The Company Behind the Sound
Audioengine, founded in 2005, stands as a testament to American innovation in audio technology. With a focus on customer satisfaction, they provide US-based phone support, and a commitment to quality that’s hard to beat.Â
Why Audioengine D1P Stands Out
With its hi-fi audio quality and robust 3-year warranty, the D1P not only meets but exceeds expectations. It represents the culmination of Audioengine’s dedication to creating products that deliver music the way it was meant to be heard.
As an American company with deep roots in innovation, Audioengine ensures each customer feels valued with US-based support.
In conclusion, while the AudioQuest DragonFly Cobalt offers a pathway to enhanced audio, the Audioengine D1P leads to the destination of audio perfection. It’s more than a DAC; it’s a gateway to experiencing music in its purest form, making it the clear choice for audiophiles and casual listeners alike seeking the ultimate sound experience.
Make sure to maximize your audio source volume/s connected to the N22 and lower the N22 volume dial to minimize naturally occurring noise floor that can come thru the speakers when amplifiers are turned up high.
The dimensions of each speaker is 9.2″H x 5.5″W x 6.5″D
The Audioengine remote takes a CR2025 battery.
Using Third-Party Software
- Audirvana:
- Audirvana is a high-quality audio player for macOS that automatically switches the sample rate to match the source audio.
- It provides a direct mode that bypasses macOS’s audio processing, allowing for bit-perfect playback.
- To use Audirvana:
- Download and install Audirvana from the official website.
- Open Audirvana and go to the preferences.
- Ensure the option to automatically adjust the sample rate is enabled.
- Roon:
- Roon is another powerful music player and library manager that supports automatic sample rate switching.
- It offers advanced features for managing your music collection and provides high-quality playback.
- To use Roon:
- Download and install Roon from the official website.
- Open Roon and go to the settings.
- In the audio settings, configure your DAC as a zone and ensure it is set to automatically adjust the sample rate.
- BitPerfect:
- BitPerfect is a simple and affordable app that integrates with iTunes (Music app) to ensure bit-perfect playback, including automatic sample rate switching.
- To use BitPerfect:
- Download and install BitPerfect from the Mac App Store.
- Open BitPerfect and configure it to work with your preferred audio output device.
- Ensure that automatic sample rate switching is enabled in the settings.
For Windows
To configure your Windows PC to automatically switch the indicator color on your D1P or DAC3 based on the sample rate of the audio file being played, you can use specialized audio playback software that supports this feature. Here are a few options:
Using foobar2000 with WASAPI or ASIO Plugins
foobar2000 is a popular and highly customizable audio player for Windows that can be configured to use WASAPI or ASIO for bit-perfect playback, which allows automatic sample rate switching.
- Download and Install foobar2000:
- You can download foobar2000 from the official website.
- Install WASAPI or ASIO Plugin:
- Download the WASAPI component or ASIO component from the foobar2000 components page.
- Install the component by dragging the downloaded file into the foobar2000 Components window (File > Preferences > Components).
- Configure Output:
- Go to File > Preferences > Playback > Output.
- Select your DAC under the WASAPI or ASIO output device.
- Enable Bit-Perfect Playback:
- Ensure that your DAC is set to “Event” or “Push” mode (for WASAPI) or the correct ASIO driver.
- This configuration will allow foobar2000 to automatically switch the sample rate based on the source material.
Using JRiver Media Center
JRiver Media Center is another powerful media player that supports automatic sample rate switching.
- Download and Install JRiver Media Center:
- You can download JRiver Media Center from the official website.
- Configure Output Mode:
- Go to Tools > Options > Audio.
- Select your DAC as the audio device.
- Under Settings, choose “WASAPI” or “ASIO” as the output mode.
- Set Automatic Sample Rate Switching:
- In the Audio settings, go to “DSP & output format”.
- Ensure “Output Format” is checked, then set the sample rate to “Source Sample Rate” or “No Change” to enable automatic switching based on the source file.
Using Roon
Roon is a premium music player with extensive support for high-resolution audio and automatic sample rate switching.
- Download and Install Roon:
- You can download Roon from the official website.
- Configure Audio Device:
- Go to Settings > Audio.
- Enable your DAC as an output device.
- Set Up Playback:
- Ensure that the sample rate conversion settings are set to “Source Sample Rate” to allow Roon to automatically adjust the sample rate.
Using specialized audio playback software like foobar2000, JRiver Media Center, or Roon can help you achieve automatic sample rate switching on your Windows PC, allowing your DAC to read and display the correct sample rate based on the audio file being played. These applications provide bit-perfect playback and ensure that your DAC receives the correct sample rate without manual configuration.
Type
Powered Subwoofer, sealed enclosure
Amplifier Type
Class D
Rated Power Output: 140W RMS (measured in compliance with 16 C.F.R. § 432.3)
Total Peak Power Output: 210W (AES)
Drivers
6″ long throw front-firing woofer
Inputs
3.5 mm stereo mini-jack, RCA L/R
Outputs
N/A
Input Voltages
100-240 V AC, 50/60 Hz auto-switching
SNR
Greater than 100 dB (typical A-weighted)
THD+N
Less than0.2% at all power settings
Crosstalk
N/A
Frequency Response
33Hz – 132Hz ±1.5dB
Frequency Response w/ Bass Reduction Switch selected
N/A
Analog Input Impedance
N/A
Nominal Impedance
N/A
Input Impedance
10K ohms unbalanced
Crossover Frequency
40Hz – 130Hz
Protection
Output current limiting, thermal over-temperature, power on/off transient protection
Power Consumption
N/A
Standby Consumption
<1W
Phase
0 / 180 degrees
Recommended Amplifier Power
N/A
Battery Life
N/A
Battery Charge Time
N/A
Outputs
N/A
Input Voltages
100-240 V AC, 50/60 Hz auto-switching
SNR
Greater than 100 dB (typical A-weighted)
THD+N
Less than0.2% at all power settings
Crosstalk
N/A
Nominal Impedance
N/A
Input Impedance
10K ohms unbalanced
Crossover Frequency
40Hz – 130Hz
Protection
Output current limiting, thermal over-temperature, power on/off transient protection
Power Consumption
N/A
Frequency Response
33Hz – 132Hz ±1.5dB
Frequency Response w/ Bass Reduction Switch selected
N/A
Analog Input Impedance
N/A
Nominal Impedance
N/A
Input Impedance
10K ohms unbalanced
Dimensions (HWD)
10″ (25.2 cm) x 8.7″ (22.2 cm) x 10″ (25.3 cm)
Weight
15.4 lb (6.98 kg)
Total Shipping Weight
18.2 lb (8.26 kg)
Shipping Box Dimensions (LWH)
13″ (33 cm) x 13″ (33 cm) x 14″ (35.6 cm)
15mm thick MDF cabinet, 6″ custom front-firing woofer
Frequently Asked Subwoofer Questions
Subwoofers are pivotal in enhancing the audio experience, providing the depth and richness that transform good sound systems into great ones.
As part of the Audioengine lineup, the S6 and S8 subwoofers offer distinct advantages and features tailored to various listening environments. Here, we address some frequently asked questions about these two subwoofers to help you make an informed decision.
#1 What Makes the Audioengine S6 and S8 Different?
The Audioengine S6 and S8 are designed to cater to different needs and preferences:
- Audioengine S6: Compact and front-firing, the S6 is ideal for desktop setups and apartment living. Its design directs sound towards the listener, minimizing disruption to neighbors and fitting seamlessly into smaller spaces. This subwoofer is perfect for enhancing desktop audio without taking up much room.
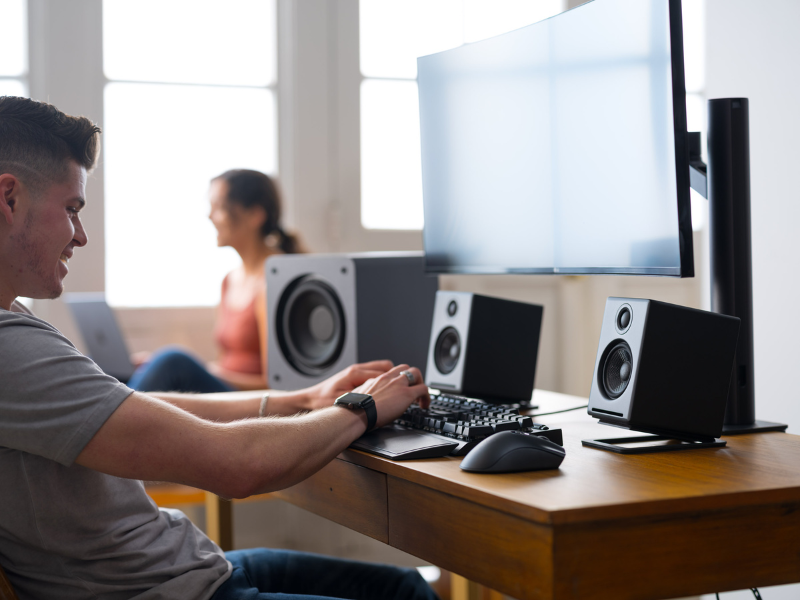
- Audioengine S8: Larger and down-firing, the S8 excels in providing powerful, deep bass suitable for home theaters and larger rooms. Its design ensures that sound resonates throughout the room, making it a versatile choice for both music and movie enthusiasts.
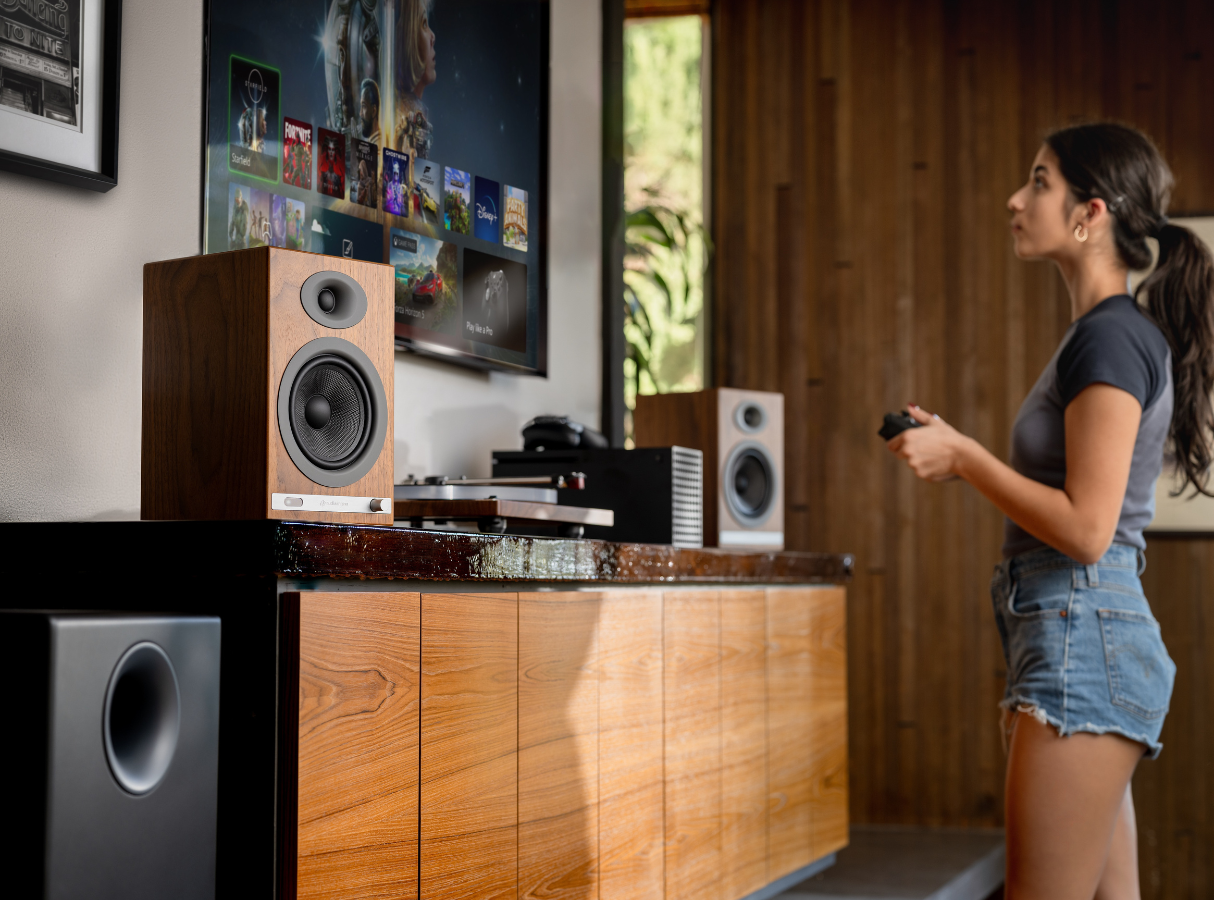
# 2 Why Do I Need a Subwoofer?
Even with high-quality speakers, adding a subwoofer like the S6 or S8 can dramatically enhance your audio experience. Subwoofers handle the lower frequencies that regular speakers struggle with, adding depth and clarity to your music and movies.
For example, the Audioengine A2+ Home Music System delivers excellent mid and high range sounds but pairing it with a subwoofer like the S6 or S8 brings out the full spectrum of bass frequencies, making your listening experience richer and more immersive.
# 3 Are All Subwoofers Created Equal?
When it comes to subwoofers, quality is paramount. Lower quality subwoofers, included with some desktop audio systems, can significantly detract from the overall listening experience.
Here’s why investing in a high-quality subwoofer like the Audioengine S6 or S8 can make all the difference.
- Precision and Clarity: High-quality subwoofers like the Audioengine S6 and S8 deliver tight, controlled bass that enhances both music and movie soundtracks. They provide clear, defined bass that complements mid and high frequencies.
- Robust Build Quality: The S6 and S8 are built from durable materials that minimize unwanted vibrations and resonance. This ensures improved sound quality and a longer lifespan compared to cheaper subwoofers.
- Wide Frequency Range: Both the S6 and S8 reproduce a broad range of low frequencies, providing depth and impact across various types of audio content. Lower quality subwoofers often struggle with this, resulting in a lack of depth.
- Sufficient Power: The S6 and S8 produce ample volume and dynamic range without distortion. Lower quality subwoofers are often underpowered, leading to distortion at higher volumes.
#4 How Should I Place My Subwoofer for Optimal Sound?
Placement Tips for the S6:
- Desk Setup: Place the S6 on your desk or a dedicated stand to keep the bass directed towards your ears. This front-firing design ensures the sound reaches you directly without spreading through floors or walls.
- Room Positioning: Position the S6 near your primary listening area but avoid corners and walls to prevent muddy sound.
Placement Tips for the S8:
- Larger Spaces: The S8 can be placed on the floor in larger rooms to fill the space with deep bass. Its down-firing design allows sound waves to resonate off the floor, enhancing the overall audio experience.
- Subwoofer Crawl Technique: For the best placement, use the subwoofer crawl method. Place the S8 in your usual listening spot, play bass-heavy music, and move around the room to find where the bass sounds best. This spot is where you should place your subwoofer for optimal performance.
#5 Should I Choose a Sealed or Ported Subwoofer?
- Sealed Subwoofers: The S6, with its sealed design, offers tighter and more precise bass. This makes it ideal for genres like jazz or acoustic music, where detail and clarity are paramount.
- Ported Subwoofers: The S8 features a ported design that produces deeper and more impactful bass, suitable for energetic genres like rock and EDM. It’s perfect for larger spaces where you want the bass to be felt as well as heard.
#6 What is an Adjustable Crossover and Why is it Important?
An adjustable crossover allows you to control which frequencies are sent to your subwoofer and which are sent to your speakers. This ensures that the subwoofer handles only the low-end frequencies, allowing your speakers to deliver clearer highs and mids. Both the S6 and S8 feature adjustable crossovers, enabling you to fine-tune your audio setup for the best performance.
#7 How Do I Connect My Subwoofer to My System?
Both the S6 and S8 can be connected to your home music system through various methods:
- Wired Connection: Provides a stable and continuous sound quality. It’s ideal for setups where the subwoofer will remain in a fixed position.
- Wireless Connection: Using adapters like Audioengine’s W3, you can convert a wired subwoofer into a wireless unit, offering more flexibility in placement and reducing cable clutter.
#8 Are Front-Firing Subwoofers Better for Desktop Setups?
Yes, front-firing subwoofers like the S6 are specifically designed for desktop setups. They direct sound towards the listener, making them ideal for close-proximity listening environments like a home office or gaming station. This design ensures that you experience the full impact of the bass without disturbing adjacent rooms or neighbors.
Conclusion
Choosing the right subwoofer depends on your specific needs and listening environment. The Audioengine S6 is perfect for compact spaces and desktop setups, offering precise bass in a neighbor-friendly package. The S8, on the other hand, excels in larger rooms and home theater setups, delivering powerful and resonant bass that can transform your listening experience.
Whether you’re enhancing a home music system or creating a full home theater, understanding the features and benefits of the S6 and S8 will help you make the right choice. Both subwoofers embody Audioengine’s commitment to quality and superior sound, ensuring that every note and beat is delivered with clarity and depth. Upgrade your audio experience today with the S6 or S8 and discover the difference a high-quality subwoofer can make.
Table of Contents
- Introduction
- Common Features and Brand Highlights
- Design
- Ideal Spaces and Uses
- Audio Quality
- Tech Specs and Features
- Conclusion
Introduction
In the search for the ideal subwoofer to improve your home music setup, Audioengine’s S6 and S8 models emerge as standout options. Renowned for their superior quality and performance, both the S6 and S8 offer unique features that cater to different audio preferences and environments. This comprehensive comparison will help you understand the differences and decide which subwoofer is right for your setup.
Common Features and Brand Highlights
Both the Audioengine S6 and S8 are built with exceptional sound quality, premium handcrafted real wood design, and versatility in placement. Some common features include:
- Handcrafted, Real Wood Cabinets: Both models are meticulously crafted with attention to detail, ensuring the best sound quality in a modern and durable finish that complements any setup.
- Airtight Enclosure: This design feature ensures precise and clear bass response by preventing air leaks that can cause unwanted resonances and vibrations. The enclosure controls woofer cone movement by maintaining an airtight seal, minimizing distortion, and enhancing sound quality.
- Music-Focused Performance: Both subwoofers are engineered for music lovers, delivering detailed and dynamic sound that enhances the overall listening experience.
- Wireless Upgrades Available: Both subwoofers offer wireless connectivity upgrades, providing flexibility in placement for optimal acoustics.
- Clarity at Higher Volumes: The detailed construction and advanced engineering of the S6 and S8 ensure consistent audio performance, even at higher volumes. This is due to their Class D amplifier and precision-tuned enclosure that minimize distortion and maintain sound integrity.
- Versatile Connectivity Options: Both models include multiple input options such as RCA and 3.5mm, ensuring compatibility with a wide range of audio sources and setups. This versatility allows seamless integration into various audio systems.
Design
Audioengine S6
Front-Firing Design: The S6 features a front-firing woofer that directs sound toward the listener, ensuring a more direct and immersive audio experience. This design is particularly beneficial in compact spaces where optimal placement options are limited. Front-firing subwoofers like the S6 are effective in smaller rooms because they reduce bass reflection issues, providing clearer and more accurate sound directly to the listener.
Airtight Enclosure: Encased in an airtight enclosure, the S6’s design minimizes distortion and ensures tight, controlled bass. The premium handcrafted, real wood cabinet adds a touch of style and durability, making it the perfect addition to any audio setup. The airtight design is crucial in maintaining the purity of the bass output, as it prevents the unwanted resonance that can muddy the sound.
Audioengine S8
Down-Firing Design: The S8’s down-firing woofer ensures powerful bass distribution throughout larger rooms. This design helps in evenly dispersing sound, providing a balanced and uniform audio experience. Down-firing subwoofers like the S8 are ideal for larger spaces because they use the floor to reflect and amplify the bass waves, filling the room with rich, deep sound.
Detailed Construction: The Audioengine S8 is available in Hi-Gloss Piano White and Satin Black finishes, ensuring it blends seamlessly into any setup. Its larger form factor and solid build are designed to deliver impactful bass, making it a focal point in any high-quality audio system. The sturdy construction not only looks great but also supports the powerful output of the subwoofer, ensuring it performs at its best, even at high volumes.
Ideal Spaces and Uses
Audioengine S6
The S6 is optimized for music listening, providing clear and precise bass that enhances every genre. The S6’s precise and controlled bass ensures that you can enjoy high-quality sound without disturbing your neighbors, making it an excellent choice for apartments and other shared living spaces. Whether you are an audiophile who loves every nuance of your music, a gamer needing clear, undistorted bass, the S6 is tailored to meet these needs without overwhelming the space.
Audioengine S8
The S8 is tailored for larger, floor-based setups and is ideal for standalone houses and non-shared living spaces where there is more room to fill. Its powerful, down-firing woofer is perfect for sounds where deep, impactful bass is desired. The S8 excels in delivering room-filling bass that enhances any genre, making it a great choice for more immersive audio experiences. If you have a dedicated media room or an open-plan living space, the S8’s ability to produce powerful, room-shaking bass will transform your listening experience.
Audio Quality
Audioengine S6
The Audioengine S6 excels in delivering tight, controlled bass with precision and clarity. Its sealed design ensures minimal distortion, making it ideal for critical listening scenarios. With a 210W Class D amplifier and a 6″ long-throw woofer, the S6 offers a frequency response of 33 – 132 Hz ±1.5dB, providing a rich and full listening experience. The Class D amplifier is efficient and powerful, providing ample power for the woofer without generating excessive heat. This efficiency helps maintain high audio quality by minimizing power loss and ensuring that the woofer can deliver consistent, clean sound even at higher volumes.
Audioengine S8
The Audioengine S8 offers deep, room-filling bass thanks to its ported design and 8″ custom down-firing woofer. It delivers a frequency response of 27 – 180 Hz ±1.5dB, ensuring it can handle very low frequencies with ease. This makes the S8 perfect for sounds that require deep, impactful bass, providing a more dynamic and immersive sound experience. The ported design allows for greater efficiency in producing low frequencies, making the bass sound more natural and less strained.
Tech Specs and Features
Audioengine S6
- 210W Class D Amplifier & 6″ Long Throw Woofer: Ensures powerful yet controlled bass output.
- Frequency Response: 33 – 132 Hz ±1.5dB: Reproduces low frequencies with high accuracy.
- Adjustable Crossover: 40 – 130Hz: Allows for fine-tuning to optimize integration with other speakers.
- Wireless Upgrade Available: Provides flexibility in placement for optimal sound quality.
- Phase Switch and Volume Control: Offers precise tuning for perfect integration into any audio setup.
Audioengine S8
- 8″ Custom Down-Firing Woofer: Delivers deeper and more impactful bass.
- Frequency Response: 27 – 180 Hz ±1.5dB: Handles very low frequencies for a profound bass experience.
- 3.5MM AUX & RCA Audio Inputs: Ensures compatibility with a wide range of audio sources.
- Wireless Upgrade Available: Allows for flexible placement without compromising sound quality.
- Auto-Sleep Power Saving Mode: Reduces power consumption when not in use, making it an eco-friendly choice.
Conclusion
Choosing between the Audioengine S6 and S8 depends on your specific needs and listening environment. Here’s our definitive quick guide to help you decide which subwoofer is right for your situation:
For Urban Living Environments
If you live in an urban setting with shared walls or limited space, the Audioengine S6 is the perfect choice. Its compact size and front-firing design make it ideal for placing on desks, bookshelves, or other elevated locations. The S6 provides tight, controlled bass that won’t disturb your neighbors, making it perfect for apartments or smaller rooms. Its precision and clarity ensure that you enjoy high-quality sound without overwhelming your living space.
For Homes with No Shared Walls
For those living in houses with no shared walls and more space to fill, the Audioengine S8 is the perfect option. Its larger size and down-firing woofer are designed to deliver deep, impactful bass that can fill larger rooms. The S8 is ideal for home theaters, living rooms, or any setup where you can enjoy powerful bass without worrying about disturbing others. Its ability to produce room-filling bass makes it perfect for creating an immersive audio experience in spacious environments.
The S6 and S8 models focus on music, ensuring that every note and beat is reproduced with clarity and depth. Their superior bass performance enhances the music listening experience, providing an exceptional audio experience for music enthusiasts. Both models offer wireless options, providing the freedom to place your subwoofer in the acoustically optimal position, ensuring an audio experience that meets your highest expectations. By focusing on the specific features and benefits of each model, this comparison provides a clear, detailed view to help potential buyers make an informed decision.
Audioengine B1 and B-Fi Comparison Guide
Choosing the right wireless music streamer can significantly enhance your listening experience by offering you the convenience and quality of streaming music wirelessly. In the realm of home audio systems, two standout choices from Audioengine are the B1 Bluetooth Music Receiver and the B-Fi Multiroom Music Streamer. Both devices are designed to stream music wirelessly to your stereo system but cater to different preferences and functionalities.
Here’s an in-depth look at these options to help you decide which one aligns with your audio streaming needs.
B1 Bluetooth Music Receiver: Expanding Horizons with Bluetooth
The B1 Bluetooth Music Receiver is designed for simplicity and quality, allowing you to wirelessly stream music from your device directly to your music system. It’s particularly suitable for integrating with both contemporary and vintage stereo systems, offering a touch of modernity without compromising the system’s original charm.
Noteworthy Aspects:
- Extended Range: The B1 boasts a 100-foot range, ensuring stable, quality sound transmission across extensive spaces.
- Digital to Analog Converter (DAC): It comes equipped with an internal DAC that guarantees CD-quality or better sound, preserving the integrity of the music exactly as the artist intended.
- Ease of Connectivity: Setup is straightforward, requiring no internet or network configuration, offering a hassle-free user experience.
- aptX-HD Bluetooth: This technology supports better than CD-quality sound, providing an enhanced listening experience without the typical constraints of wireless streaming. Your device will stay paired, pair once and forget it!
- Versatile Outputs: The B1 features both analog and optical outputs, offering flexibility in connection to various audio systems.
- Design Aesthetic: With its brushed metal finish, the B1 not only sounds good but also adds a sleek, aesthetic appeal to your audio setup that is durable as well.

B-Fi Multiroom Music Streamer: The Wi-Fi Revolution
In contrast, the B-Fi Multiroom Music Streamer takes a leap forward by utilizing your home’s Wi-Fi network for music streaming. This approach bypasses traditional Bluetooth streaming, offering a direct and uncompressed audio signal for a pure, high-fidelity sound experience.
Key Features:
- Wi-Fi Streaming: B-Fi streams music directly to your stereo from your streaming service via your router. This way, your songs are free from Bluetooth’s digital signal processing, a feature enjoyed by Audiophiles everywhere (more on this below).
- Audioengine App: Control is at your fingertips with the Audioengine app, allowing you to stream from major music services or your personal music library directly to any music system in your home.
- Internal DAC: Like the B1, B-Fi includes an internal DAC, ensuring that the music delivered to your stereo system is of the highest quality, just as the artist intended.
- Multiroom Capability: B-Fi’s strength lies in its ability to fill your entire home with music, streaming seamlessly to multiple rooms for a unified listening experience.
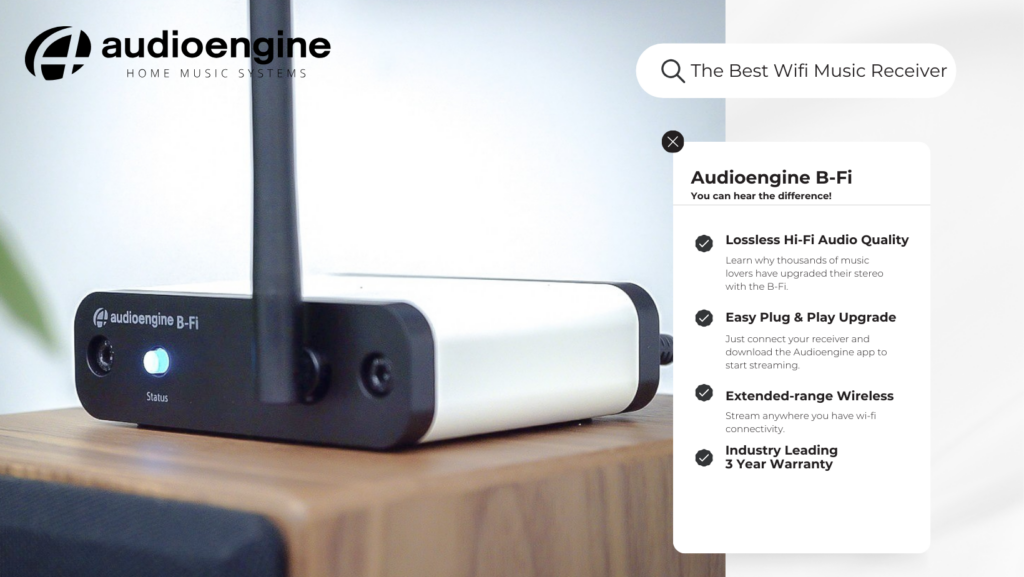
Making Your Choice: The Bluetooth vs. Wi-Fi Streaming Quality Debate
The B1, on the other hand, employs Bluetooth connectivity, utilizing high-quality codecs like Qualcomm aptX HD. These codecs are designed to compress and then decompress digital audio files with minimal loss of quality.
However, even the most advanced Bluetooth codecs involve some level of digital signal processing (DSP) to recreate the song. While to many listeners the difference may be imperceptible, discerning audiophiles might lean towards the B-Fi for its method of streaming.
The B-Fi’s reliance on Wi-Fi rather than Bluetooth means the music is streamed without the additional step of DSP, potentially offering a purer, more accurate version of the original recording.
- B1 for Bluetooth Convenience: If you value simplicity and the versatility to stream from any Bluetooth-enabled device directly to your stereo system, the B1 offers an effective solution with an impressive range and high-quality sound. The B1 is your best option if you don’t have a smart phone or Wi-Fi network.
- B-Fi for Wi-Fi Fidelity: For those who prioritize the purity of uncompressed audio and the convenience of streaming across multiple rooms via Wi-Fi, the B-Fi stands out. It is particularly appealing to users who prefer controlling their music ecosystem through a dedicated app. You can even connect up to 9 B-Fi or A1MR for a system that connects your entire house! The B-Fi is a great choice for Audiophiles that prefer the warmth of analog audio playback.
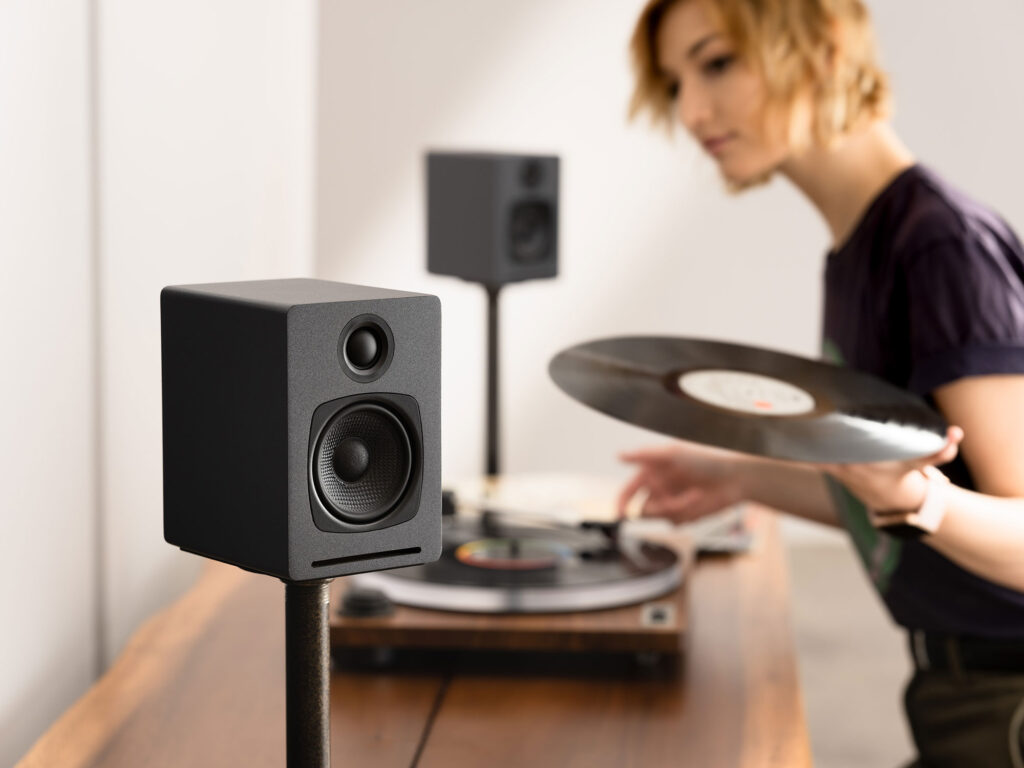
Audioengine A1MR
Both the B1 and B-Fi embody Audioengine’s commitment to delivering superior sound quality and innovative streaming solutions. By understanding the distinctive features and benefits of each device, you can select the wireless music streamer that best aligns with your lifestyle and audio preferences, ensuring an unparalleled listening experience that brings your music to life exactly as the artist intended.
Audioengine’s Home Music Systems are designed to deliver exceptional sound quality, offering you a next level gaming experience enhancing every footstep and gunshot, pulling you into the game’s world, making every moment feel real and alive.
This guide will help you navigate the nuances of connecting your Xbox Series X or PS5 directly to your Audioengine Desktop Speakers, Gaming DAC, or other speakers. Before we dive in, let’s address a crucial but often overlooked aspect: the type of display you’re using.
Why TVs Simplify Speaker Connection
Gaming on a modern TV makes connecting speakers straightforward. TVs usually offer a variety of audio outputs, giving you several options for your audio setup. Simply connect via HDMI to your TV and connect the speakers through an available audio output.
Computer monitors, while often providing high refresh rates, often have limited audio output options and so, this guide will be helpful to those of you who are looking to avoid using a TV.
Note on Direct Connections
The FAQs and compatibility table below focus on direct connections between your gaming console and speakers. If you’re using an additional device like an A/V receiver, or connecting through your TV, compatibility may differ.
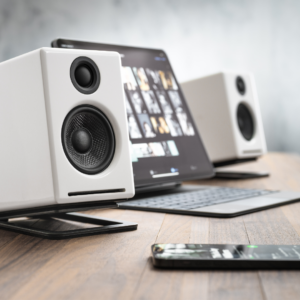
Audioengine’s Best Selling A2+ Desktop Speakers
How To Connect Your Xbox Series X to Your Speakers
Can I connect external speakers to my Xbox Series X?
Certainly, although with limitations. The Xbox Series X doesn’t natively support USB, optical, or Bluetooth audio outputs. You can, however, utilize the 3.5mm audio jack on the wireless controller to connect speakers that accept this input.
We recommend purchasing an inline HDMI audio extractor. This device can take the HDMI output from your Xbox Series X and extract the audio to outputs like Optical or RCA, allowing you to connect your speakers more easily.
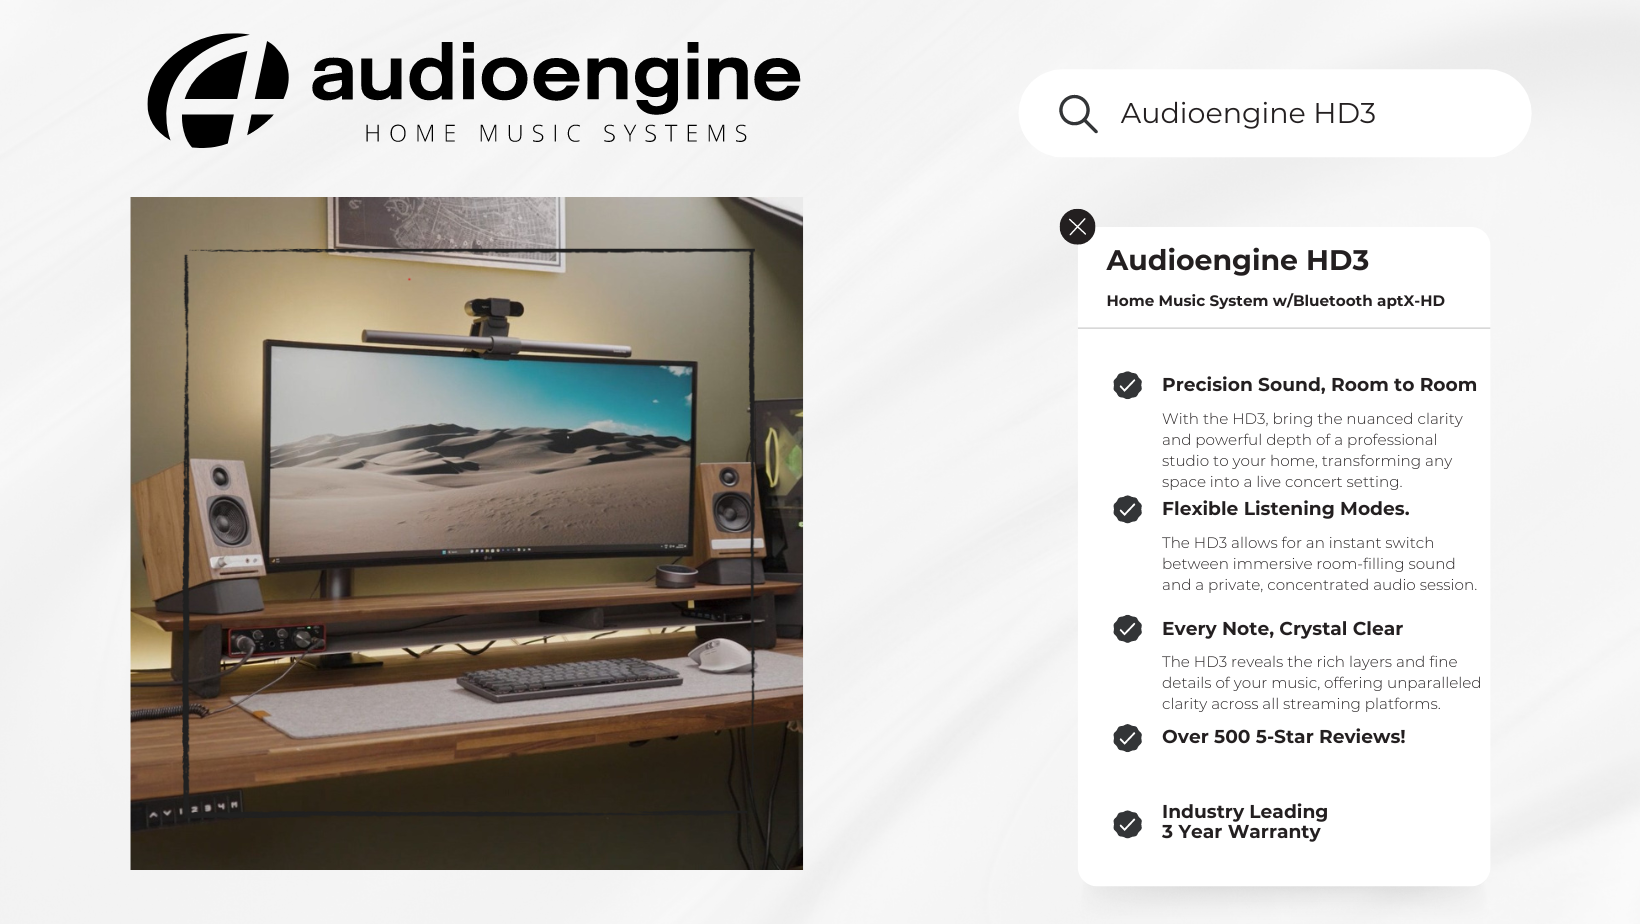
How To Connect Your PS5 to Your Speakers
Can I connect external speakers to my PS5?
Yes, you can. The PS5 supports USB audio output, making it compatible with speakers that offer this input*. However, the PS5 does not support 3.5mm, optical, or Bluetooth audio outputs.
Why is the type of display I use important?
As previously mentioned, your choice of display—whether a monitor or a TV—affects your audio options. Monitors usually lack the audio output variety found in modern TVs.
Summary of Input Compatibility
Refer to this table for compatibility between different audio input types and the Xbox Series X and PS5:
| Input Type | Xbox Series X | PS5 |
| 3.5mm | ✓ (via controller) | ✕ |
| USB | ✕ | ✓* |
| RCA | ✕ | ✕ |
| Optical | ✕ | ✕ |
| Bluetooth | ✕ | ✕ |
Key
- ✓: Compatible
- ✕: Not Compatible
- Note: *While the PS5 supports USB audio, it supports USB Audio Class 1 devices. If your device doesn’t support USB 1.0, you will need an adapter as discussed in this guide on the PS5 reddit. We have confirmed that the Audioengine A2+ (current generation) will support USB audio from the PS5.
Final Thoughts
Understanding your setup’s compatibility is essential for an optimal audio experience. Using a TV provides more options for connecting your speakers, but a monitor isn’t entirely limiting; you just need the right equipment, like an HDMI audio extractor for Xbox setups.
Feel free to explore our other resources to further optimize your gaming and audio experience.
Kanto Sub8 vs. Audioengine S8: Product Comparison
Table of Contents
- Introduction
- Main Differences Between Kanto Sub8 and Audioengine S8
- Key Features
- Overall Design
- Bass Performance
- Key Specifications
- Audioengine S8 Exclusive Advantages
- Kanto Sub8 Overview
- Pros and Cons
Introduction
When selecting a subwoofer, the choice often comes down to the Kanto Sub8 and the Audioengine S8. Both offer distinct features and benefits, but the Audioengine S8 is designed for those who seek premium sound quality and design. Let’s dive into what sets these two subwoofers apart and why the S8 stands out as the better option for audiophiles and home audio enthusiasts.
Main Differences Between Kanto Sub8 and Audioengine S8
The Audioengine S8 distinguishes itself with its handcrafted wood cabinets, far superior bass response, and a 3-year warranty. In contrast, the Kanto Sub8, while more budget-friendly, offers a basic design and a shorter 2-year warranty.
Key Features
The Audioengine S8 is designed for those who prioritize sound quality and aesthetic appeal. It’s ported down-firing design and real wood construction are indicative of its superior performance. Meanwhile, the Kanto Sub8 offers a sealed front-firing design and practical features but falls short in delivering the same depth of sound.
Overall Design
The Audioengine S8’s design is a testament to craftsmanship and quality. With a finish akin to a baby grand piano, it adds a luxurious touch to any room. On the other hand, the Kanto Sub8, while practical with its matte vinyl finish, doesn’t offer the same level of elegance or refinement.
Bass Performance
Audioengine S8:
- Down-Firing Design: This design enhances bass depth and clarity, offering a richer listening experience.
- Frequency Reach: With a capability to deliver bass down to 28 Hz, the S8 captures deeper tones often missed by other subwoofers.
Kanto Sub8 – Beware of Frequency Limitations:
- Sealed Front-Firing Design: While practical, it doesn’t match the depth of a down-firing system.
- Frequency Limitations: With a frequency response of only 35 Hz, the Sub8 misses the deepest bass tones. Even Audioengine’s smaller S6, a sealed front-firing subwoofer with a 6-inch driver and 210W power, achieves 33 Hz with ease.
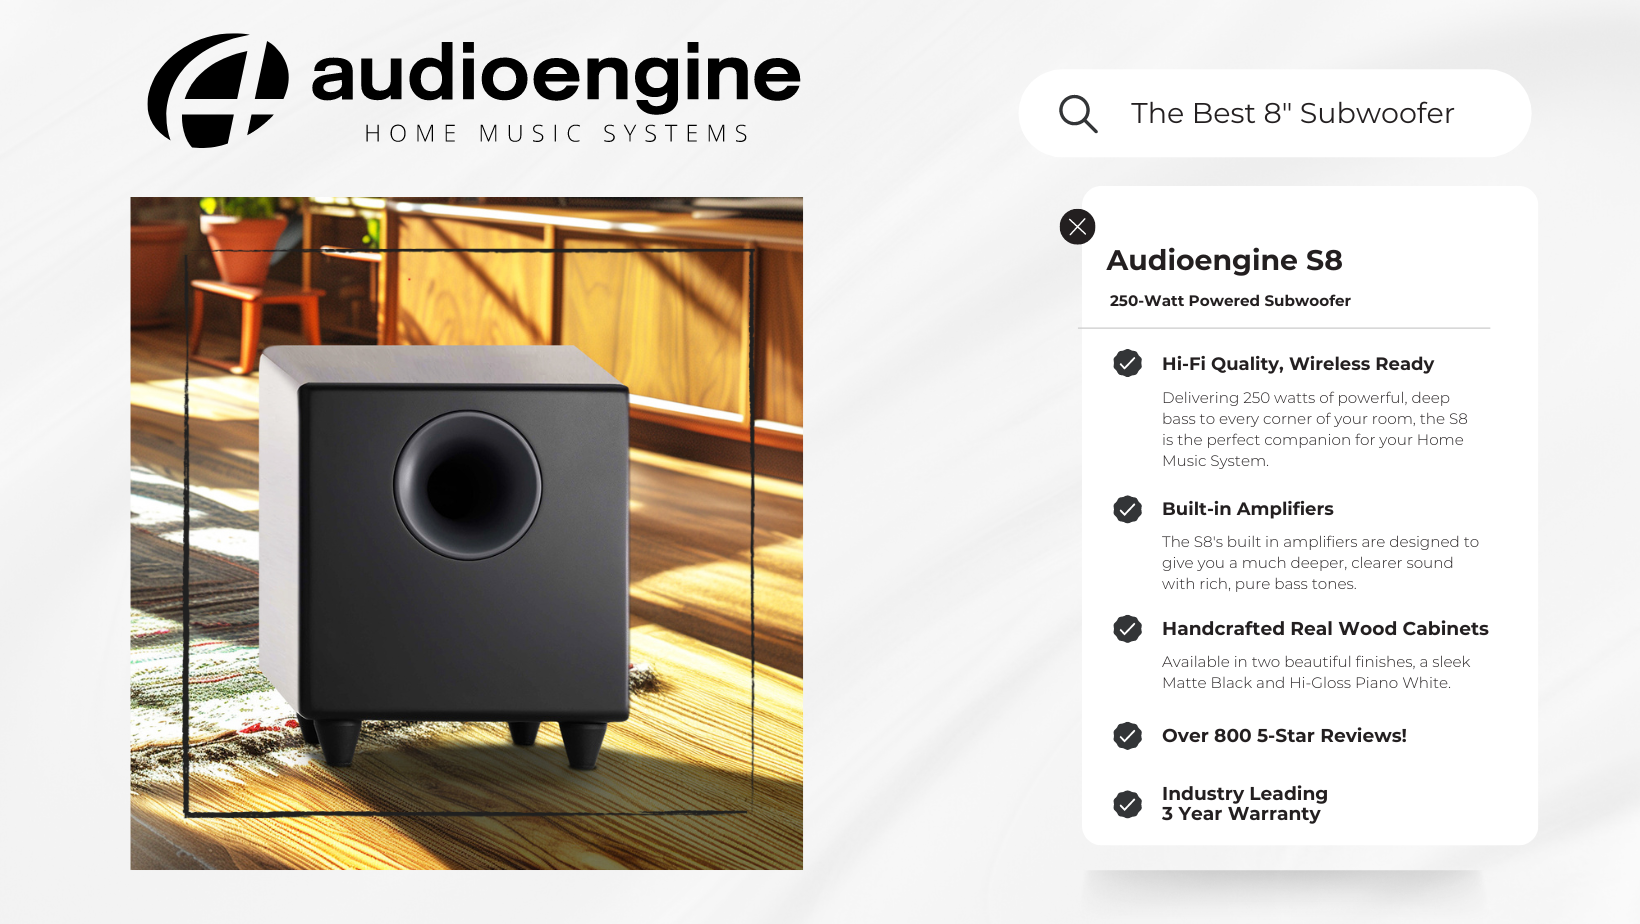
Audioengine S8 Exclusive Advantages
Audioengine’s S8 offers easy integration into any home music setup, along with exceptional customer support and an industry-leading 3-year warranty. In contrast, the Kanto Sub8 offers a standard 2-year warranty, which may be limiting for those seeking long-term reliability.
Reliability
The Audioengine S8 is backed by thousands of positive reviews and a high average rating, making it a top choice for consumers seeking lasting satisfaction. Its 3-year warranty also provides peace of mind, ensuring long-term performance. The Kanto Sub8, while reliable, lacks the same level of customer assurance and support.
- Rich Bass Performance: Delivers unparalleled bass depth thanks to its down-firing design and extended frequency range.
- Premium Construction: Handcrafted wood cabinets not only enhance sound but also add a touch of class to any setup.
- Extended Warranty: A 3-year warranty reflects Audioengine’s confidence in their product’s durability.
- Brand Assurance: Audioengine’s stellar reputation for customer service and product quality speaks for itself.
Audioengine S8 Customer Review:

Kanto Sub8 Overview
The Kanto Sub8 is an accessible option for those on a budget, offering basic functionality and affordability. While it provides good sound quality, it doesn’t compete with the sophisticated design and performance of the Audioengine S8.
Kanto Sub8 Customer Experiences
The Kanto Sub8, while marketed with a powerful 300W peak amplifier, has received mixed reviews regarding its actual performance, especially when it comes to delivering impactful low-frequency sound. Many users have noted that its output doesn’t match expectations when compared to other subwoofers in its class. Here’s what one Amazon customer had to say about their experience with the Sub8:
“Not impressed. I have input and crossover settings maxed, paired with Kanto YU3 speakers. There is just not much low-frequency output from this sub, I have to crank up the YU3 speakers to get any measurable sound from this sub. I am comparing this to the Polk Audio … which hits hard at much lower sound levels… the Polk only has 100W sustained 200W max, whereas the Kanto claim on Amazon is 300W peak.”
Key Specifications
Audioengine S8:
- Amplifier Power: 250W Peak Power
- Frequency Response: Reaches 28 Hz
- Cabinet: Handcrafted, hand-painted real wood
- Warranty: 3 years
Kanto Sub8:
- Amplifier Power: 300W Peak Power
- Frequency Response: Reaches 35 Hz
- Cabinet: Matte vinyl finish
- Warranty: 2 years
Pros and Cons
Audioengine S8
Pros:
- Exceptional bass performance
- Luxurious design and finish
- Comprehensive customer support
- Longer 3-year warranty
Cons:
- Higher price point, justified by superior quality
Kanto Sub8
Cons:
- Inferior sound quality compared to the S8
- Limited frequency response and design elegance
- Shorter 2-year warranty
Conclusion
When choosing between the Kanto Sub8 and the Audioengine S8, it’s clear that the S8 is the superior choice for those seeking premium sound quality and design. The Audioengine S8 stands out with its handcrafted wood cabinets, impressive down-firing bass capabilities, and a more extended 3-year warranty, offering a level of sophistication and reliability that the Kanto Sub8 struggles to match.
While the Kanto Sub8 provides an affordable entry point for those on a budget, it falls short in delivering the rich, deep bass that audiophiles crave, as highlighted by customer feedback and its limited frequency response. The Audioengine S8 not only excels in providing a more immersive audio experience but also showcases a level of craftsmanship that adds a touch of elegance to any listening environment.
Ultimately, for those who prioritize high-quality sound, aesthetic appeal, and lasting performance, the Audioengine S8 is the clear winner, offering an unmatched audio experience that goes beyond basic functionality.